Main Menu
Picture Menu Operation
MAIN MENU
N
PICTURE
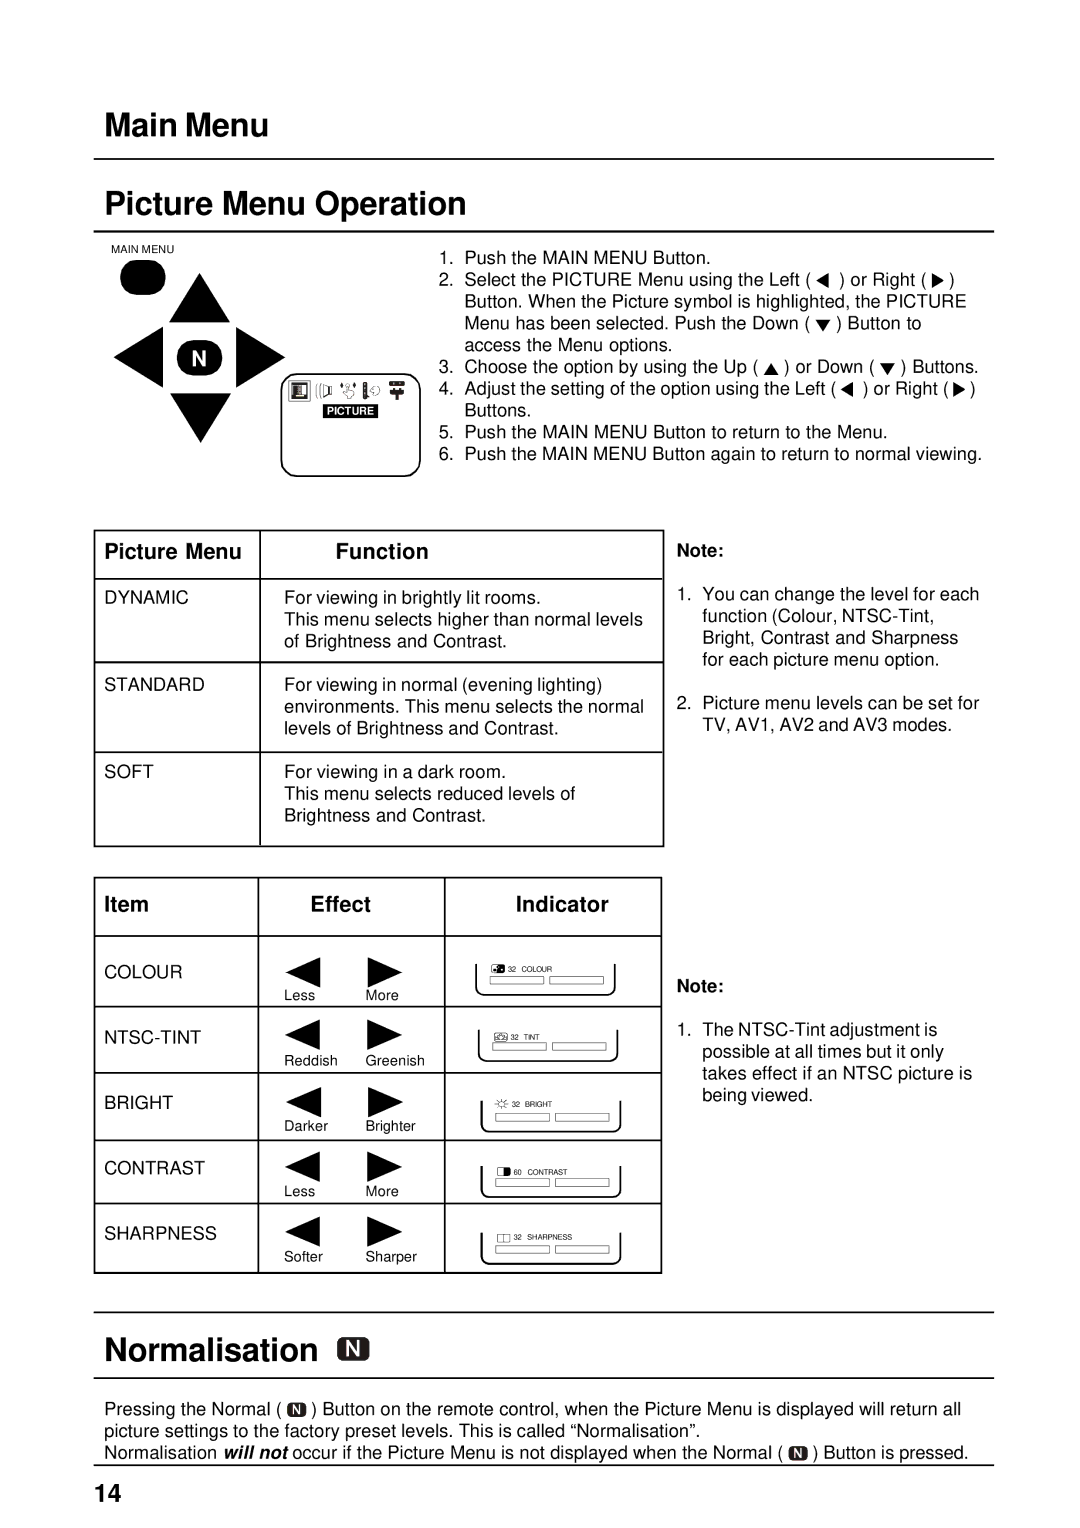
1.Push the MAIN MENU Button.
2.Select the PICTURE Menu using the Left ( ![]() ) or Right (
) or Right ( ![]() ) Button. When the Picture symbol is highlighted, the PICTURE Menu has been selected. Push the Down (
) Button. When the Picture symbol is highlighted, the PICTURE Menu has been selected. Push the Down ( ![]() ) Button to access the Menu options.
) Button to access the Menu options.
3.Choose the option by using the Up ( ![]() ) or Down (
) or Down ( ![]() ) Buttons.
) Buttons.
4.Adjust the setting of the option using the Left ( ![]() ) or Right (
) or Right ( ![]() ) Buttons.
) Buttons.
5.Push the MAIN MENU Button to return to the Menu.
6.Push the MAIN MENU Button again to return to normal viewing.
Picture Menu | Function |
DYNAMIC | For viewing in brightly lit rooms. |
| This menu selects higher than normal levels |
| of Brightness and Contrast. |
STANDARD | For viewing in normal (evening lighting) |
| environments. This menu selects the normal |
| levels of Brightness and Contrast. |
SOFT | For viewing in a dark room. |
| This menu selects reduced levels of |
| Brightness and Contrast. |
Note:
1.You can change the level for each function (Colour,
2.Picture menu levels can be set for TV, AV1, AV2 and AV3 modes.
Item | Effect |
|
| Indicator | |||||||||||
COLOUR |
|
|
|
|
|
|
|
|
|
|
|
|
|
|
|
|
|
|
|
|
|
|
|
|
|
|
|
|
|
| |
|
|
|
|
|
| 32 COLOUR | |||||||||
| Less | More |
|
|
|
|
|
|
|
|
|
|
| ||
|
|
|
|
|
|
|
|
|
|
|
| ||||
|
|
|
|
|
|
|
|
|
|
|
| ||||
|
|
|
|
|
|
|
|
|
|
|
|
|
|
| |
|
|
|
|
|
|
|
|
|
|
|
|
|
|
| |
|
|
|
| 32 | TINT | ||||||||||
| Reddish | Greenish |
|
|
|
|
|
|
|
|
|
|
| ||
|
|
|
|
|
|
|
|
|
|
|
| ||||
BRIGHT |
|
|
|
|
|
|
|
|
|
|
|
|
|
|
|
|
|
|
|
|
|
|
|
|
|
|
|
|
|
| |
|
|
|
| 32 | BRIGHT | ||||||||||
CONTRAST | Darker | Brighter |
|
|
|
|
|
|
|
|
|
|
| ||
|
|
|
|
|
|
|
|
|
|
| |||||
|
|
|
|
|
|
|
|
|
|
| |||||
|
|
|
|
|
|
|
|
|
|
|
| ||||
|
|
|
|
|
|
|
|
|
|
|
| ||||
|
|
|
| 60 | CONTRAST | ||||||||||
SHARPNESS | Less | More |
|
|
|
|
|
|
|
|
|
|
| ||
|
|
|
|
|
|
|
|
|
|
| |||||
|
|
|
|
|
|
|
|
|
|
|
|
|
|
| |
|
|
|
|
|
|
|
|
|
|
|
|
|
|
| |
|
|
|
| 32 | SHARPNESS | ||||||||||
| Softer | Sharper |
|
|
|
|
|
|
|
|
|
|
| ||
|
|
|
|
|
|
|
|
|
|
|
| ||||
Note:
1.The
Normalisation
Pressing the Normal ( ![]()
![]()
![]() ) Button on the remote control, when the Picture Menu is displayed will return all picture settings to the factory preset levels. This is called “Normalisation”.
) Button on the remote control, when the Picture Menu is displayed will return all picture settings to the factory preset levels. This is called “Normalisation”.
Normalisation will not occur if the Picture Menu is not displayed when the Normal ( ![]()
![]()
![]() ) Button is pressed.
) Button is pressed.
14