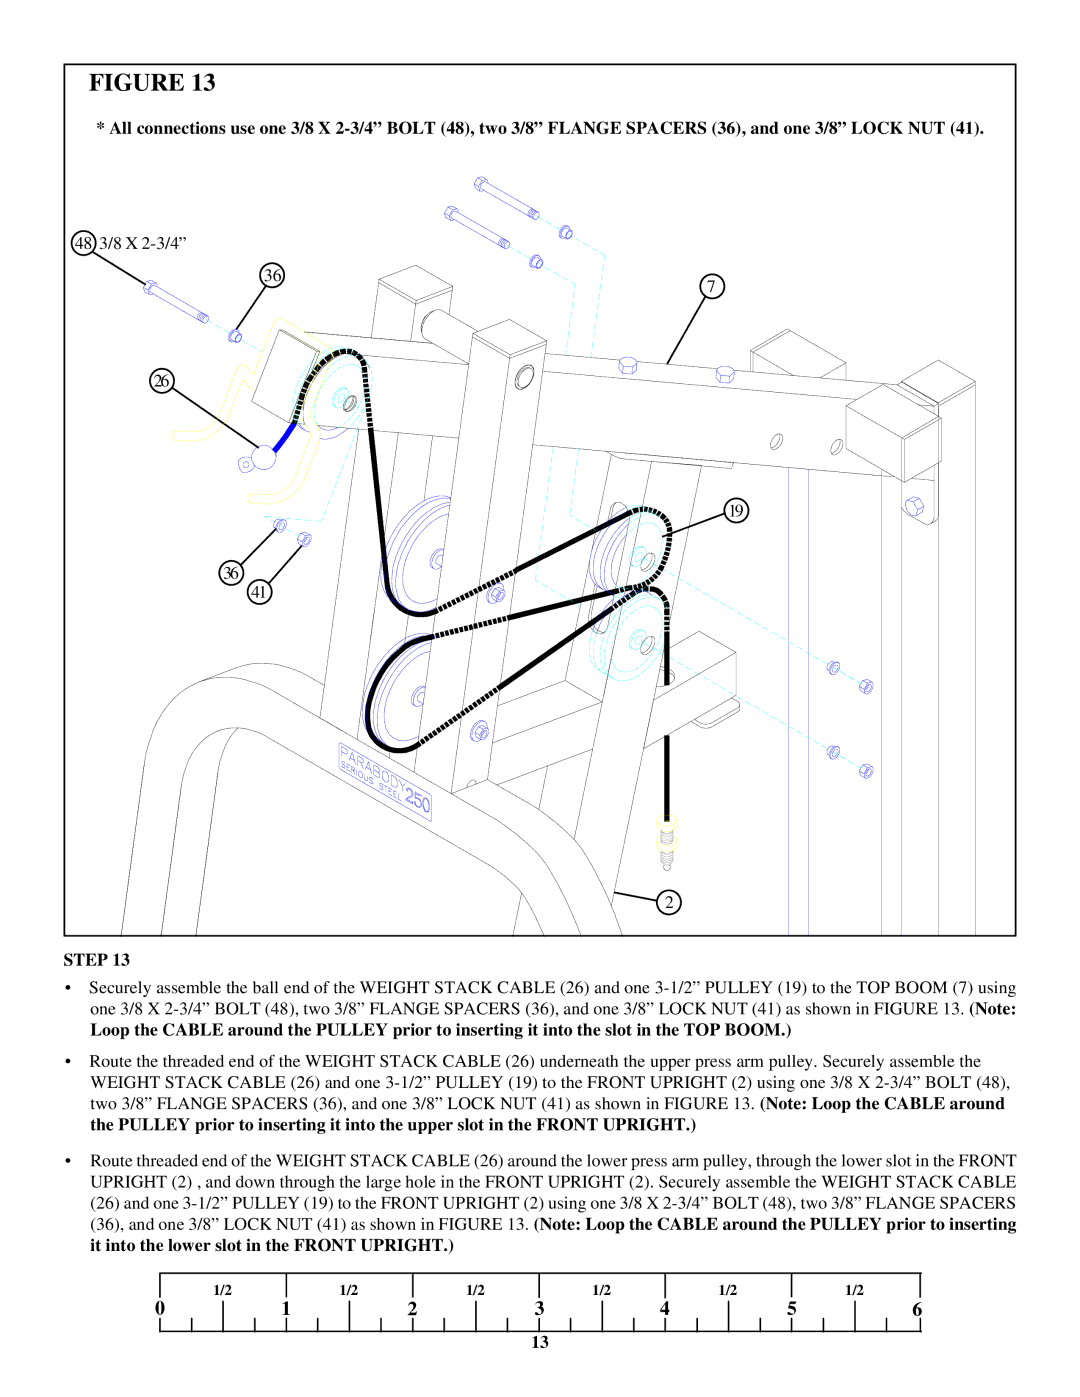
FIGURE 13
* All connections use one 3/8 X 2-3/4” BOLT (48), two 3/8” FLANGE SPACERS (36), and one 3/8” LOCK NUT (41).
48 3/8 X 2-3/4”
26
19
36
41
 2
2
STEP 13
•Securely assemble the ball end of the WEIGHT STACK CABLE (26) and one 3-1/2” PULLEY (19) to the TOP BOOM (7) using one 3/8 X 2-3/4” BOLT (48), two 3/8” FLANGE SPACERS (36), and one 3/8” LOCK NUT (41) as shown in FIGURE 13. (Note:
Loop the CABLE around the PULLEY prior to inserting it into the slot in the TOP BOOM.)
•Route the threaded end of the WEIGHT STACK CABLE (26) underneath the upper press arm pulley. Securely assemble the WEIGHT STACK CABLE (26) and one 3-1/2” PULLEY (19) to the FRONT UPRIGHT (2) using one 3/8 X 2-3/4” BOLT (48), two 3/8” FLANGE SPACERS (36), and one 3/8” LOCK NUT (41) as shown in FIGURE 13. (Note: Loop the CABLE around the PULLEY prior to inserting it into the upper slot in the FRONT UPRIGHT.)
•Route threaded end of the WEIGHT STACK CABLE (26) around the lower press arm pulley, through the lower slot in the FRONT UPRIGHT (2) , and down through the large hole in the FRONT UPRIGHT (2). Securely assemble the WEIGHT STACK CABLE (26) and one 3-1/2” PULLEY (19) to the FRONT UPRIGHT (2) using one 3/8 X 2-3/4” BOLT (48), two 3/8” FLANGE SPACERS (36), and one 3/8” LOCK NUT (41) as shown in FIGURE 13. (Note: Loop the CABLE around the PULLEY prior to inserting it into the lower slot in the FRONT UPRIGHT.)
| 1/2 | | 1/2 | | 1/2 | | 1/2 | | 1/2 | | | 1/2 |
0 | 1 | 2 | 3 | 4 | 5 | 6 |
13

![]() 2
2