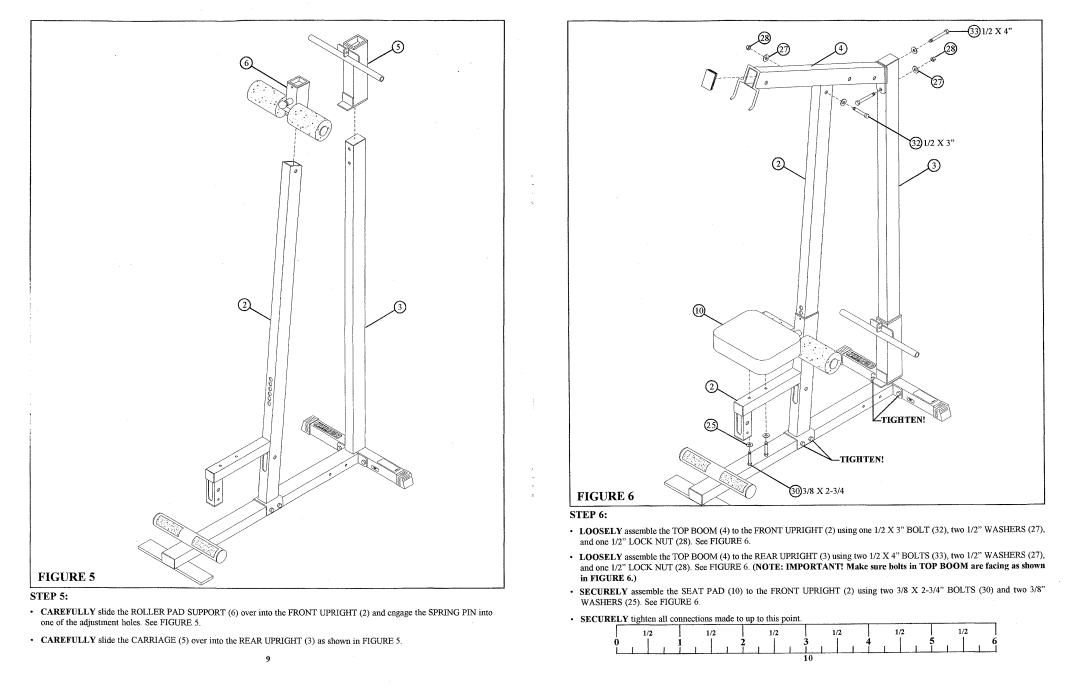
FIGURE 5
STEP 5:
•CAREFULLY slide the ROLLER PAD SUPPORT (6) over into the FRONT UPRIGHT (2) and engage the SPRING PIN into one of the adjustment holes. See FIGURE 5.
oCAREFULLY slide the CARRIAGE (5) over into the REAR UPRIGHT (3) as shown in FIGURE 5.
FIGURE 6
STEP 6:
oLOOSELY assemble the TOP BOOM (4) to the FRONT UPRIGHT (2) using one 112 X 3" BOLT (32), two 1/2" WASHERS (27), and one 112" LOCK NUT (28). See FIGURE 6.
oLOOSELY assemble the TOP BOOM (4) to the REAR UPRIGHT (3) using two 112 X 4" BOLTS (33), two 1/2" WASHERS (27), and one 112" LOCK NUT (28). See FIGURE 6. (NOTE: IMPORTANT! Make sure bolts in TOP BOOM are facing as shown in FIGURE 6.)
oSECURELY assemble the SEAT PAD (10) to the FRONT UPRIGHT (2) using two 3/8 X
oSECURELY tighten all connections made to up to this point.
I | 1/2 | I 1/2 I | 1/2 I | 1/2 | I | 1/2 | I 1/2 | I | |
? | I |
| 1~ | ||||||
fiT | I | T |
|
| |||||
9 | 1 |
