Installing a Replacement Fan Tray Assembly
You will need a Phillips screwdriver to install a replacement fan tray.
 Procedure
To install a replacement fan tray:
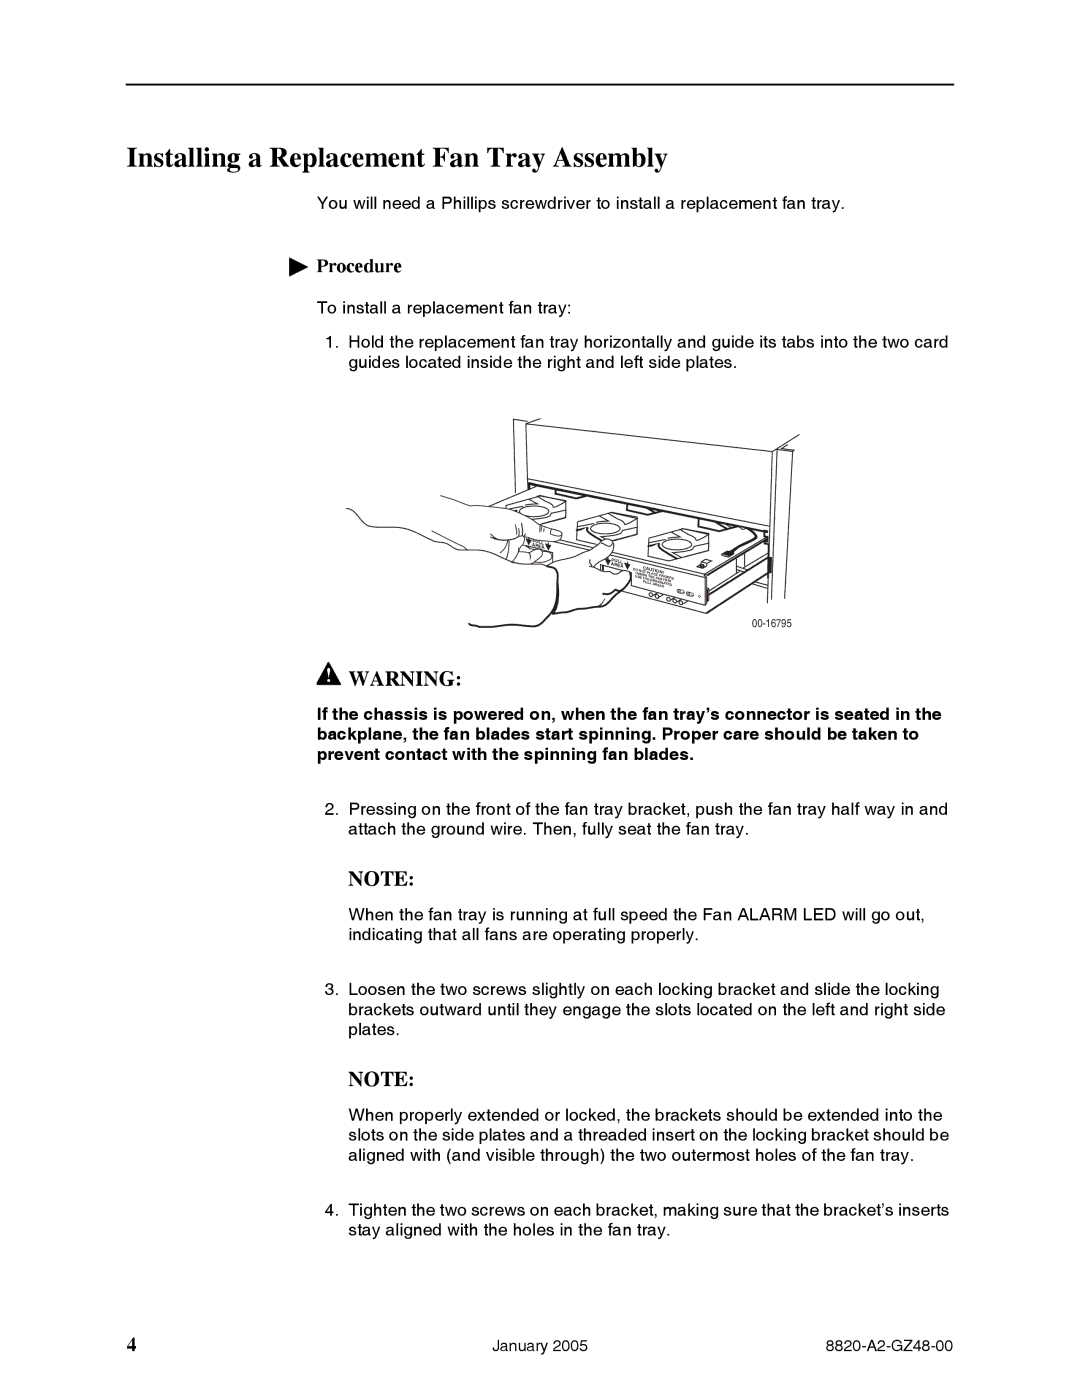
1.Hold the replacement fan tray horizontally and guide its tabs into the two card guides located inside the right and left side plates.
PULL
AREA
P |
|
|
|
ULL |
|
|
|
AREA | DO | CA |
|
|
| NOT UTION! | |
| UNDERPLACE |
| |
| USE THETHE FANFINGERS | ||
|
| PULL | TRAY |
|
| DESIGNATEDAREAS | |
!WARNING:
If the chassis is powered on, when the fan tray’s connector is seated in the backplane, the fan blades start spinning. Proper care should be taken to prevent contact with the spinning fan blades.
2.Pressing on the front of the fan tray bracket, push the fan tray half way in and attach the ground wire. Then, fully seat the fan tray.
NOTE:
When the fan tray is running at full speed the Fan ALARM LED will go out, indicating that all fans are operating properly.
3.Loosen the two screws slightly on each locking bracket and slide the locking brackets outward until they engage the slots located on the left and right side plates.
NOTE:
When properly extended or locked, the brackets should be extended into the slots on the side plates and a threaded insert on the locking bracket should be aligned with (and visible through) the two outermost holes of the fan tray.
4. Tighten the two screws on each bracket, making sure that the bracket’s inserts stay aligned with the holes in the fan tray.
4 | January 2005 |