4 • Getting started with the SmartNode | Model 4520 & 4110 Series Getting Started Guide |
|
|
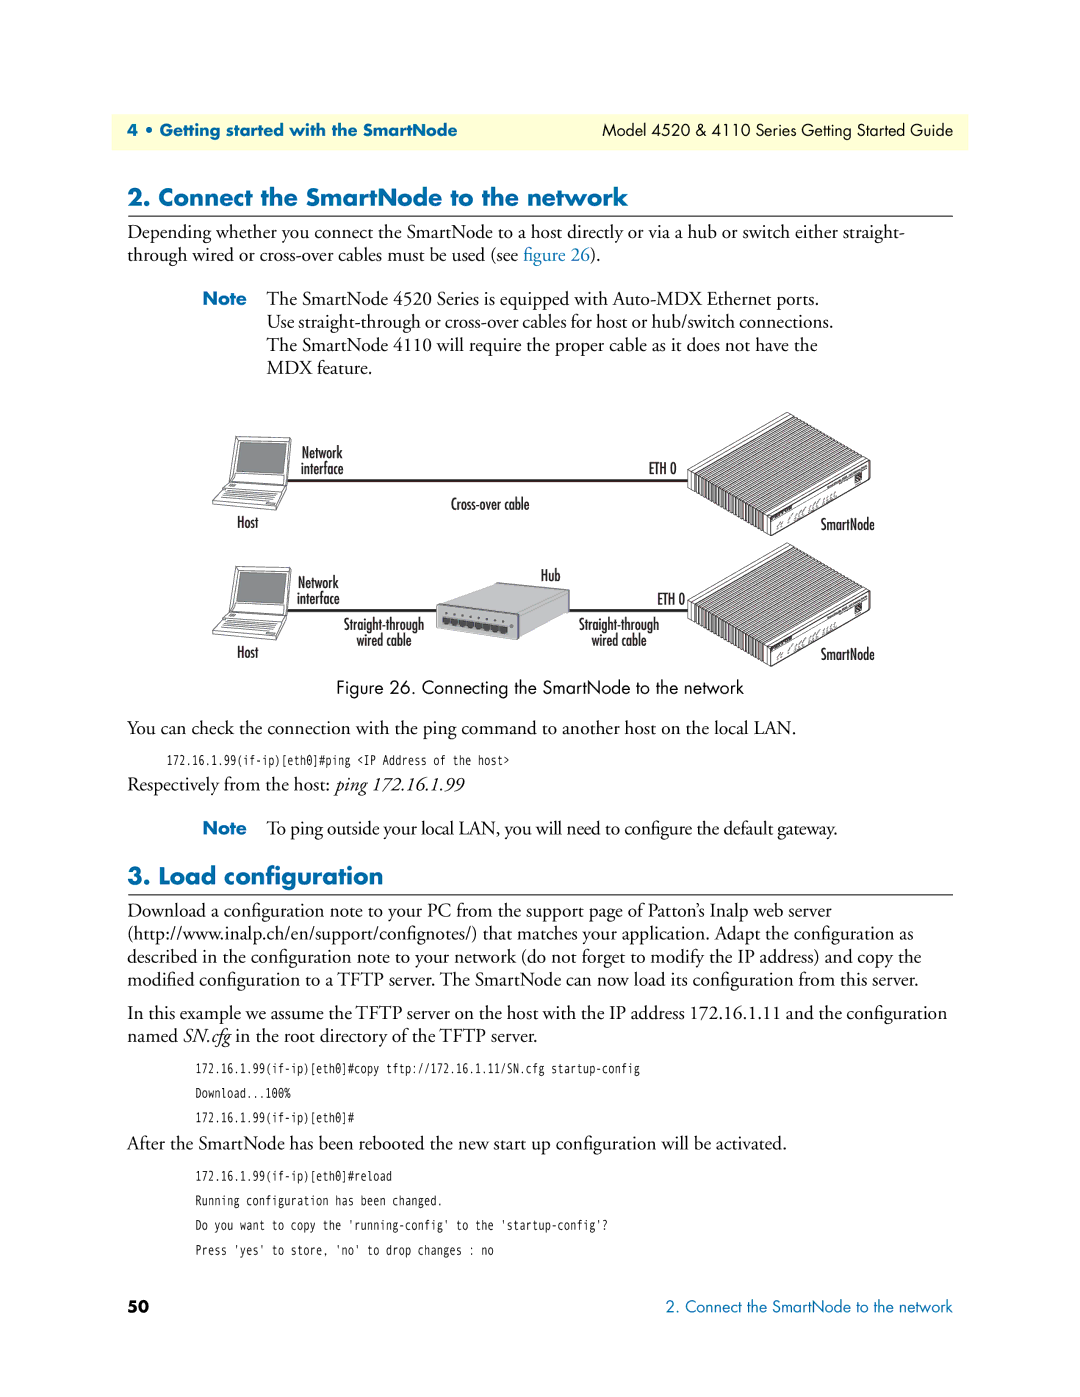
2. Connect the SmartNode to the network
Depending whether you connect the SmartNode to a host directly or via a hub or switch either straight- through wired or
Note The SmartNode 4520 Series is equipped with
Use
The SmartNode 4110 will require the proper cable as it does not have the
MDX feature.
Figure 26. Connecting the SmartNode to the network
You can check the connection with the ping command to another host on the local LAN.
Respectively from the host: ping 172.16.1.99
Note To ping outside your local LAN, you will need to configure the default gateway.
3. Load configuration
Download a configuration note to your PC from the support page of Patton’s Inalp web server (http://www.inalp.ch/en/support/confignotes/) that matches your application. Adapt the configuration as described in the configuration note to your network (do not forget to modify the IP address) and copy the modified configuration to a TFTP server. The SmartNode can now load its configuration from this server.
In this example we assume the TFTP server on the host with the IP address 172.16.1.11 and the configuration named SN.cfg in the root directory of the TFTP server.
Download...100%
After the SmartNode has been rebooted the new start up configuration will be activated.
Do you want to copy the
Press 'yes' to store, 'no' to drop changes : no
50 | 2. Connect the SmartNode to the network |