
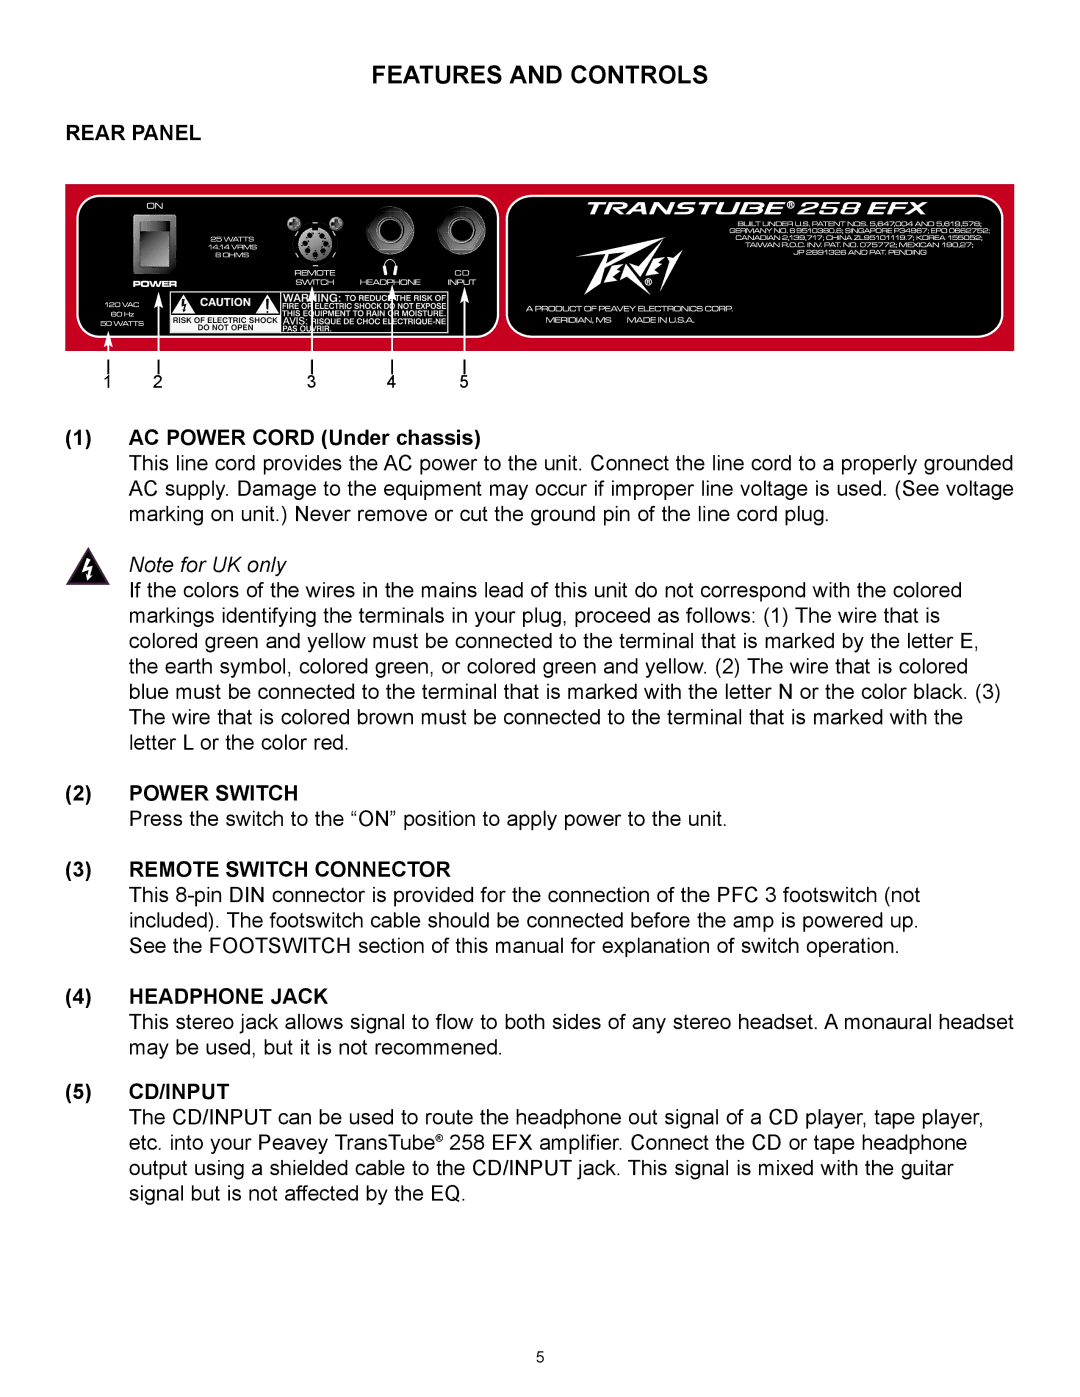
258 EFX specifications
The Peavey 258 EFX is a versatile and reliable audio mixer designed for both live sound and studio applications. With its impressive array of features, this mixer is an excellent choice for musicians, audio engineers, and event organizers seeking quality sound reinforcement in a compact and user-friendly package.One of the standout features of the Peavey 258 EFX is its configuration, which includes 8 input channels, allowing for multiple audio sources to be mixed simultaneously. Each channel is equipped with a three-band EQ, which enables users to fine-tune their sound, ensuring clarity and balance across all frequencies. The mixer also includes two auxiliary sends, which provide flexible routing options for effects and monitor mixes.
A key highlight of the 258 EFX is its built-in digital effects processor. This feature offers 16 different effects, such as reverb, delay, and chorus, all of which can be applied to individual channels or the overall mix. This built-in processing eliminates the need for additional external gear, making it an ideal choice for users seeking a streamlined setup.
In terms of connectivity, the Peavey 258 EFX boasts a variety of input and output options. It features XLR and 1/4-inch TRS inputs, which accommodate both microphone and line-level sources. Additionally, the mixer includes stereo RCA inputs and a headphone output, providing further flexibility for connecting various audio devices.
Another essential aspect of the Peavey 258 EFX is its sturdy construction. Built to withstand the rigors of live performance, the mixer features a rugged chassis and high-quality components that ensure longevity and reliability. It is lightweight and portable, making it easy for musicians and sound engineers to transport to gigs and events.
Furthermore, the Peavey 258 EFX is designed with user-friendliness in mind. The intuitive layout of controls and indicators allows for quick adjustments during performances, minimizing the need for extensive sound checks. Users can easily navigate the mixer, making it accessible to both beginners and experienced professionals.
In conclusion, the Peavey 258 EFX is an exceptional audio mixer that combines a compact design with powerful features. With its versatile input options, built-in effects, and robust construction, it serves as a reliable tool for achieving high-quality sound in various applications. Whether for live performances, rehearsals, or studio recordings, the Peavey 258 EFX stands out as a solid choice for audio enthusiasts.