Projector Alignment
9 | To adjust yaw (swivel) for threaded rod mounting applications: Loosen locknuts on threaded rods | |
(step 5), until projector mount can be rotated. Rotate mount to desired position and retighten locknuts. | ||
|
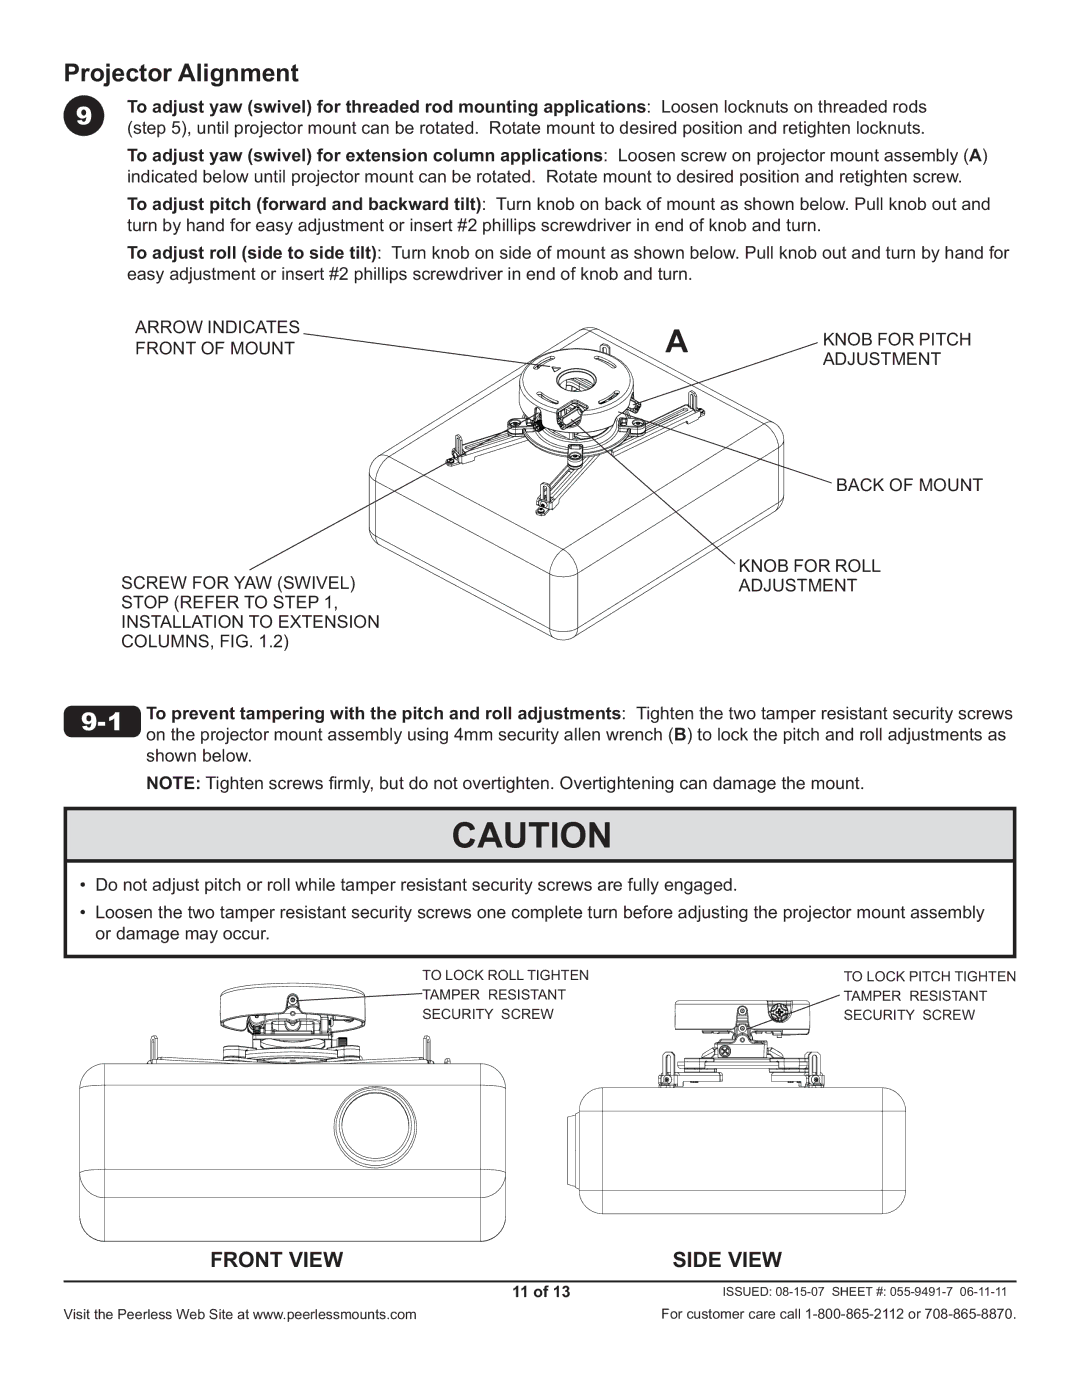
To adjust yaw (swivel) for extension column applications: Loosen screw on projector mount assembly (A) indicated below until projector mount can be rotated. Rotate mount to desired position and retighten screw.
To adjust pitch (forward and backward tilt): Turn knob on back of mount as shown below. Pull knob out and turn by hand for easy adjustment or insert #2 phillips screwdriver in end of knob and turn.
To adjust roll (side to side tilt): Turn knob on side of mount as shown below. Pull knob out and turn by hand for easy adjustment or insert #2 phillips screwdriver in end of knob and turn.
ARROW INDICATES
FRONT OF MOUNT ![]()
SCREW FOR YAW (SWIVEL)
STOP (REFER TO STEP 1,
INSTALLATION TO EXTENSION
COLUMNS, FIG. 1.2)
AKNOB FOR PITCH ADJUSTMENT
BACK OF MOUNT
KNOB FOR ROLL
ADJUSTMENT
To prevent tampering with the pitch and roll adjustments: Tighten the two tamper resistant security screws | |
| on the projector mount assembly using 4mm security allen wrench (B) to lock the pitch and roll adjustments as |
shown below.
NOTE: Tighten screws fi rmly, but do not overtighten. Overtightening can damage the mount.
CAUTION
•Do not adjust pitch or roll while tamper resistant security screws are fully engaged.
•Loosen the two tamper resistant security screws one complete turn before adjusting the projector mount assembly or damage may occur.
TO LOCK ROLL TIGHTEN | TO LOCK PITCH TIGHTEN |
TAMPER RESISTANT | TAMPER RESISTANT |
SECURITY SCREW | SECURITY SCREW |
FRONT VIEW | SIDE VIEW |
11 of 13 | ISSUED: |
Visit the Peerless Web Site at www.peerlessmounts.com | For customer care call |
