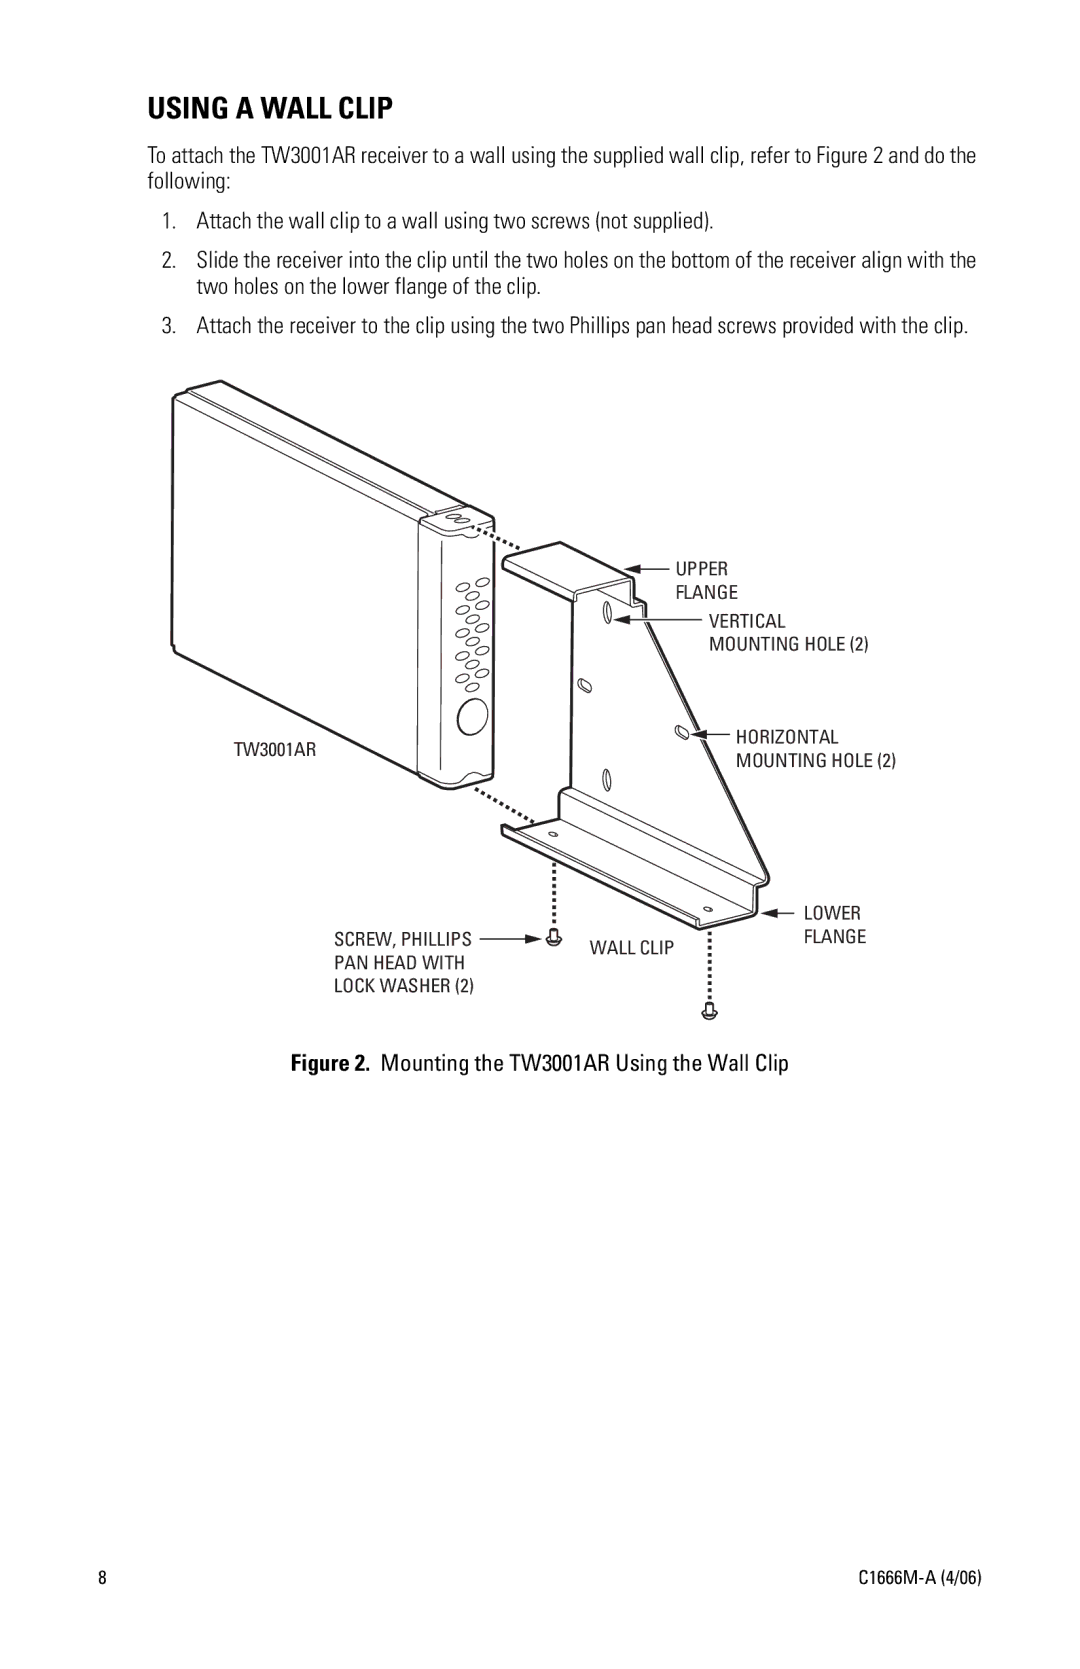
Pelco C1666M-A (4/06) manual Using A Wall Clip, Upper Flange Vertical Mounting Hole Horizontal

Models: C1666M-A (4/06)

1 20
Download 20 pages 13.37 Kb
Page 8
Image 8
USING A WALL CLIP

USING A WALL CLIP

To attach the TW3001AR receiver to a wall using the supplied wall clip, refer to Figure 2 and do the following:

1.Attach the wall clip to a wall using two screws (not supplied).

2.Slide the receiver into the clip until the two holes on the bottom of the receiver align with the two holes on the lower flange of the clip.

3.Attach the receiver to the clip using the two Phillips pan head screws provided with the clip.

 UPPER UPPER

FLANGE

VERTICAL

MOUNTING HOLE (2)

TW3001AR HORIZONTAL

TW3001AR

MOUNTING HOLE (2)

LOWER

SCREW, PHILLIPS SCREW, PHILLIPS  WALL CLIPFLANGELOCK WASHER (2) WALL CLIPFLANGE

PAN HEAD WITH

LOCK WASHER (2)

Figure 2. Mounting the TW3001AR Using the Wall Clip

8

C1666M-A (4/06)

Page 8
Image 8
Pelco C1666M-A (4/06) Using A Wall Clip, Upper Flange Vertical Mounting Hole Horizontal, TW3001AR MOUNTING HOLE LOWER

FAQ

What is the best way to attach the TW3001AR receiver to a wall?

The best way to attach the TW3001AR receiver to a wall is by using the supplied wall clip. Follow the instructions in the manual for proper installation.

Are screws provided for attaching the wall clip to the wall?

No, screws for attaching the wall clip to the wall are not provided. You will need to use two screws that are not supplied.

What type of screws are used to attach the receiver to the clip?

The receiver is attached to the clip using two Phillips pan head screws that are provided with the clip.