C2410M-G specifications
The Pelco C2410M-G is a powerful and versatile camera designed for a wide array of surveillance applications. Known for its robust performance and advanced features, the C2410M-G is ideal for both indoor and outdoor environments, providing high-definition video quality and reliability.One of the main features of the C2410M-G is its high-resolution 4MP imaging sensor, which guarantees sharp and clear images. This high resolution is particularly beneficial for identifying subjects in detail, making it an ideal choice for critical security locations such as retail stores, parking lots, and institutional settings.
The camera supports H.265 and H.264 video compression technologies, allowing for efficient data storage and bandwidth management. This means that users can achieve excellent video quality while minimizing the storage space required on their servers or cloud services. The adaptability in compression techniques ensures compatibility with various video management systems and network configurations.
Additionally, the Pelco C2410M-G features a wide dynamic range (WDR), which enhances its performance in challenging lighting conditions. This technology ensures that details in both bright and dark areas of the scene are captured effectively, making it particularly useful for environments with mixed lighting, such as entrances or areas with glare from windows.
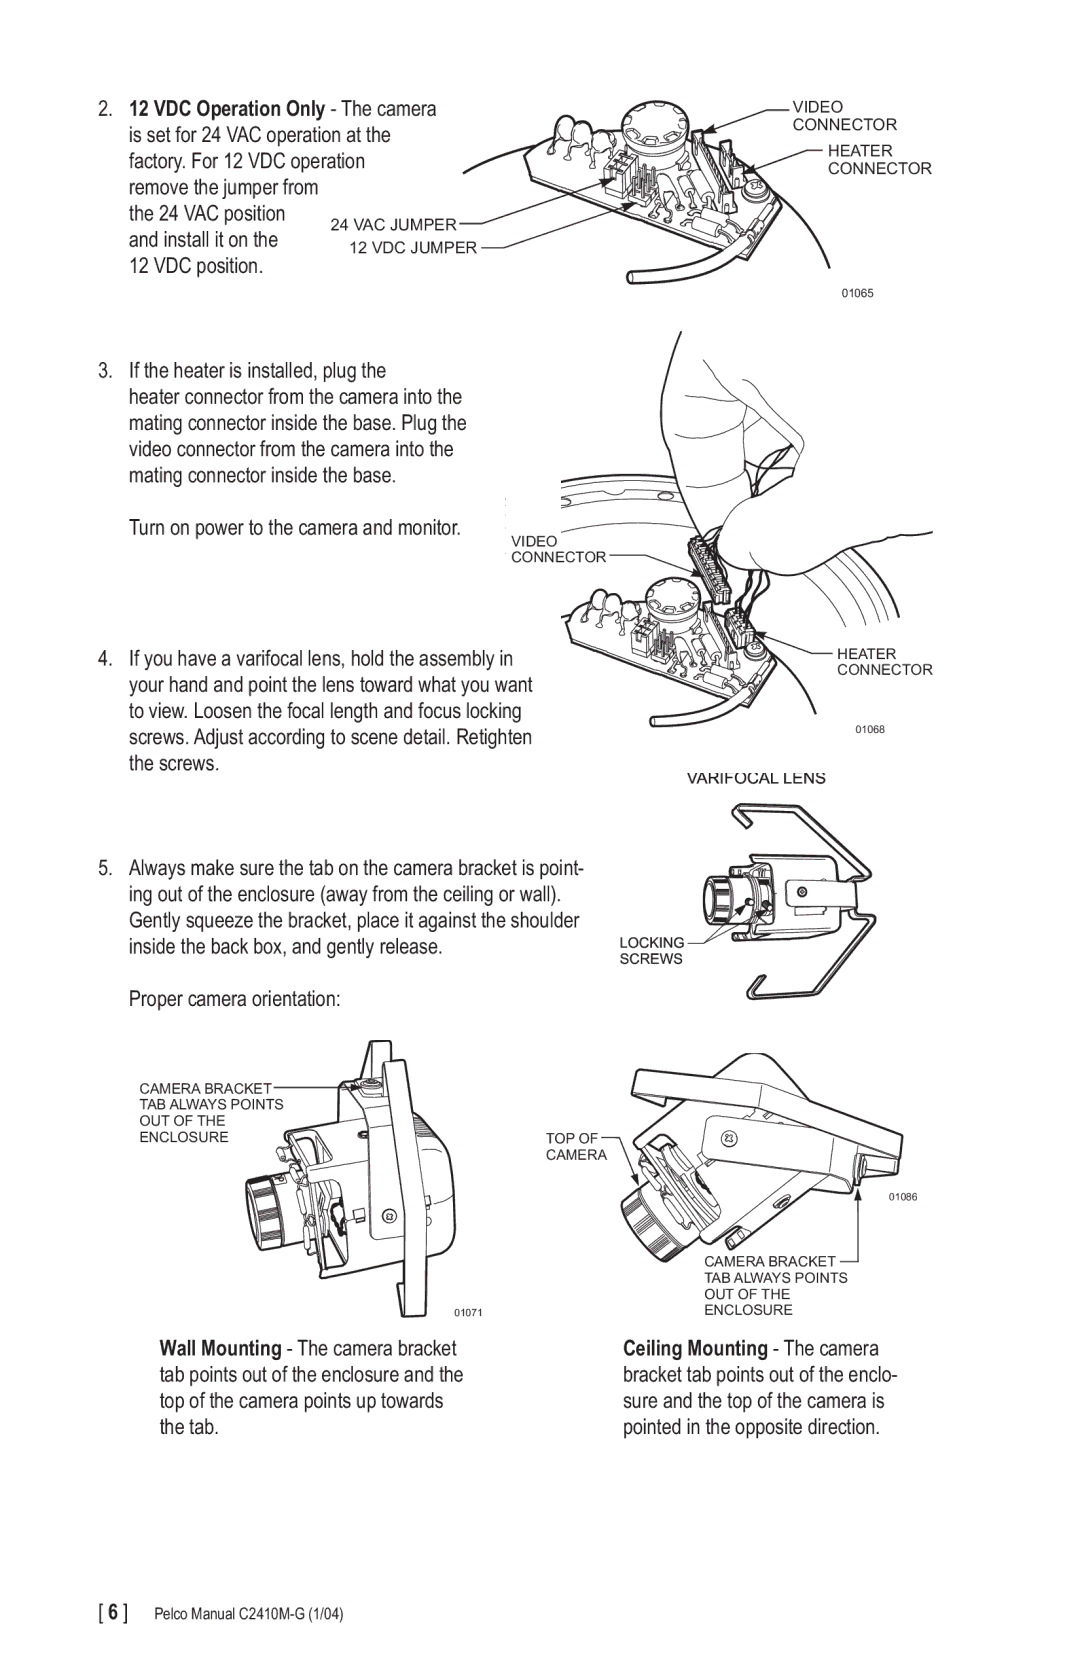
Another vital characteristic of the C2410M-G is its flexible lens options. The camera supports a varifocal lens, giving users the ability to adjust the field of view according to their monitoring needs. This adjustability makes it easier to cover specific areas of interest without compromising the overall surveillance coverage.
The Pelco C2410M-G is equipped with advanced analytics features, including motion detection and intrusion detection, which can help to enhance security responses by providing timely notifications of any suspicious activities. These intelligent features allow for proactive monitoring, making the system more efficient.
Durability is also a key characteristic of the C2410M-G. The camera is built to withstand harsh weather conditions, complying with IP67 standards for ingress protection. This level of resistance ensures that the camera remains operational in extreme conditions, providing reliability in various environmental settings.
Overall, the Pelco C2410M-G combines high-performance imaging, flexible installation options, advanced analytics, and rugged construction, making it a preferred choice for comprehensive security solutions in diverse applications. Its integration of cutting-edge technologies sets a high standard in the surveillance industry, catering to the needs of professionals seeking reliable and effective monitoring solutions.

