MOUNTING
The DX7100 may be placed on a flat surface, such as a shelf, or it can be installed in a
FLAT SURFACE MOUNTING
Before placing the unit on a flat surface, attach the rubber feet (supplied) to the bottom of the DVR. The unit may scratch the surface if the rubber feet are not installed.
EQUIPMENT RACK MOUNTING
To install the unit in an equipment rack:
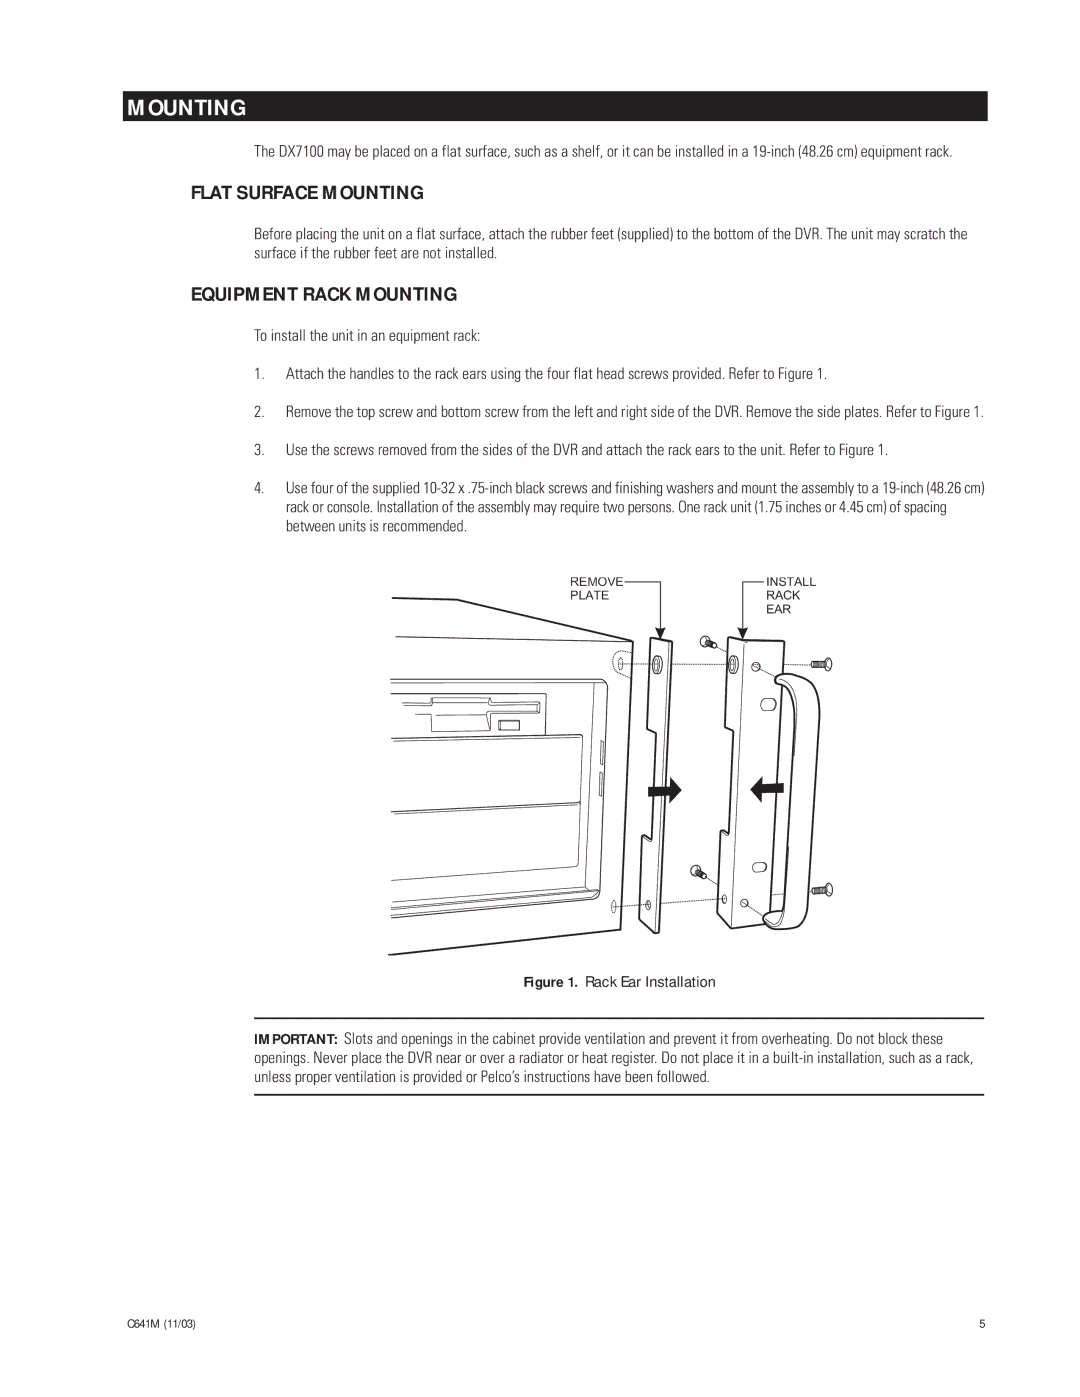
1.Attach the handles to the rack ears using the four flat head screws provided. Refer to Figure 1.
2.Remove the top screw and bottom screw from the left and right side of the DVR. Remove the side plates. Refer to Figure 1.
3.Use the screws removed from the sides of the DVR and attach the rack ears to the unit. Refer to Figure 1.
4.Use four of the supplied
REMOVE |
|
|
| INSTALL |
|
| |||
PLATE |
|
|
| RACK |
|
|
|
| EAR |
Figure 1. Rack Ear Installation
IMPORTANT: Slots and openings in the cabinet provide ventilation and prevent it from overheating. Do not block these openings. Never place the DVR near or over a radiator or heat register. Do not place it in a
C641M (11/03) | 5 |