UPGRADING CM9760-KBD FIRMWARE
CAUTION: Only qualified personnel observing electrostatic discharge (ESD) precautions should perform the procedure below. Always wear a grounding strap connected to an approved grounding source when working on or near exposed electronic components. Handle circuit boards by their edges.
To upgrade
1.Using System Manager, upload
NOTE: This step is necessary to avoid loss of
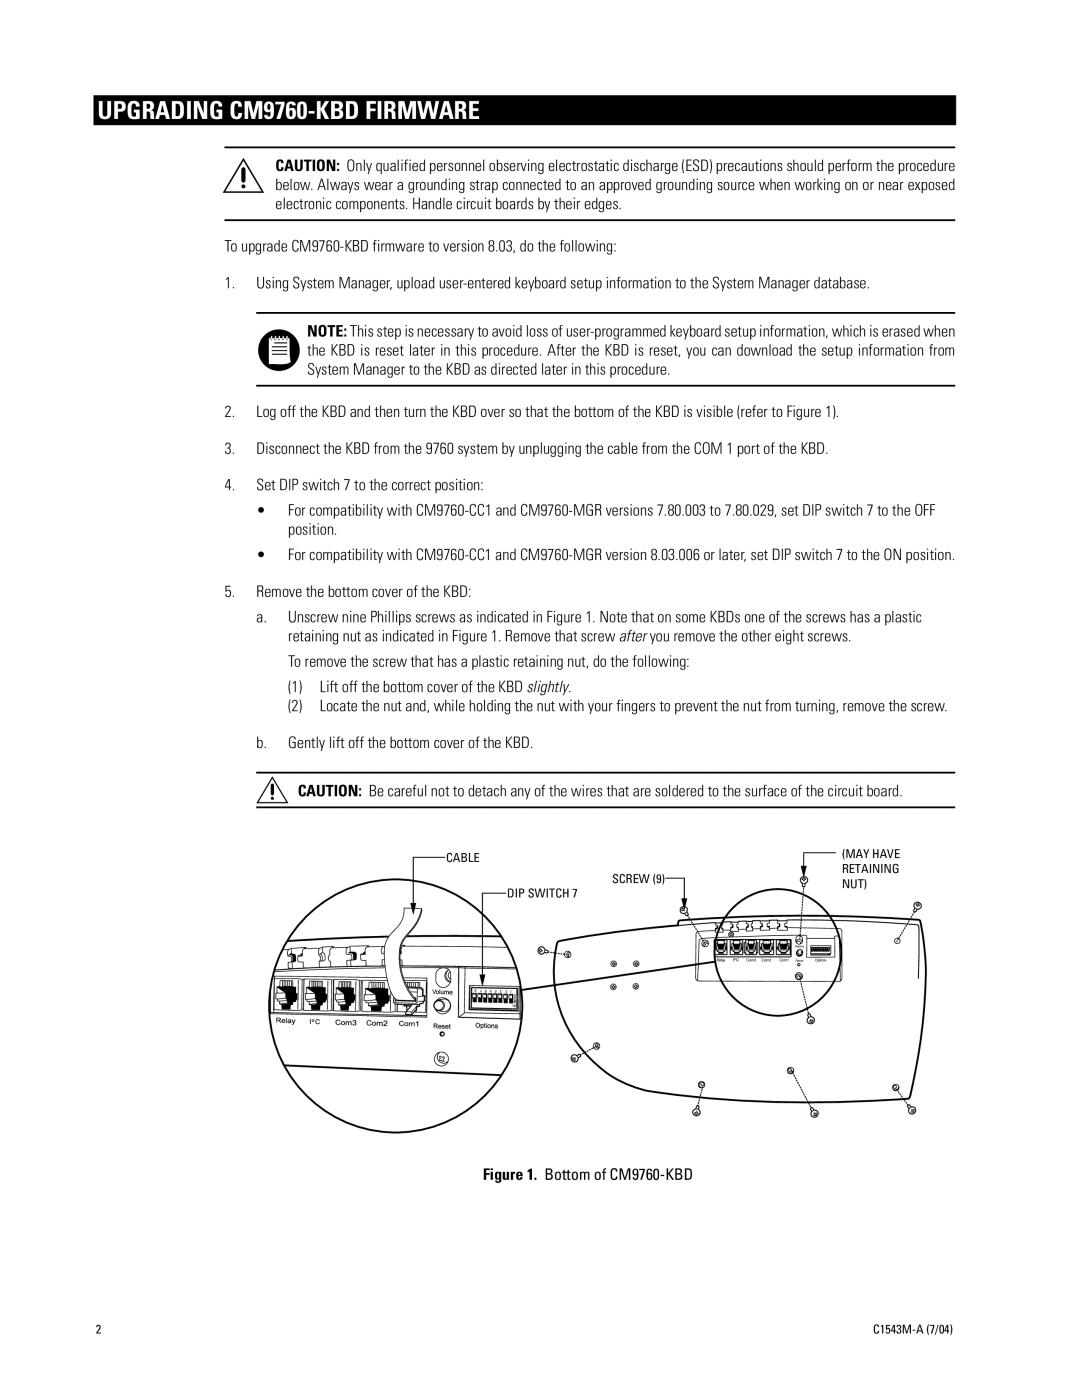
2.Log off the KBD and then turn the KBD over so that the bottom of the KBD is visible (refer to Figure 1).
3.Disconnect the KBD from the 9760 system by unplugging the cable from the COM 1 port of the KBD.
4.Set DIP switch 7 to the correct position:
•For compatibility with
•For compatibility with
5.Remove the bottom cover of the KBD:
a.Unscrew nine Phillips screws as indicated in Figure 1. Note that on some KBDs one of the screws has a plastic retaining nut as indicated in Figure 1. Remove that screw after you remove the other eight screws.
To remove the screw that has a plastic retaining nut, do the following:
(1)Lift off the bottom cover of the KBD slightly.
(2)Locate the nut and, while holding the nut with your fingers to prevent the nut from turning, remove the screw.
b.Gently lift off the bottom cover of the KBD.
CAUTION: Be careful not to detach any of the wires that are soldered to the surface of the circuit board.
CABLE
SCREW (9)
DIP SWITCH 7
(MAY HAVE RETAINING NUT)
Volume
Relay | Com3 Com2 | Com1 Reset | Options |
8 | 7 | 6 | 5 | 4 | 3 | 2 | 1 |
NO
Figure 1. Bottom of CM9760-KBD
2 |