4. Automatic flash mode
1
2
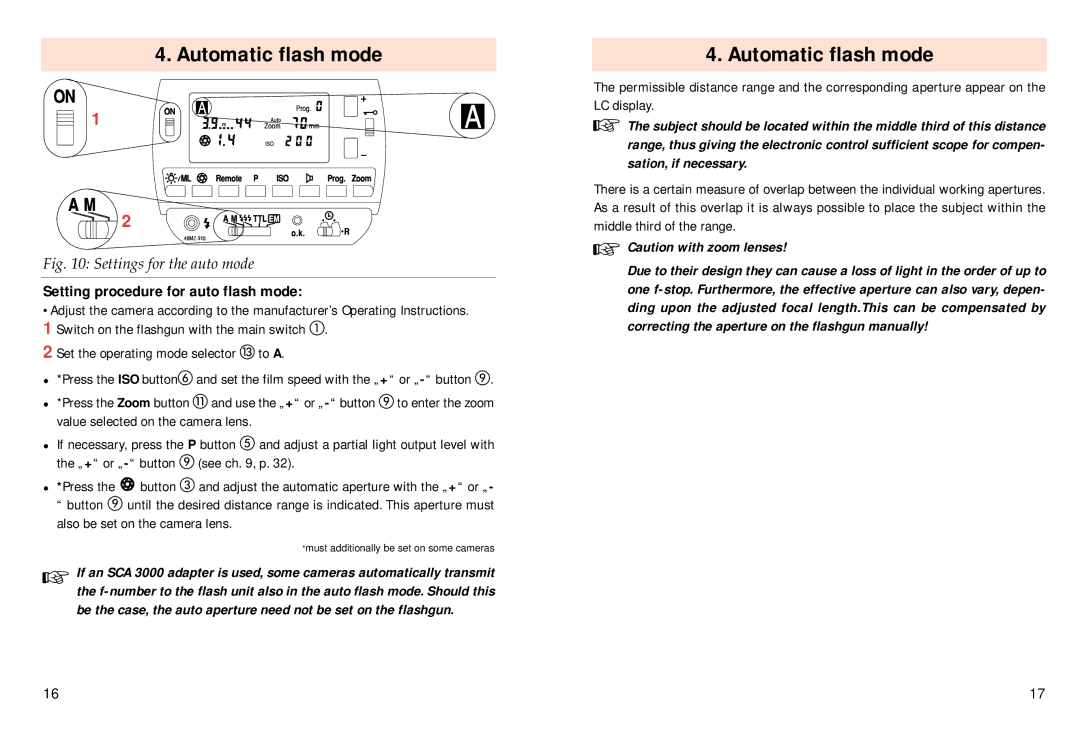
Fig. 10: Settings for the auto mode
Setting procedure for auto flash mode:
•Adjust the camera according to the manufacturer’s Operating Instructions. 1 Switch on the flashgun with the main switch .
2 Set the operating mode selector | to A. |
| ||
• *Press the ISO button | and set the film speed with the „+“ or | |||
• *Press the Zoom button | and use the „+“ or | to enter the zoom | ||
value selected on the camera lens. |
|
| ||
• If necessary, press the P button | and adjust a partial light output level with | |||
the „+“ or | (see ch. 9, p. 32). |
| ||
• *Press the | button | and adjust the automatic aperture with the „+“ or „- | ||
“ button | until the desired distance range is indicated. This aperture must | |||
also be set on the camera lens.
*must additionally be set on some cameras
☞If an SCA 3000 adapter is used, some cameras automatically transmit the
4. Automatic flash mode
The permissible distance range and the corresponding aperture appear on the LC display.
☞The subject should be located within the middle third of this distance range, thus giving the electronic control sufficient scope for compen- sation, if necessary.
There is a certain measure of overlap between the individual working apertures. As a result of this overlap it is always possible to place the subject within the middle third of the range.
☞Caution with zoom lenses!
Due to their design they can cause a loss of light in the order of up to one
16 | 17 |