Chapter 2- General Installation
2.1 Installation Location
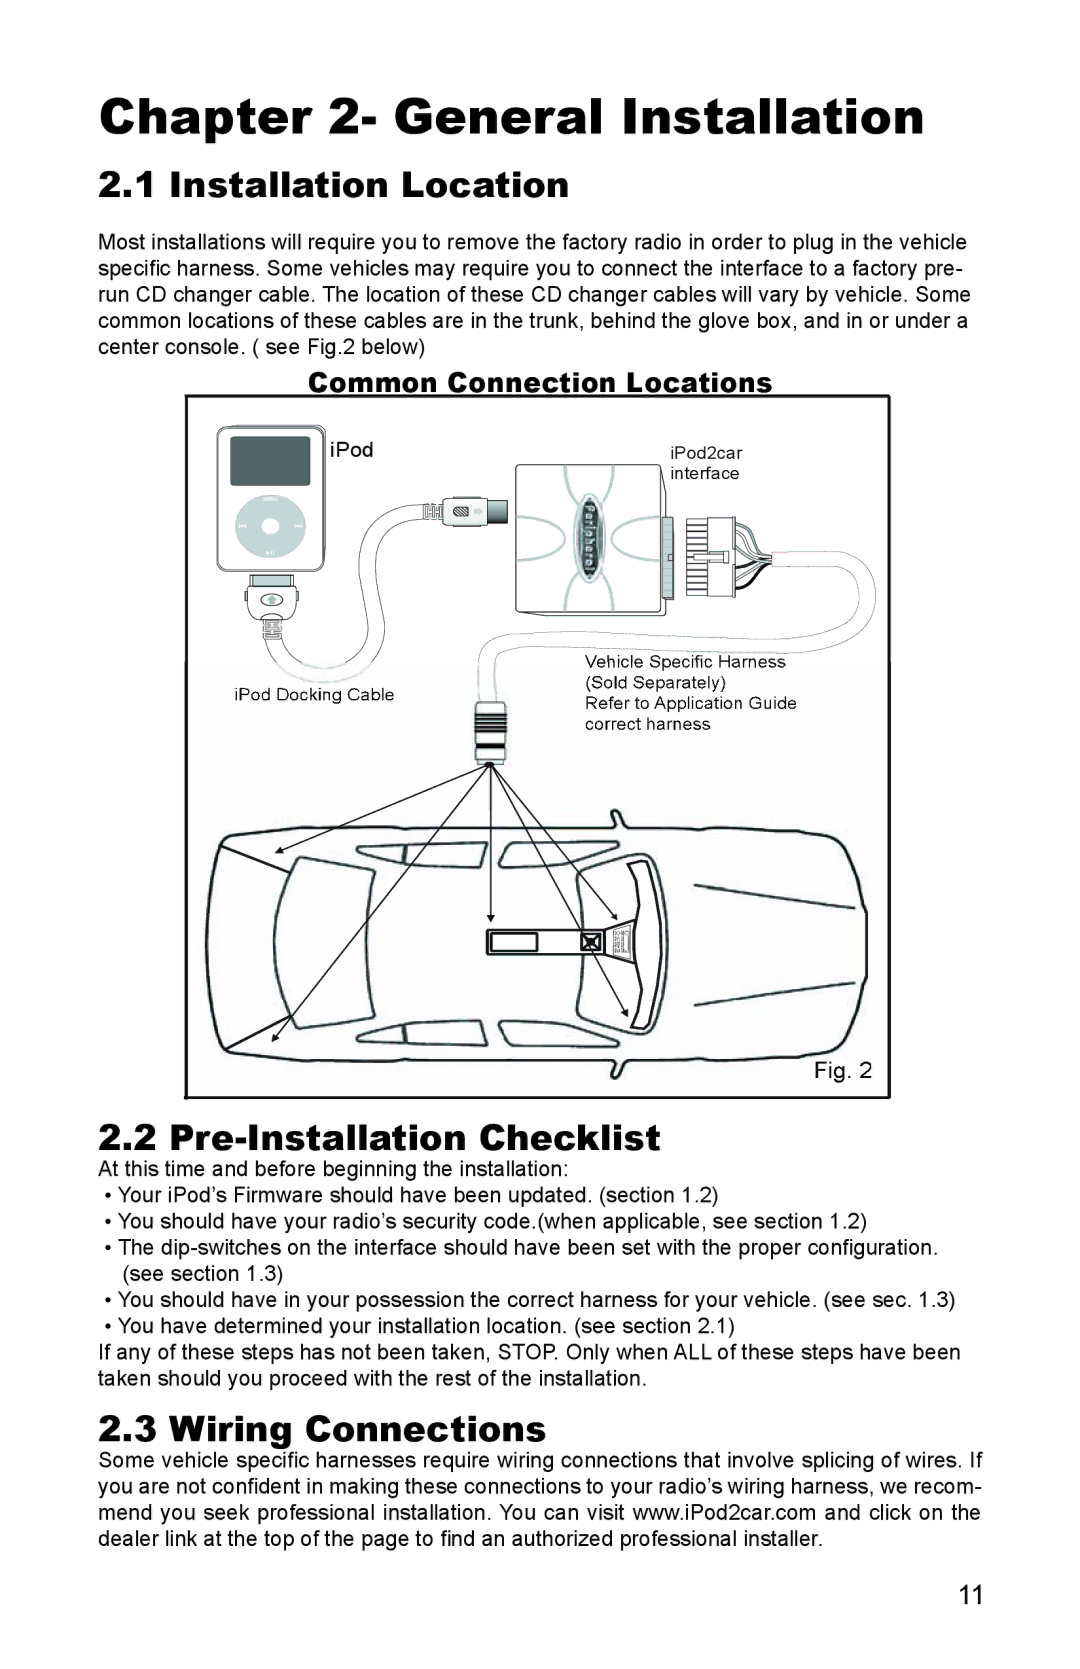
Most installations will require you to remove the factory radio in order to plug in the vehicle specifi c harness. Some vehicles may require you to connect the interface to a factory pre- run CD changer cable. The location of these CD changer cables will vary by vehicle. Some common locations of these cables are in the trunk, behind the glove box, and in or under a center console. ( see Fig.2 below)
Common Connection Locations
iPod | iPod2car |
| interface |
MENU
2.2 Pre-Installation Checklist
At this time and before beginning the installation:
•Your iPod’s Firmware should have been updated. (section 1.2)
•You should have your radio’s security code. (when applicable, see section 1.2)
•The
•You should have in your possession the correct harness for your vehicle. (see sec 1.3)
•You have determined your installation location. (see section 2.1)
If any of these steps has not been taken, STOP. Only when ALL of these steps have been taken should you proceed with the rest of the installation.
2.3 Wiring Connections
Some vehicle specifi c harnesses require wiring connections that involve splicing of wires. If you are not confi dent in making these connections to your radio’s wiring harness, we recom- mend you seek professional installation. You can visit www.iPod2car.com and click on the dealer link at the top of the page to fi nd an authorized professional installer.
11