Installation and Tapping – Concessionaire Dispensers
Connecting the Regulator to the CO2 Cylinder
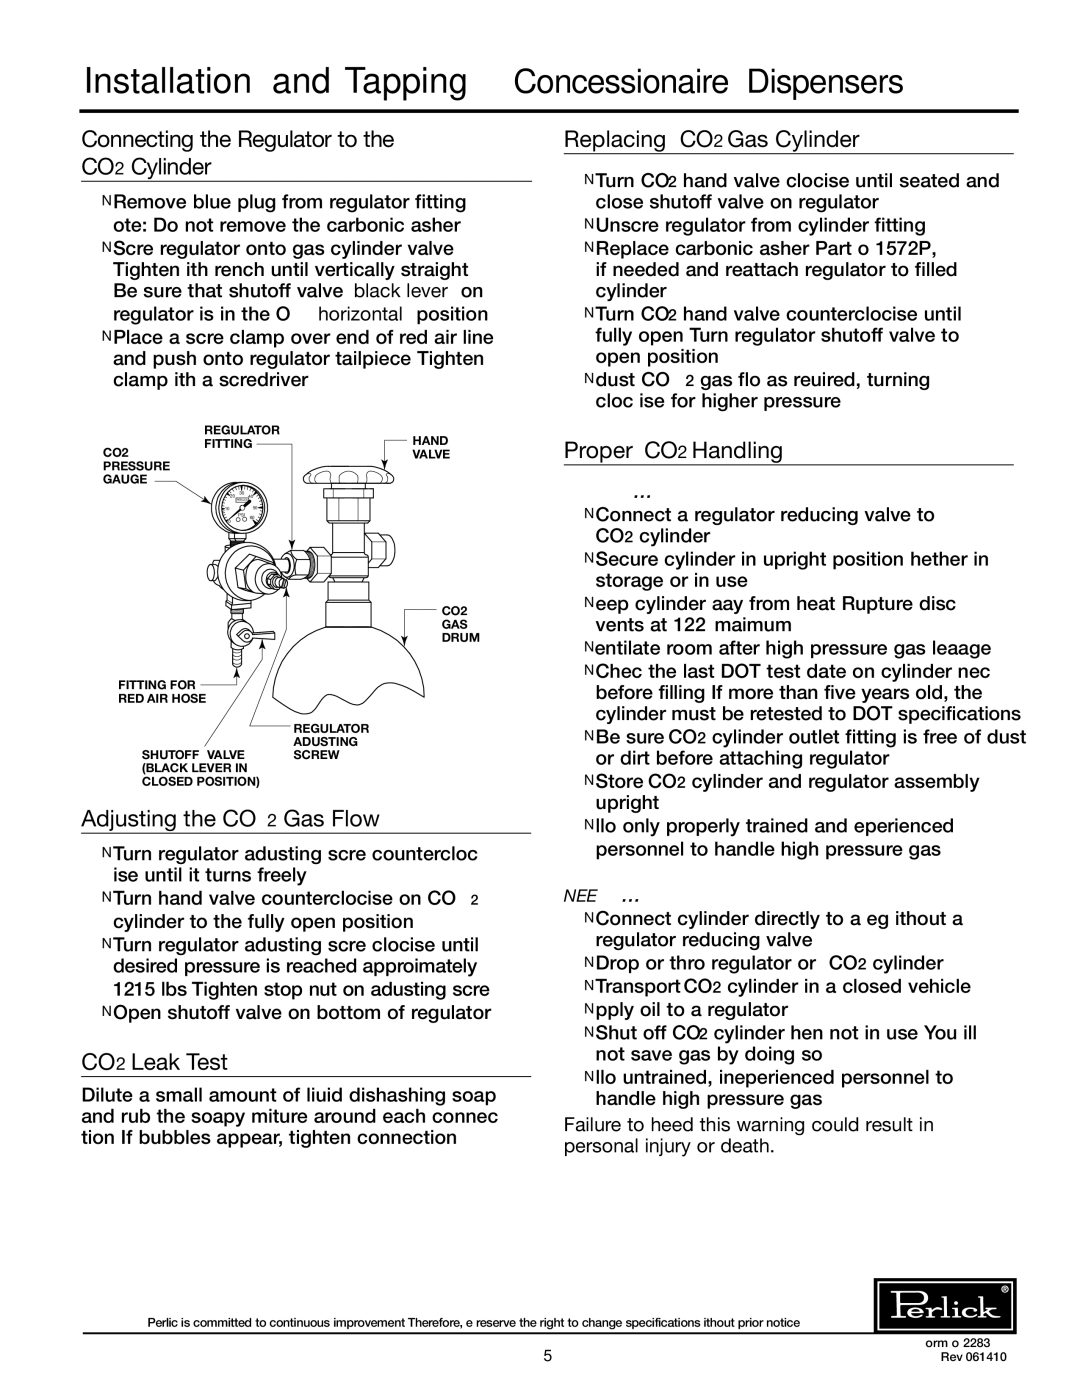
■Remove blue plug from regulator fitting. (Note: Do not remove the carbonic washer).
■Screw regulator onto gas cylinder valve. Tighten with wrench until vertically straight. Be sure that
■Place a screw clamp over end of red air line and push onto regulator tailpiece. Tighten clamp with a screwdriver.
| REGULATOR | HAND |
CO2 | FITTING | |
| VALVE | |
PRESSURE |
|
|
GAUGE |
|
|
![]() 20 30 40
20 30 40![]()
PERLICK |
![]() 10
10 ![]() 50
50![]()
Replacing CO2 Gas Cylinder
■Turn CO2 hand valve clockwise until seated and close
■Unscrew regulator from cylinder fitting.
■Replace carbonic washer (Part No. 157F2P), if needed and reattach regulator to filled cylinder.
■Turn CO2 hand valve counterclockwise until fully open. Turn regulator
■Adjust CO2 gas flow as required, turning clock wise for higher pressure.
Proper CO2 Handling
always...
Connect a regulator (reducing valve) to |
![]() 0
0
PSI 60
CO2
GAS
DRUM
■ |
|
| CO2 cylinder. |
■ | Secure cylinder in upright position whether in |
| storage or in use. |
■ | Keep cylinder away from heat. Rupture disc |
| vents at 122° F. maximum. |
■ | Ventilate room after high pressure gas leakage. |
■ | Check the last DOT test date on cylinder neck |
FITTING FOR ![]()
RED AIR HOSE
REGULATOR
ADJUSTING
CLOSED POSITION)
Adjusting the CO2 Gas Flow
■Turn regulator adjusting screw counterclock- wise until it turns freely.
■Turn hand valve counterclockwise on CO2 cylinder to the fully open position.
■Turn regulator adjusting screw clockwise until desired pressure is reached (approximately
■Open
CO2 Leak Test
Dilute a small amount of liquid dishwashing soap and rub the soapy mixture around each connec- tion. If bubbles appear, tighten connection.
| before filling. If more than five years old, the |
| cylinder must be retested to DOT specifications. |
■ | Be sure CO2 cylinder outlet fitting is free of dust |
| or dirt before attaching regulator. |
■ | Store CO2 cylinder and regulator assembly |
| upright. |
■ | Allow only properly trained and experienced |
| personnel to handle high pressure gas. |
never...
■Connect cylinder directly to a keg without a regulator (reducing valve).
■Drop or throw regulator or CO2 cylinder.
■Transport CO2 cylinder in a closed vehicle.
■Apply oil to a regulator.
■Shut off CO2 cylinder when not in use. You will not save gas by doing so!
■Allow untrained, inexperienced personnel to handle high pressure gas.
Failure to heed this warning could result in personal injury or death.
Perlick is committed to continuous improvement. Therefore, we reserve the right to change specifications without prior notice.
5 | Form No. Z2283 |
Rev. 06.14.10 |