Preparing the Cabinet for Use – Single Keg Beer Dispensers

Parts List

Casters* .

Faucet Standard.

Faucet Head Assembly.

Spanner Wrench for Faucet.

Black Connector Hose 316” x 3’.

516” Air Hose.

Bag of Miscellaneous Parts.

Plastic Waste Bottle.*

*Portable Model Only.

Suggested Tools

#2 Phillips Screwdriver.

Spanner Wrench (included).

10” Crescent Wrench.

9/ 16” Allen Wrench.

5/ 16” and 3/ 8” Hex Socket.

Power drill or driver.

Plumbing

Portable Model

No plumbing connections are required. Condensate from the cooling coil is automatically evaporated. Drain pan waste is accumulated in the plastic bottle installed inside the cabinet.

Underbar Model

Features a floor drain with a 34” female pipe thread connection for disposal of both condensate and drip pan waste. Remove bottom 1” NPS or side 34” drain plug attach male pipe to create external drain.

Electrical

The cabinet must be connected to a separately fused power source (see electrical specification plate) and grounded in accordance with National and Local Electrical Codes. Caution: Do not attempt to operate the equipment on any other power source than that listed on the Electrical Specification plate.

Uncrating and Inspection

Remove all crating material before operating. Carefully inspect cabinet for hidden damage. If damage is discovered, file your claim immediately with the transportation company. Perlick is

not responsible for damage in transit.

Installing Casters (Portable Models Only)

Attach four casters to the cabinet bottom; rigid casters at the rear and swivel casters on the front. Use the supplied 1/ 4”- 20 x 3/ 4” hex head self- tapping machine screws.

Placing the Cabinet

Push the cabinet into place using rollers when necessary. Important: Proper air flow around the condensing unit is necessary for efficient operation. Never obstruct the air flow in and out of the condensing unit.

Leveling the Cabinet

When the cabinet is in place, check installation with carpenter’s level. When perfectly level, accumulated water will drain out. A slight pitch to the drain side will not harm the cabinet. Water may accumulate if cabinet is pitched to the opposite side.

Installing the Faucet and

Dispensing Head

Before you begin: Wash dispensing head and faucet. Flush beer, dispensing head and faucet lines with fresh water.

Apply RTV around the base of the dispensing head to seal it to the top. Align the dispensing head over the five holes on the cabinet top and use the five stainless steel #10-32 x 134” Phillips pan head stainless steel machine screws to secure standard to cabinet top. Wipe off excess RTV to complete the seal.

Attach faucet to standard using spanner wrench to tighten coupling. Attach faucet handle to faucet.

Insert flexible plastic air hose six to seven inches into bottom of faucet standard. Secure hose with tie wrap (supplied).

WARNING!

To avoid compressor damage, after returning cabinet to an upright position, let unit stand for 24 hours before plugging it in and running the unit.

Perlick is committed to continuous improvement. Therefore, we reserve the right to change specifications without prior notice.

Form No. Z2268

3

Page 3
Image 3
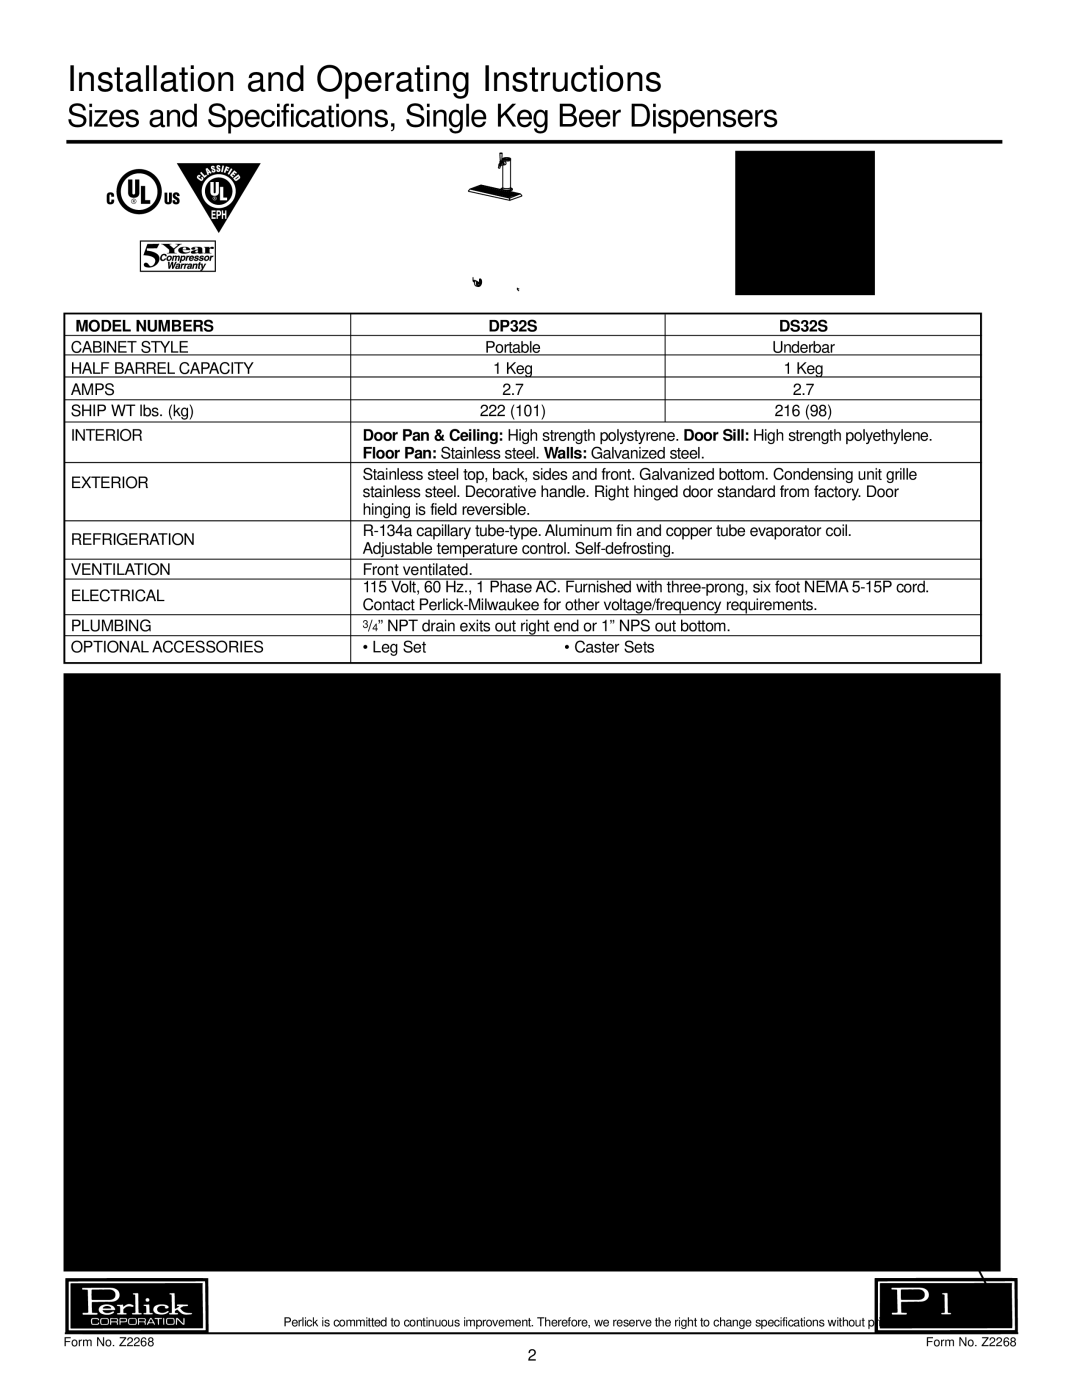
Perlick DS32S, DP32S specifications Preparing the Cabinet for Use Single Keg Beer Dispensers

DS32S, DP32S specifications

The Perlick DP32S and DS32S represent some of the finest offerings in the world of commercial refrigeration and beverage dispensing. These models are designed with a keen focus on efficiency, durability, and performance, making them an ideal choice for bars, restaurants, and any establishment that prioritizes quality beverage service.

One of the standout features of the DP32S and DS32S is their dual-zone design. This allows for separate temperature controls, enabling users to store different types of beverages at their optimal temperature. The models are equipped with advanced digital temperature controls that allow for precise adjustments and monitoring, which is essential for maintaining the quality of craft beers, wines, and other beverages.

Constructed with high-grade stainless steel, these units are built to last. Their robust design not only ensures longevity but also simplifies cleaning and maintenance, thus ensuring a hygienic storage environment for beverages. The smooth finish is resistant to fingerprints and smudges, catering to aesthetic appeal in front-of-house applications.

Both models come with a self-closing door feature, which is designed to reduce the risk of temperature fluctuations caused by open doors. This is enhanced by magnetic door seals that create a tight fit, ensuring energy efficiency while minimizing operational costs.

In addition to temperature control, the DP32S and DS32S boast a high-capacity refrigeration system. This technology allows for quick recovery times, ensuring that your beverages remain at the ideal temperature even during peak service periods. Moreover, these models are designed with energy-efficient components, which can lead to significant savings in energy costs over time.

Another important characteristic is their generous storage capacity. The DP32S and DS32S can accommodate a variety of keg sizes, making them versatile options for establishments that serve multiple beverage types. Adjustable shelving and storage configurations further enhance their usability.

Finally, both models are engineered for exceptional performance. The cooling systems are designed to distribute cold air evenly throughout the cabinet, preventing hot spots and ensuring that every beverage is consistently chilled.

Overall, the Perlick DP32S and DS32S are exemplary choices for any commercial setting looking for reliable, stylish, and functionally superior beverage storage solutions. With their advanced technology and durable design, they stand out as investments that pay dividends in both performance and service quality.