
PDT00-12892, PDT00-12894, PAC00-12914, PAC00-12893 specifications
The PetSafe PAC00-12893, PDT00-12894, PDT00-12892, and PAC00-12914 are innovative products designed to improve pet care and enhance the bond between pets and their owners. Each device features unique capabilities and technologies tailored to different aspects of pet management.The PetSafe PAC00-12893 is an advanced training collar that integrates state-of-the-art technology to assist pet owners in effectively training their dogs. This collar offers adjustable levels of stimulation, allowing users to customize the intensity based on their pet’s sensitivity and training needs. The lightweight design ensures comfort, while the waterproof feature allows for outdoor training regardless of weather conditions. With a range of up to 400 yards, it is ideal for use in various environments.
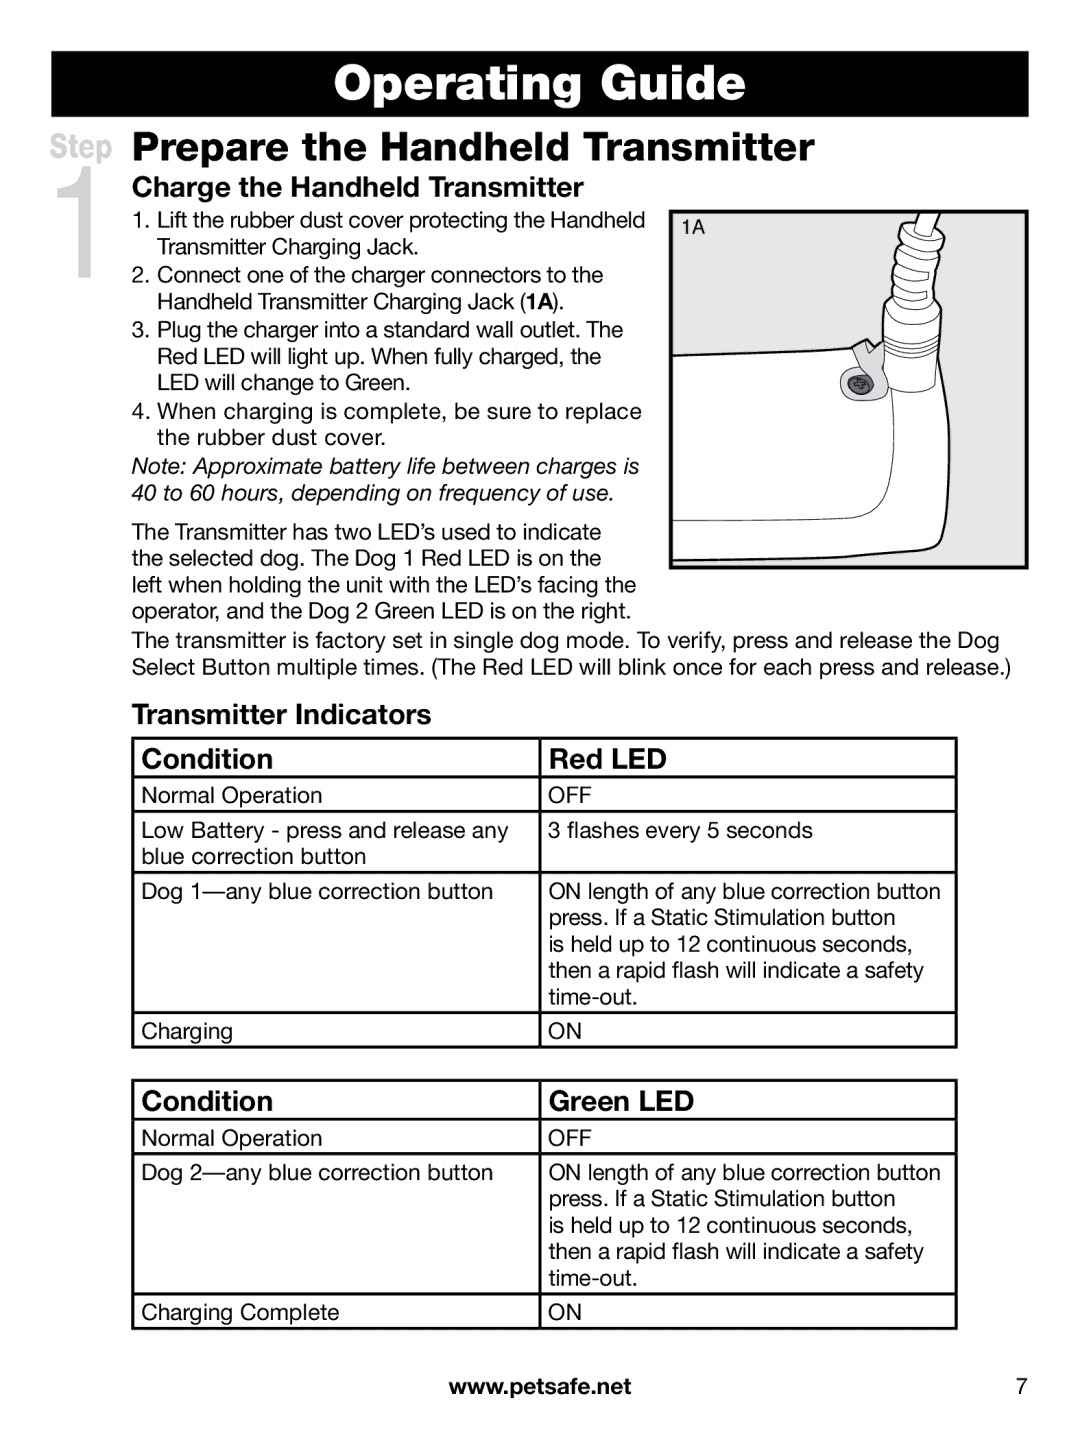
The PDT00-12894 model is a premium remote trainer designed with versatility in mind. It includes a user-friendly remote control that allows pet owners to issue commands from a distance. The remote features multiple training modes, including vibration, tone, and static stimulation, providing flexibility in training methods. The collar is rechargeable and boasts a long-lasting battery life, making it suitable for extended training sessions. Its durable construction ensures that it can withstand the rigors of daily use.
The PDT00-12892 is similar in function but is tailored specifically for smaller breeds. Its smaller collar size and gentler stimulation levels make it ideal for petite pooches. It retains many features of its larger counterparts, such as adjustable settings and waterproof capabilities, ensuring that smaller pets receive effective training without discomfort.
PetSafe’s PAC00-12914 is a state-of-the-art indoor pet containment system that utilizes advanced radio frequency technology to create a safe boundary for your pet. This system is designed to prevent unwanted wandering while giving pets freedom within a designated area. It comes with a collar that emits a warning tone as pets approach the boundary, followed by a mild static correction if they attempt to cross it. This gentle method helps to instill a sense of boundaries without harsh training methods.
In summary, the PetSafe PAC00-12893, PDT00-12894, PDT00-12892, and PAC00-12914 provide comprehensive solutions for pet training and safety. With features like adjustability, waterproof designs, and innovative training technologies, these products are excellent tools for pet owners looking to enhance their pets' lives while ensuring safety and compliance with training routines. Whether for training purposes or containment, PetSafe’s range stands out in pet care innovation.