Embroidery Mode - Preparations
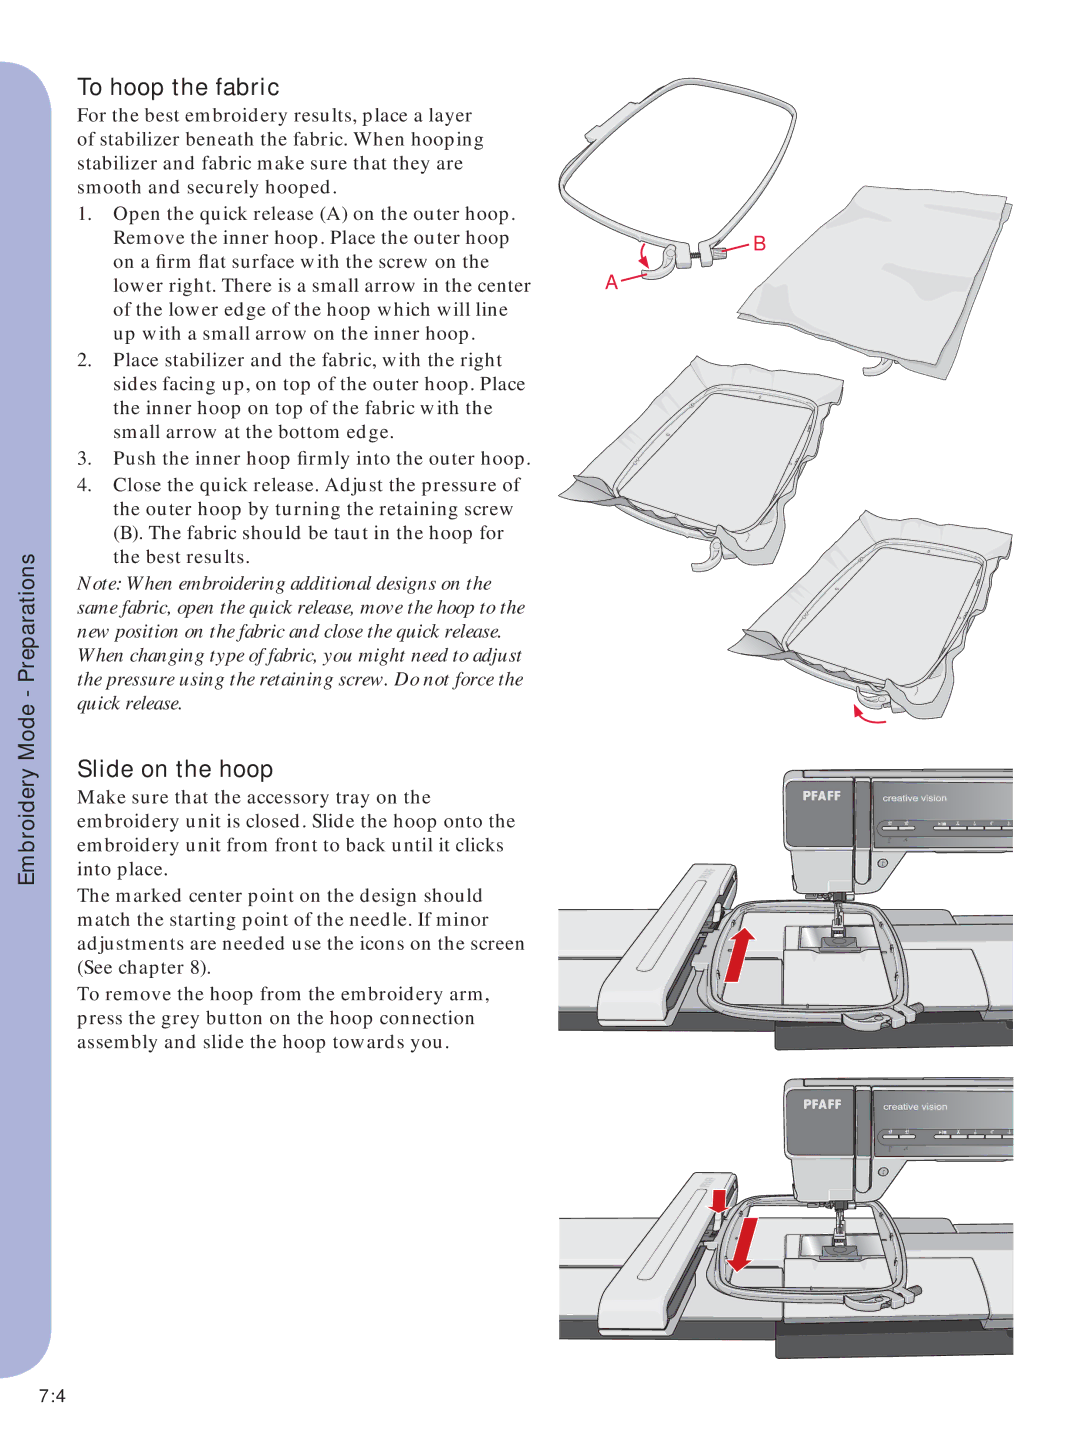
To hoop the fabric
For the best embroidery results, place a layer of stabilizer beneath the fabric. When hooping stabilizer and fabric make sure that they are smooth and securely hooped.
1. Open the quick release (A) on the outer hoop. |
|
Remove the inner hoop. Place the outer hoop | B |
on a firm flat surface with the screw on the | A |
lower right. There is a small arrow in the center | |
of the lower edge of the hoop which will line |
|
up with a small arrow on the inner hoop. |
|
2. Place stabilizer and the fabric, with the right sides facing up, on top of the outer hoop. Place the inner hoop on top of the fabric with the small arrow at the bottom edge.
3. Push the inner hoop firmly into the outer hoop.
4. Close the quick release. Adjust the pressure of the outer hoop by turning the retaining screw
(B). The fabric should be taut in the hoop for the best results.
Note: When embroidering additional designs on the same fabric, open the quick release, move the hoop to the new position on the fabric and close the quick release. When changing type of fabric, you might need to adjust the pressure using the retaining screw. Do not force the quick release.
Slide on the hoop
Make sure that the accessory tray on the embroidery unit is closed. Slide the hoop onto the embroidery unit from front to back until it clicks into place.
The marked center point on the design should match the starting point of the needle. If minor adjustments are needed use the icons on the screen
(See chapter 8). To remove the hoop from the embroidery arm,
press the grey button on the hoop connection assembly and slide the hoop towards you.
7:4