96 YejkPccPkYfe
Y l b
g t y t t 79 L
g v t y t y
1ex y v t y
2R y ux t Mf79?8 =L2 L4f4g4L4 MfU t
3exy y v
Uy | y y |
|
ux v t t t y | ||
Uy | v t y | t |
=L4 Uy t | t y y t w | |
u | ux z =L4 | |
|
|
|
| a 0 g | ux wx t t |
| ux | t 79L |
| x |
|
|
|
|
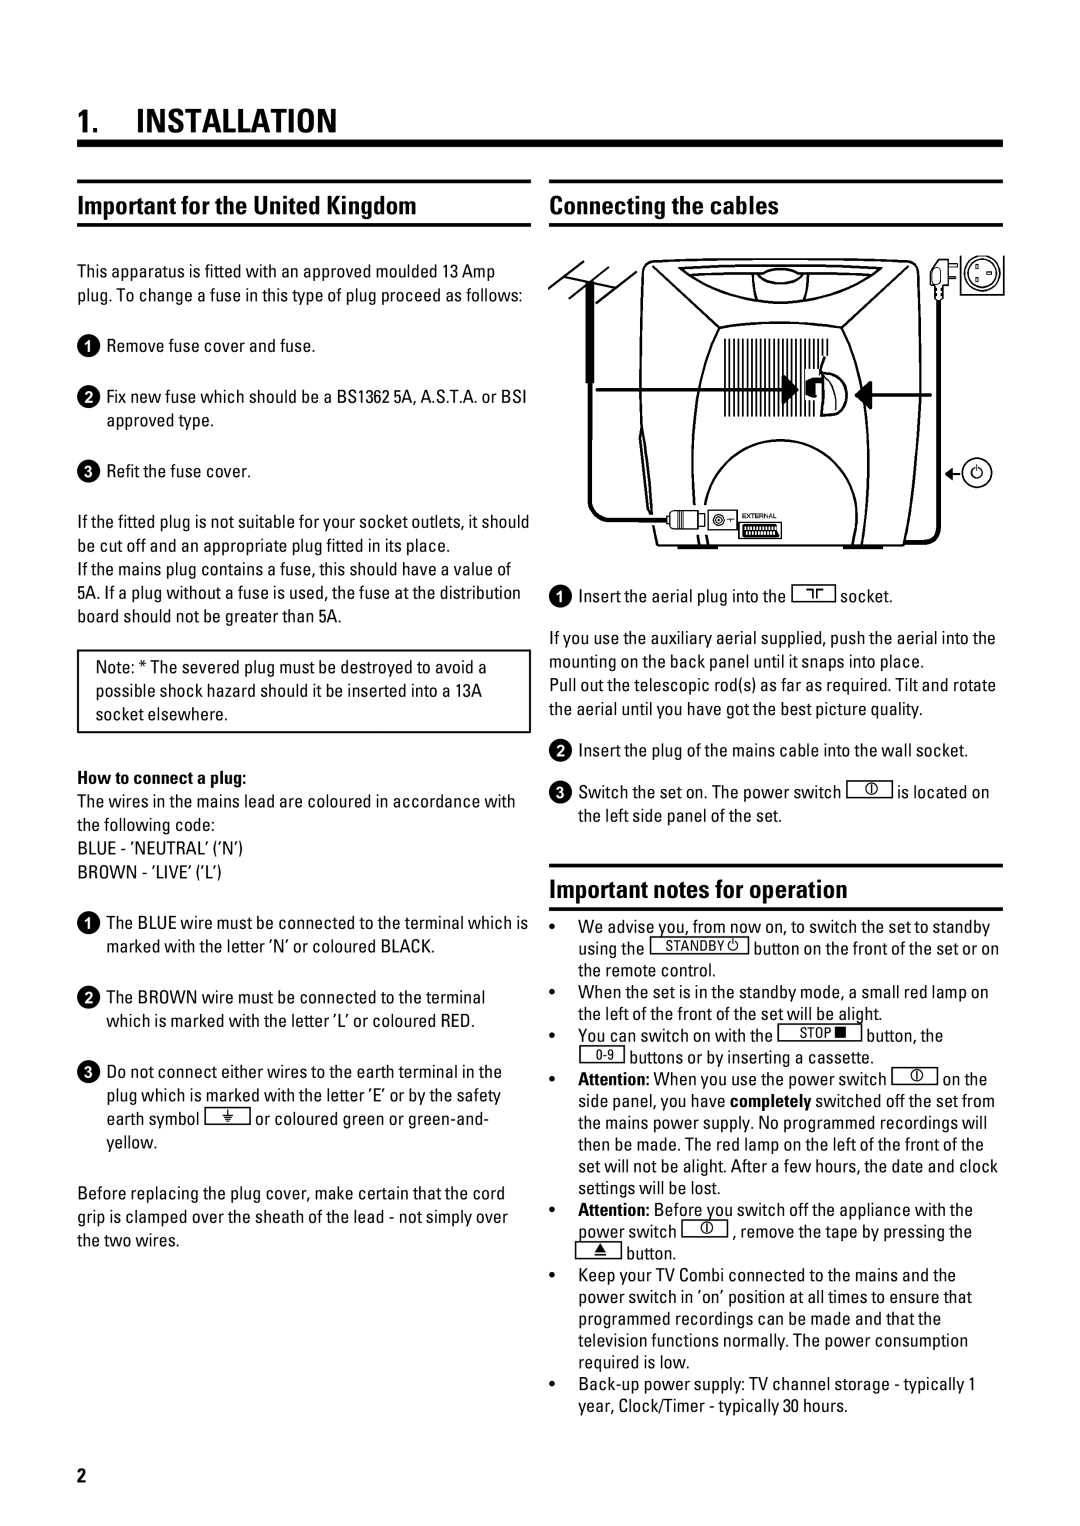
X x
gt v tvv
y v
MXhP 3
Mebja 3
1g MXhP ux v
S
1U tx | 2 |
|
Uy t tx tx utv
ct yt t g t tx z ux
2U vtu
3f g | 8 |
|
Y
• jx tw y
fgLaOMl m u y
2g Mebja ux v
3O v x xt
| |
xt | \ v z z |
Mxy v vx v
z v 3
v
• j t
yux t
•l vt
|
| 63C | u u t vt | |||
|
|
|
| |||
• | P | j |
|
| ||
|
| a |
|
|
| |
|
| ux g | y |
|
| |
|
| ux t Ly t yx | wt t v | |||
|
| ux | Mxy | t | ||
• | P | |||||
|
|
|
|
| 8 | 2 u |
|
|
|
| u |
| |
|
| J |
|
|
| |
|
|
|
|
|
| |
• Wxx gi N v t
-t t x vt ux t
y g v
fgbc h
y
u
8
•Mtv gi v 3 7 N 3 96
: