Basic connections
Connecting the power cord
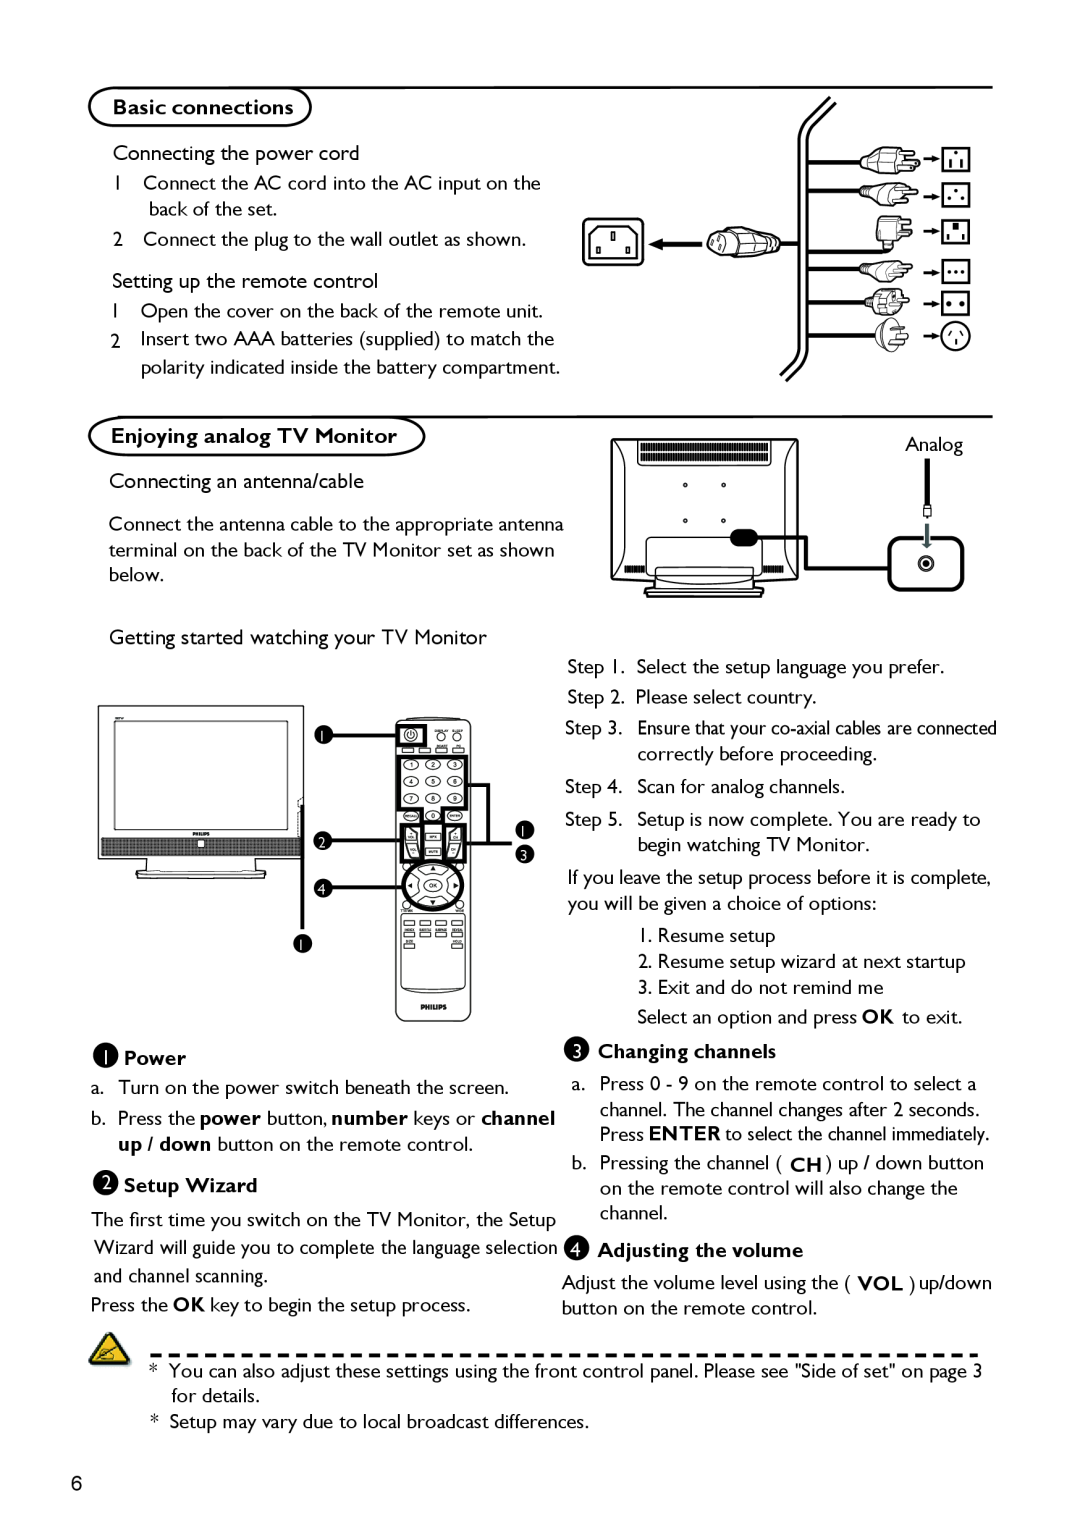
1 Connect the AC cord into the AC input on the back of the set.
2 Connect the plug to the wall outlet as shown.
Setting up the remote control
1 Open the cover on the back of the remote unit.
2 Insert two AAA batteries (supplied) to match the polarity indicated inside the battery compartment.
Enjoying analog TV Monitor | Analog |
|
Connecting an antenna/cable
Connect the antenna cable to the appropriate antenna terminal on the back of the TV Monitor set as shown below.
Getting started watching your TV Monitor
1 |
| |
2 | 1 | |
3 | ||
| ||
4 |
|
1
1Power
Step 1. Select the setup language you prefer. Step 2. Please select country.
Step 3. Ensure that your
Step 4. Scan for analog channels.
Step 5. Setup is now complete. You are ready to begin watching TV Monitor.
If you leave the setup process before it is complete, you will be given a choice of options:
1.Resume setup
2.Resume setup wizard at next startup
3.Exit and do not remind me
Select an option and press OK to exit.
3Changing channels
a.Turn on the power switch beneath the screen.
b.Press the power button, number keys or channel up / down button on the remote control.
2Setup Wizard
The first time you switch on the TV Monitor, the Setup
a.Press 0 - 9 on the remote control to select a channel. The channel changes after 2 seconds. Press ENTER to select the channel immediately.
b.Pressing the channel ( CH ) up / down button on the remote control will also change the channel.
Wizard will guide you to complete the language selection | 4 Adjusting the volume | |
and channel scanning. | Adjust the volume level using the ( VOL ) up/down | |
Press the OK key to begin the setup process. | ||
button on the remote control. |
* You can also adjust these settings using the front control panel. Please see "Side of set" on page 3 for details.
* Setup may vary due to local broadcast differences.
6