Manuals
/
Philips
/
Computer Equipment
/
Scanner
Philips
42PFL6805H
manual
Connections / Connect devices
Models:
42PFL6805H
1
56
78
78
Download
78 pages
42.2 Kb
53
54
55
56
57
58
59
60
Troubleshooting
Specifications
Locks and timers
Connecting devices
Dimension
Universal access
Setting up
Adjust
Cleaning
Resolution
Page 56
Image 56
56
Connections / Connect devices
Page 55
Page 57
Page 56
Image 56
Page 55
Page 57
Contents
#$%&%#*+ 78 !#$% =?@AH
#$%$&*+,*-$./+01$2+-34531$6787
=#0 DE?5+2#23*0/0E0/0#*3%
Contents
Remote control
To begin
TV tour
Econova
To begin / TV tour
TV menus
Red
To begin / TV tour
Connecting devices
High Definition TV
Setting up
Wall or stand mounting
To begin / Setting up
Page
To begin / Setting up
Vesa info
Positioning the TV
Safety and care
Power switch
Register your TV
Congratulations on your purchase and welcome to Philips
Using Help and Search
Help and support
Online support
Contact Philips
Overview
Remote control
Use your TV
Solar charger
EasyLink Remote Control
IR sensor
Cleaning
Charger cable
Browse
Menus
Home
Use your TV / Menus
Adjust
Options
Use your TV / Menus
Favourite channels
Switch channels
Watch TV
Smart picture and sound settings
Programme guide
Switch to standby
Picture format
Use your TV / Watch TV
Select a device
Use the TV remote control
Watch a connected device
More on
Text
Text pages
Text options
Text setup
Use iTV
Interactive TV
Benefits
Scenea
Multimedia
Browse USB
Child locks
Locks and timers
Sleep timer
Audio languages
Subtitles and languages
Subtitles
Universal access
Switch on
Hearing impaired
Visually impaired
Setup
Picture and Sound
Setup / Picture and Sound
Channels
Setup / Channels
Devices
EasyLink HDMI-CEC
Add a new device
Audio to Video sync
Auto subtitle shift
Pixel Plus link
Current version
Update with USB
Software
Power cable
Connections
First connections
Antenna cable
About cables
Cable quality
Pb Pr
Scart
Video
VGA
Blu-ray Disc / DVD player
Connect devices
SoundBar
Home Theatre System with disc player
Recorder
Digital receiver / Sat
Dig. receiver + Disc Recorder
Dig. receiver + Disc-R + Home Theatre
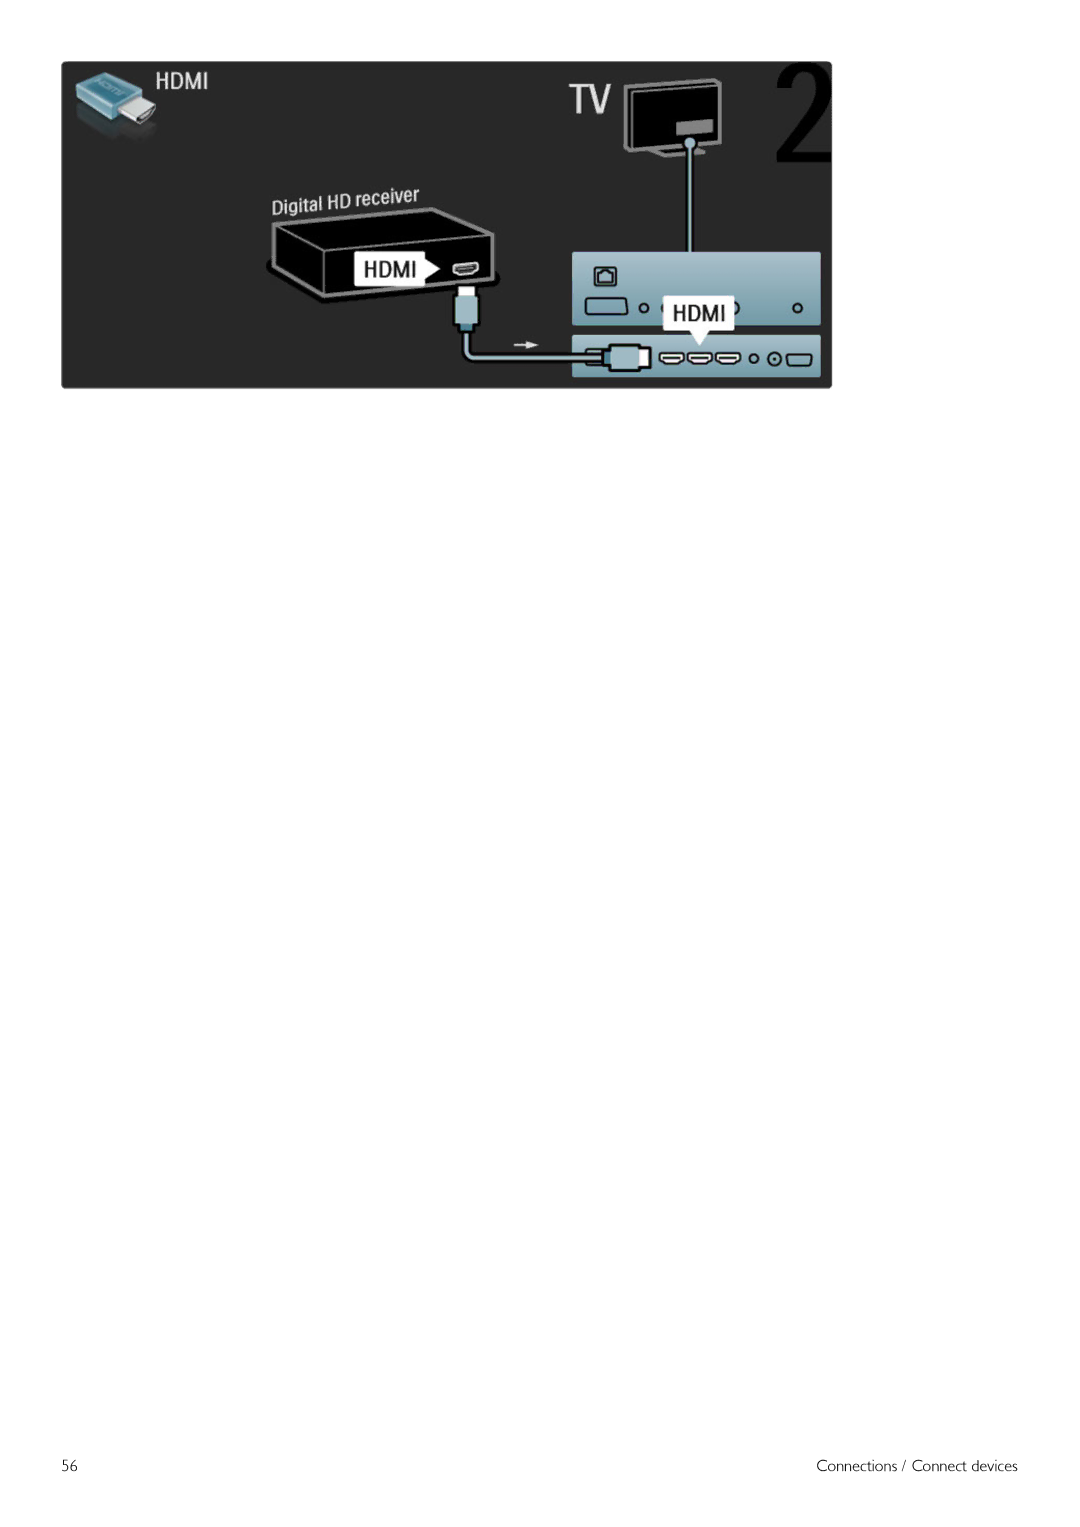
Connections / Connect devices
Digital HD receiver
Connections / Connect devices
Connect more devices
Game
HD Game
Photo camera
Camcorder
TV as PC monitor
Decoder
Common Interface CAM
CAM
Troubleshooting
Contact information
TV and remote control
TV channels
Picture and sound
Troubleshooting / Devices
Multimedia
Open source software
Specifications
Software version
Environmental
Eco-label
Energy saving
End of use
Reception
Power and reception
Power
Display and sound
Display resolutions
AVI, MP4, MKV, ASF
Connectivity
Dimensions and weights
Index
EC Declaration of Conformity
#&%&+,#-&,#
Top
Page
Image
Contents