REFRIGERATION PIPING & DRAINAGE
PREPARATION OF PIPING
Fan coil and side discharge condensing units are equipped with flare connections. Improper flaring and brazing may cause refrigerant to leak out of the system. Follow these instructions carefully in preparing the refrigerant piping.
!Ensure that all piping is of the correct size.
!Measure the distance between the indoor and outdoor units' refrigerant connections, together with all the curves necessary. Add a few inches as slack.
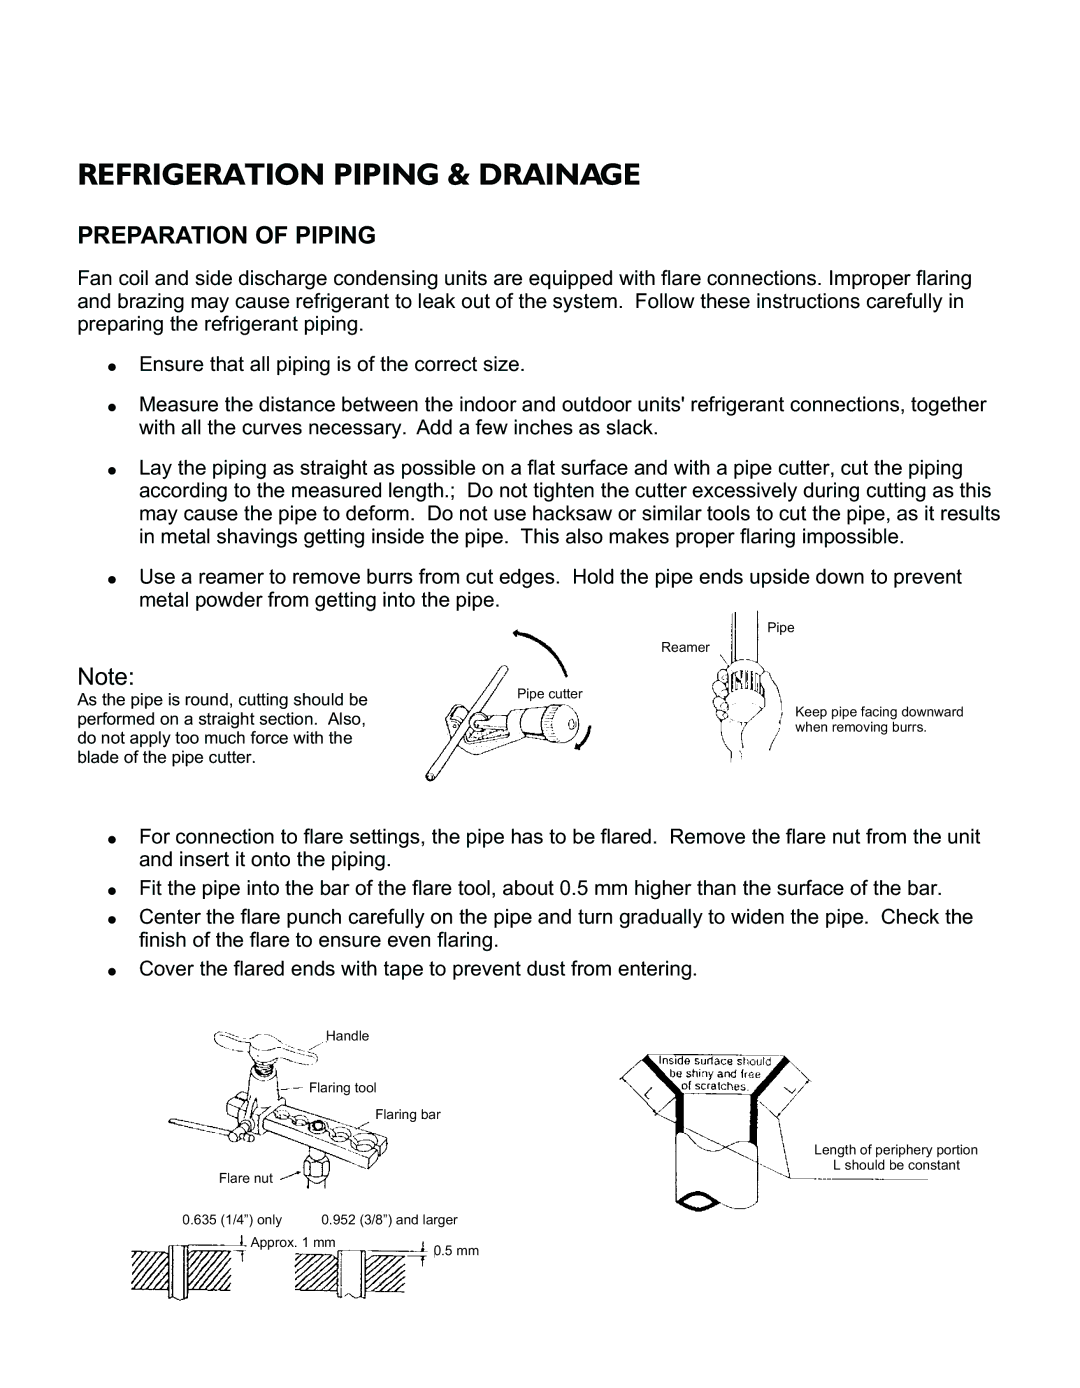
!Lay the piping as straight as possible on a flat surface and with a pipe cutter, cut the piping according to the measured length.; Do not tighten the cutter excessively during cutting as this may cause the pipe to deform. Do not use hacksaw or similar tools to cut the pipe, as it results in metal shavings getting inside the pipe. This also makes proper flaring impossible.
!Use a reamer to remove burrs from cut edges. Hold the pipe ends upside down to prevent metal powder from getting into the pipe.
Pipe
Reamer
Note:
As the pipe is round, cutting should be | Pipe cutter |
performed on a straight section. Also, |
|
do not apply too much force with the |
|
blade of the pipe cutter. |
|
Keep pipe facing downward when removing burrs.
!For connection to flare settings, the pipe has to be flared. Remove the flare nut from the unit and insert it onto the piping.
!Fit the pipe into the bar of the flare tool, about 0.5 mm higher than the surface of the bar.
!Center the flare punch carefully on the pipe and turn gradually to widen the pipe. Check the finish of the flare to ensure even flaring.
!Cover the flared ends with tape to prevent dust from entering.
| Handle |
| Flaring tool |
| Flaring bar |
| Length of periphery portion |
Flare nut | L should be constant |
| |
0.635 (1/4”) only | 0.952 (3/8”) and larger |
Approx. 1 mm
0.5 mm