CDC735 specifications
The Philips CDC735 is a notable component of the brand’s line of high-quality compact disc players, catering to enthusiasts of audio with its array of features, technologies, and characteristics. Launched in the mid-1990s, the CDC735 remains a beloved model for its reliability and performance.One of the main features of the CDC735 is its 5-disc carousel mechanism, allowing users to load multiple CDs at once. This multi-disc capacity means users can enjoy uninterrupted music sessions without the need for constant disc changes. The carousel system is both user-friendly and efficient, making it suitable for long listening periods, whether for casual background music or dedicated listening experiences.
In terms of audio quality, the Philips CDC735 is equipped with advanced digital-to-analog conversion technology, which ensures that the sound produced is both clear and accurate. The unit supports a wide range of audio formats, allowing it to play standard CDs along with CD-R and CD-RW discs. This versatility is crucial in today’s music landscape, where users often burn mix discs or download songs in a variety of formats.
The design of the CDC735 is both functional and stylish. Its user interface is intuitive, featuring a clear LCD display that provides track information, elapsed time, and other essential data. The remote control enhances user experience, allowing for seamless operation from a distance. The build quality is robust, ensuring longevity and durability.
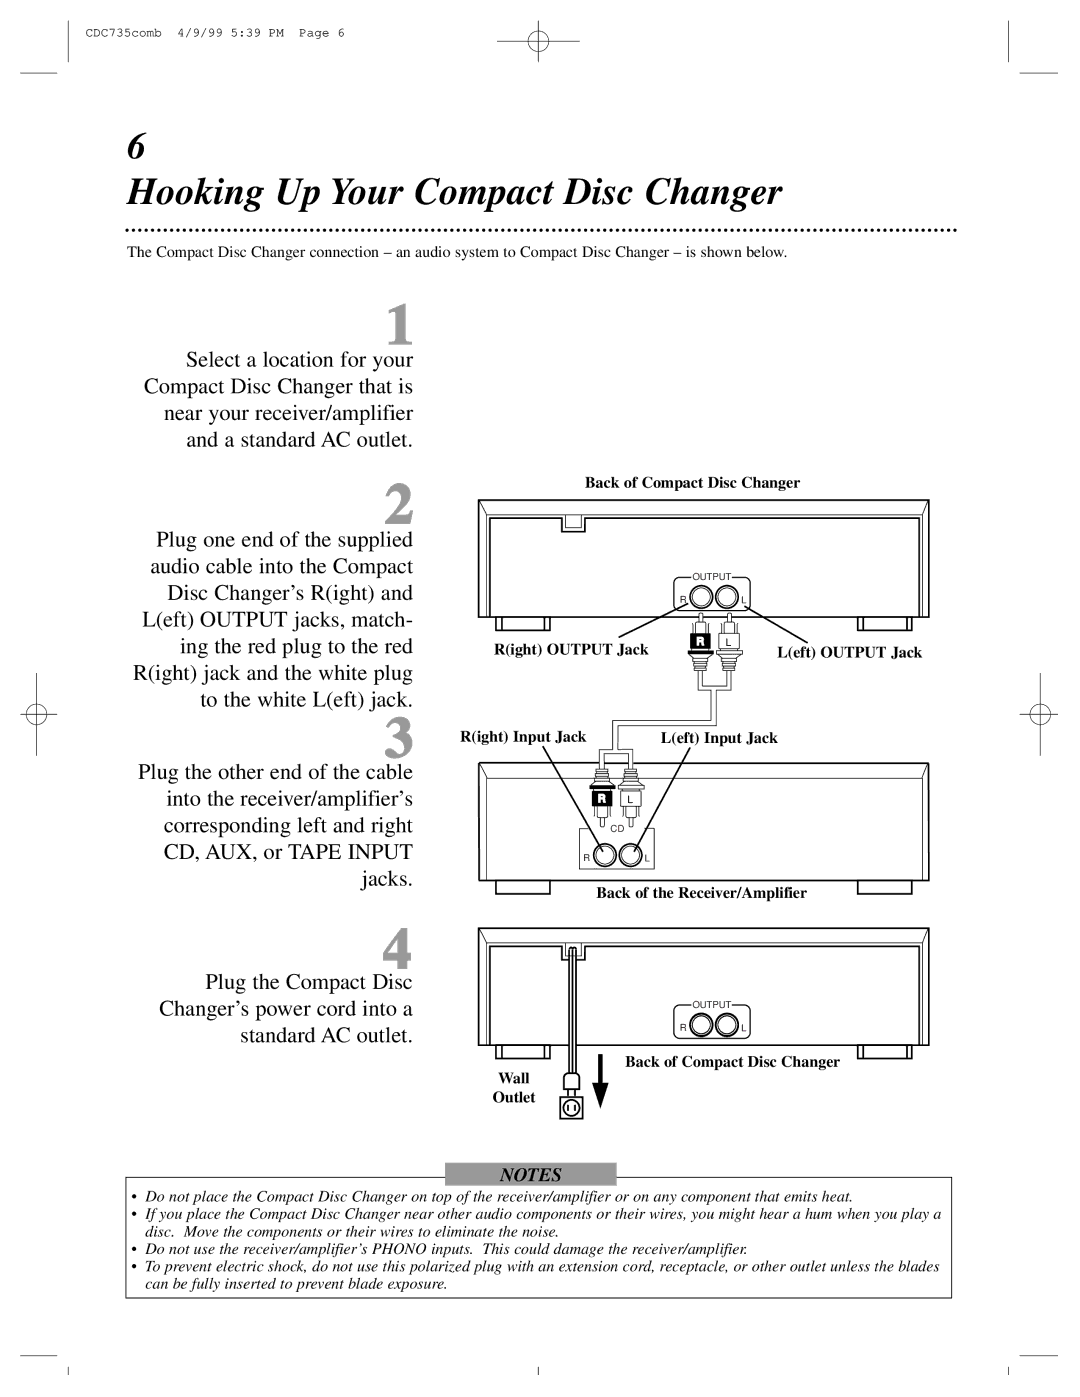
Another key characteristic of the CDC735 is its compatibility with various sound systems. It includes multiple output options, such as optical and coaxial digital outputs, allowing users to connect to external DACs or home theater systems. This compatibility ensures that the CDC735 can fit into a variety of audio setups, whether for a dedicated listening room or a versatile living space.
In conclusion, the Philips CDC735 stands out for its combination of features, sound quality, and user-friendliness. Its multi-disc capacity, impressive audio technology, and durable design make it a valuable addition to any audiophile’s collection. While newer technologies have emerged in the music industry, the CDC735 maintains its charm and continues to deliver an enjoyable listening experience for those who appreciate quality audio equipment.

