a bc | a | a |
| d |
|
a b | b | b |
c d |
|
|
ef | c | c |
g h |
|
|
| d | d |
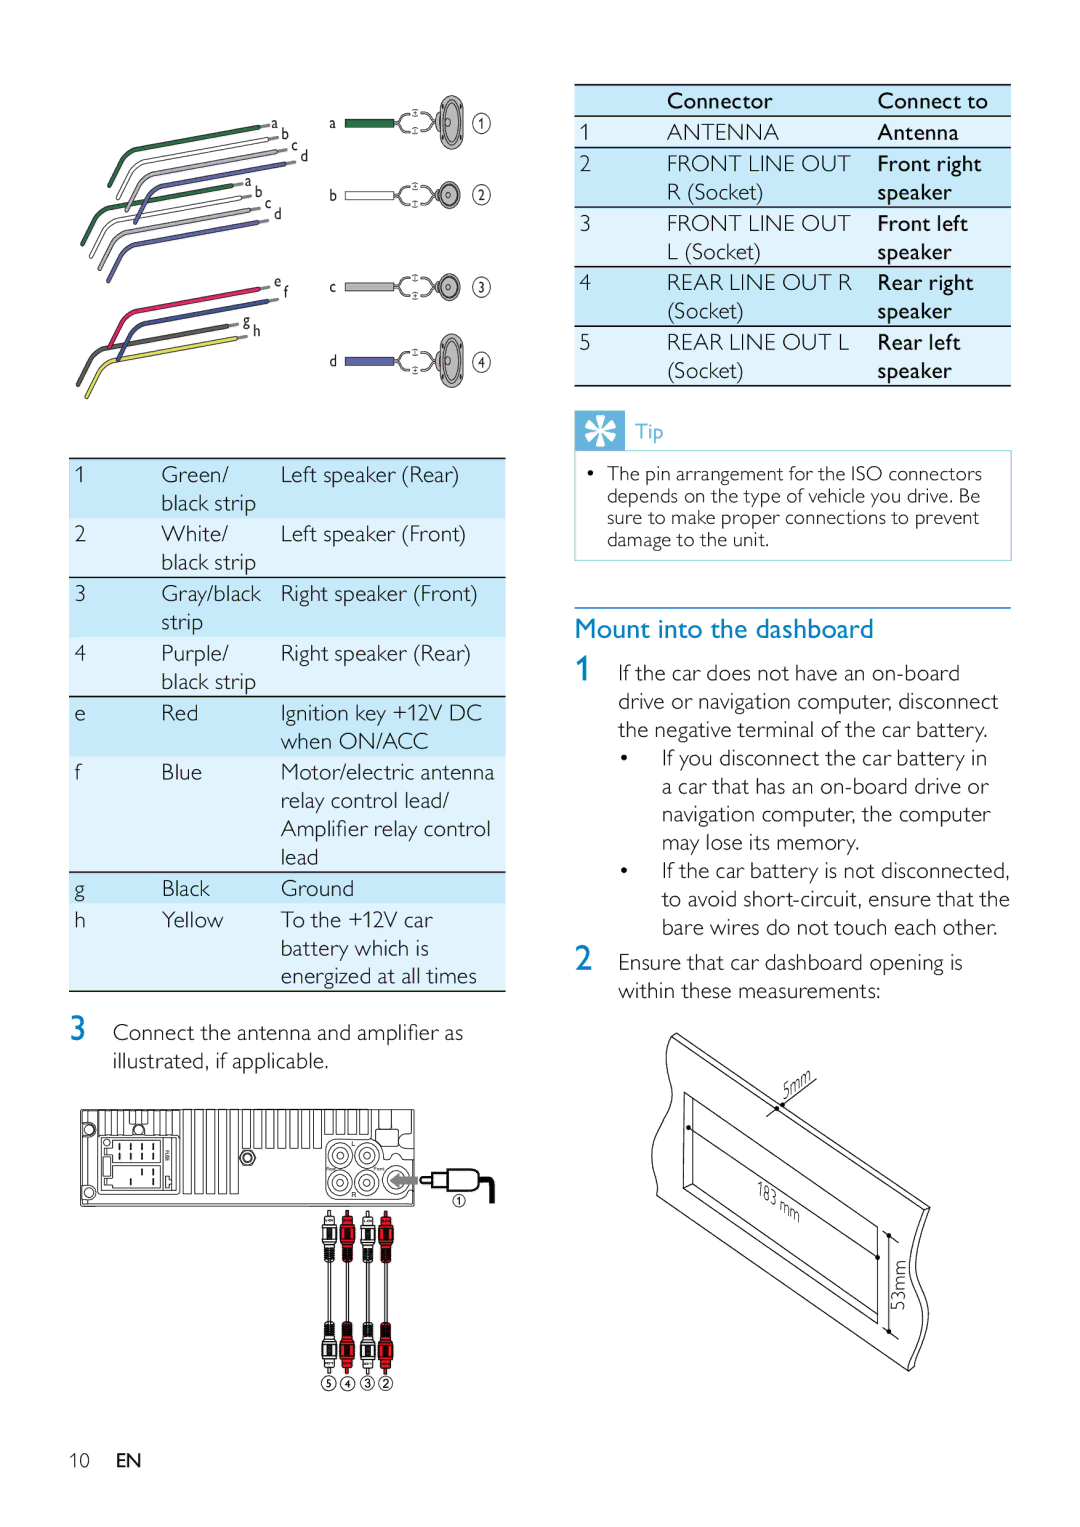
1 | Green/ | Left speaker (Rear) |
| black strip |
|
2 | White/ | Left speaker (Front) |
| black strip |
|
3Gray/black Right speaker (Front) strip
4 | Purple/ | Right speaker (Rear) |
| black strip |
|
e | Red | Ignition key +12V DC |
|
| when ON/ACC |
f | Blue | Motor/electric antenna |
|
| relay control lead/ |
|
| Amplifier relay control |
|
| lead |
g | Black | Ground |
h | Yellow | To the +12V car |
|
| battery which is |
|
| energized at all times |
3Connect the antenna and amplifier as illustrated, if applicable.
L
RearFront
R
10EN
| Connector | Connect to |
1 | ANTENNA | Antenna |
2 | FRONT LINE OUT | Front right |
| R (Socket) | speaker |
3 | FRONT LINE OUT | Front left |
| L (Socket) | speaker |
4 | REAR LINE OUT R | Rear right |
| (Socket) | speaker |
5 | REAR LINE OUT L | Rear left |
| (Socket) | speaker |
 Tip
Tip
•The pin arrangement for the ISO connectors depends on the type of vehicle you drive. Be sure to make proper connections to prevent damage to the unit.
Mount into the dashboard
1If the car does not have an
•If you disconnect the car battery in a car that has an
•If the car battery is not disconnected, to avoid
2Ensure that car dashboard opening is within these measurements:
5mm
183 | mm |
| |
| 53mm |