Basic Connections
TV |
| COMPONENT |
| VIDEO IN | |
AUDIO | IN | V (Pr/Cr) |
| ||
IN |
|
|
| VIDEO IN | U (Pb/Cb) |
|
| |
|
| Y |
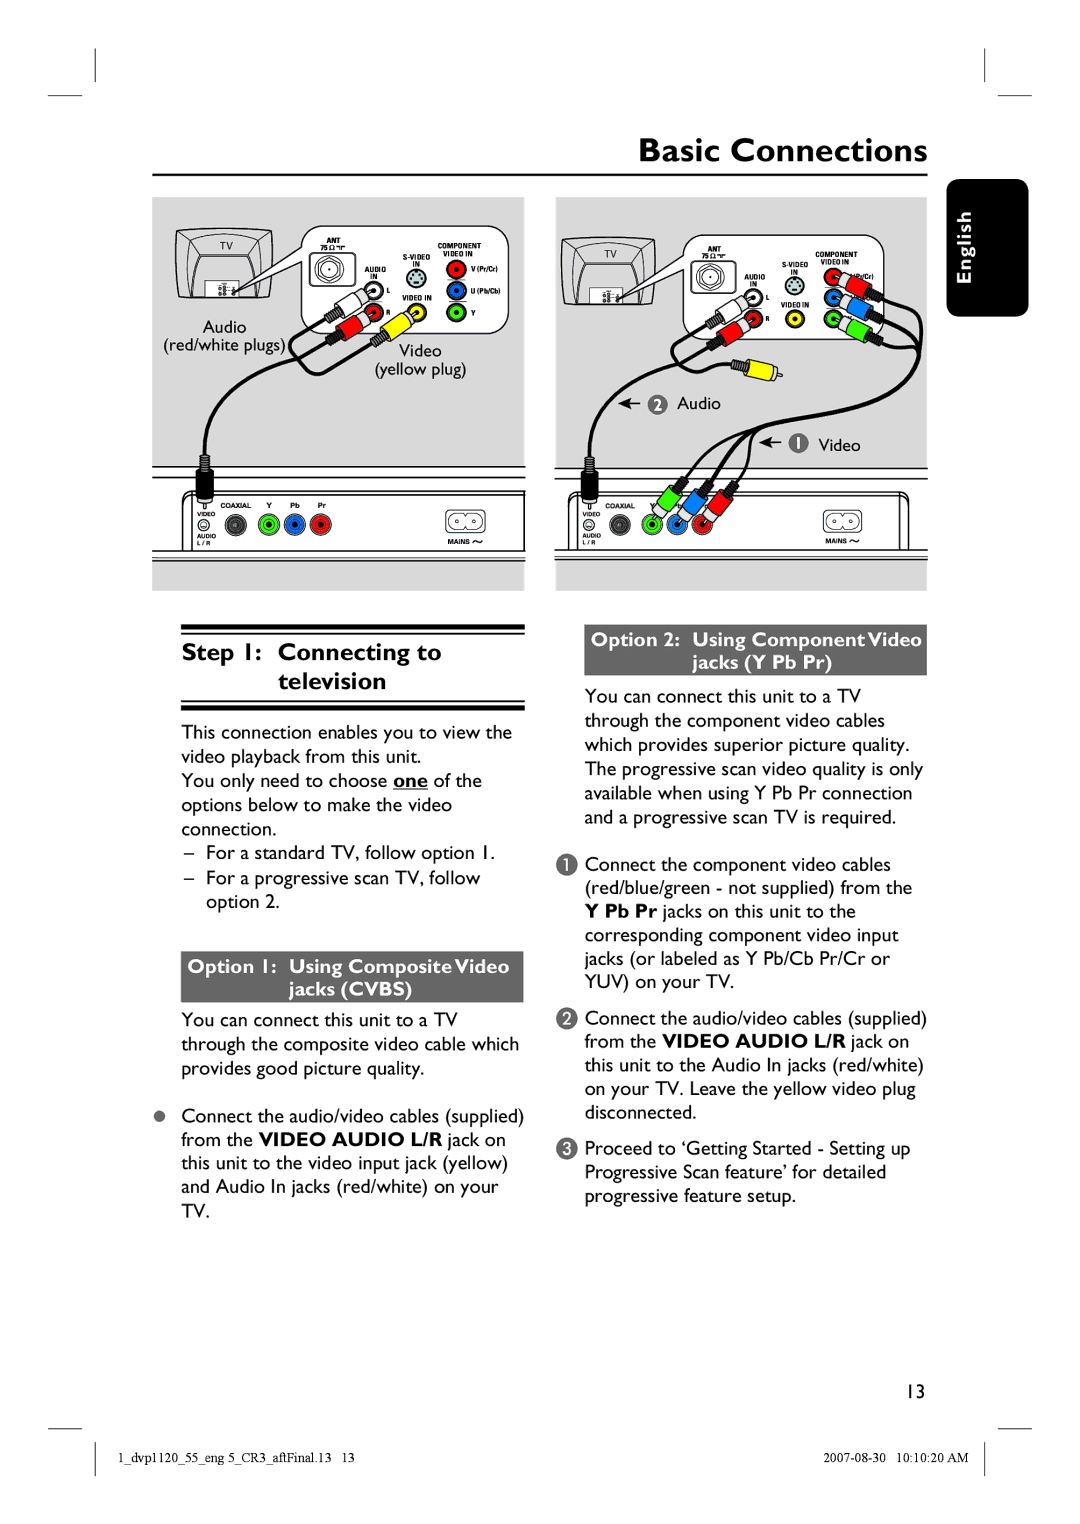
Audio
(red/white plugs) ![]()
![]() Video (yellow plug)
Video (yellow plug)
TV |
| COMPONENT |
| VIDEO IN | |
AUDIO | IN | V (Pr/Cr) |
| ||
IN |
|
|
| VIDEO IN | U (Pb/Cb) |
|
| |
|
| Y |
2 Audio
1 | Video |
|
English
Step 1: Connecting to television
This connection enables you to view the video playback from this unit.
You only need to choose one of the options below to make the video connection.
–For a standard TV, follow option 1.
–For a progressive scan TV, follow option 2.
Option 1: Using Composite Video
jacks (CVBS)
You can connect this unit to a TV through the composite video cable which provides good picture quality.
Connect the audio/video cables (supplied) from the VIDEO AUDIO L/R jack on this unit to the video input jack (yellow) and Audio In jacks (red/white) on your TV.
Option 2: Using Component Video jacks (Y Pb Pr)
You can connect this unit to a TV through the component video cables which provides superior picture quality. The progressive scan video quality is only available when using Y Pb Pr connection and a progressive scan TV is required.
A Connect the component video cables (red/blue/green - not supplied) from the Y Pb Pr jacks on this unit to the corresponding component video input jacks (or labeled as Y Pb/Cb Pr/Cr or YUV) on your TV.
B Connect the audio/video cables (supplied) from the VIDEO AUDIO L/R jack on this unit to the Audio In jacks (red/white) on your TV. Leave the yellow video plug disconnected.
C Proceed to ‘Getting Started - Setting up Progressive Scan feature’ for detailed progressive feature setup.
13
1_dvp1120_55_eng 5_CR3_aftFinal.13 13 |