Basic Connections (continued)
English
![]() OR
OR
Option 3 | Option 2 |
| OR |
| Option 1 |
|
|
|
|
|
FM/MW ANTENNA
|
| MAINS~ | MW |
SUB- | FRONT | FRONT |
|
WOOFER | RIGHT | LEFT |
|
|
| L |
|
R
FM 75![]()
HDMI OUT
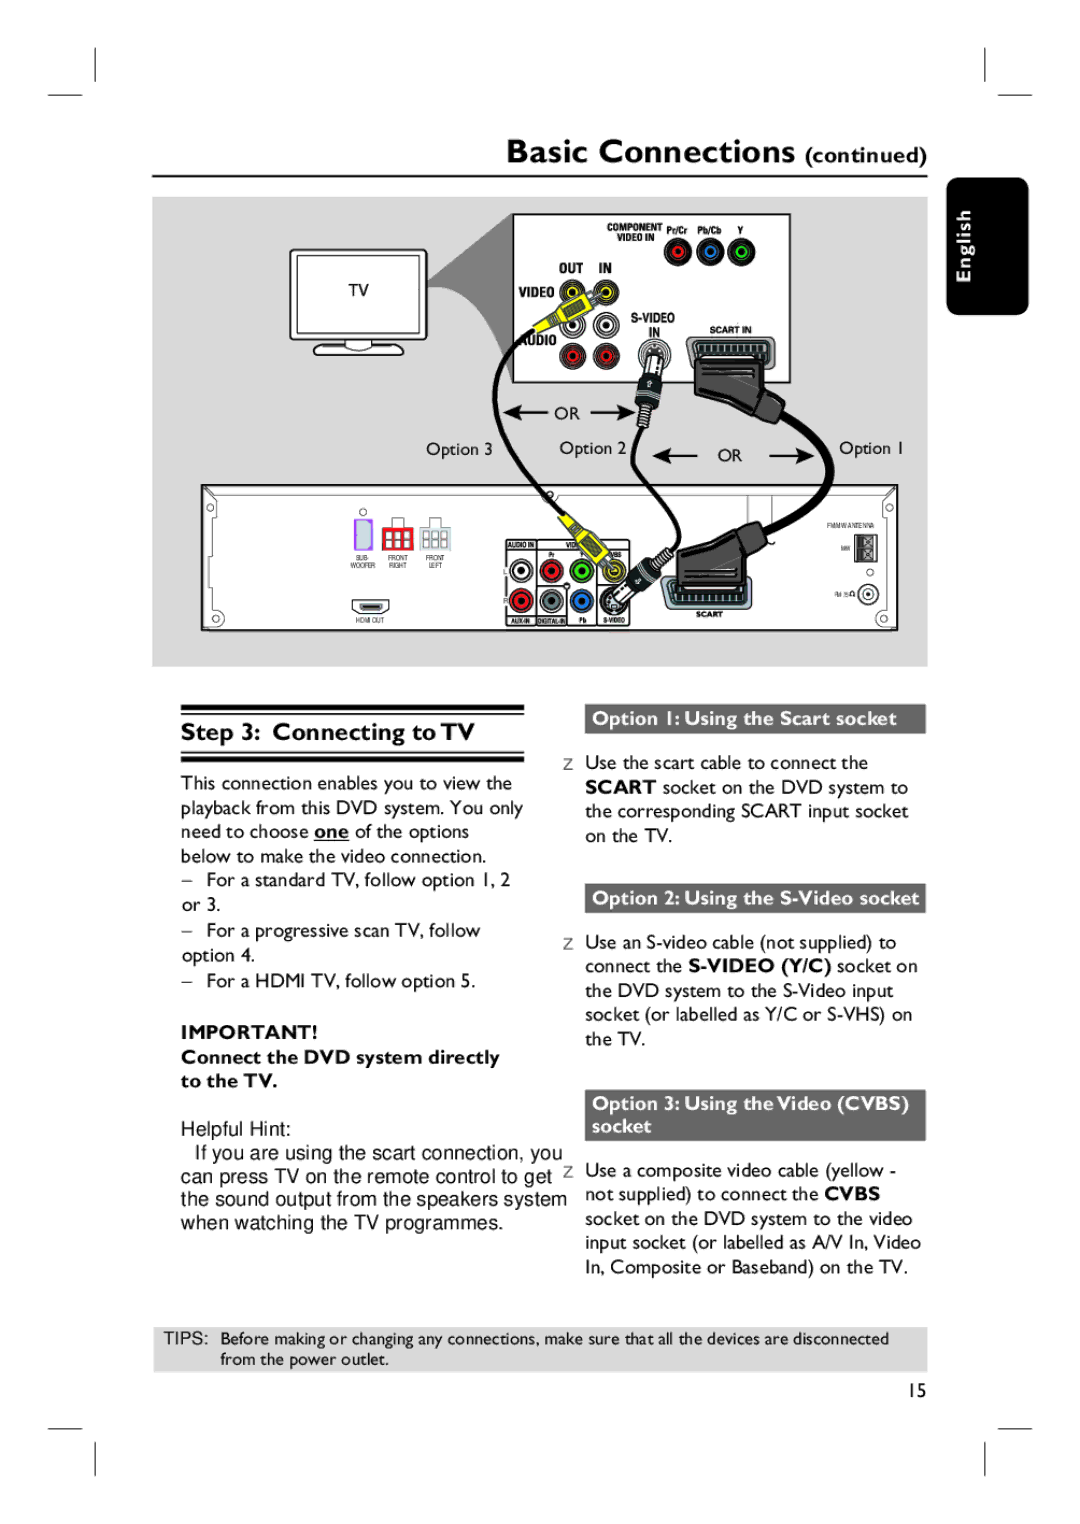
Step 3: Connecting to TV
This connection enables you to view the playback from this DVD system. You only need to choose one of the options below to make the video connection.
–For a standard TV, follow option 1, 2 or 3.
–For a progressive scan TV, follow option 4.
–For a HDMI TV, follow option 5.
IMPORTANT!
Connect the DVD system directly to the TV.
Helpful Hint:
–If you are using the scart connection, you can press TV on the remote control to get the sound output from the speakers system when watching the TV programmes.
Option 1: Using the Scart socket
Use the scart cable to connect the SCART socket on the DVD system to the corresponding SCART input socket on the TV.
Option 2: Using the S-Video socket
Use an
Option 3: Using the Video (CVBS) socket
Use a composite video cable (yellow - not supplied) to connect the CVBS socket on the DVD system to the video input socket (or labelled as A/V In, Video In, Composite or Baseband) on the TV.
TIPS: Before making or changing any connections, make sure that all the devices are disconnected from the power outlet.
15