E n g l i s h

Tuner


Manual tuning

4

Press (/ ) (or numeric keys 0-9on the remote control)

1 Press TUNER to select tuner mode.


to select the desired preset channel number to store.

5

Press PRESETS again to store the radio station.


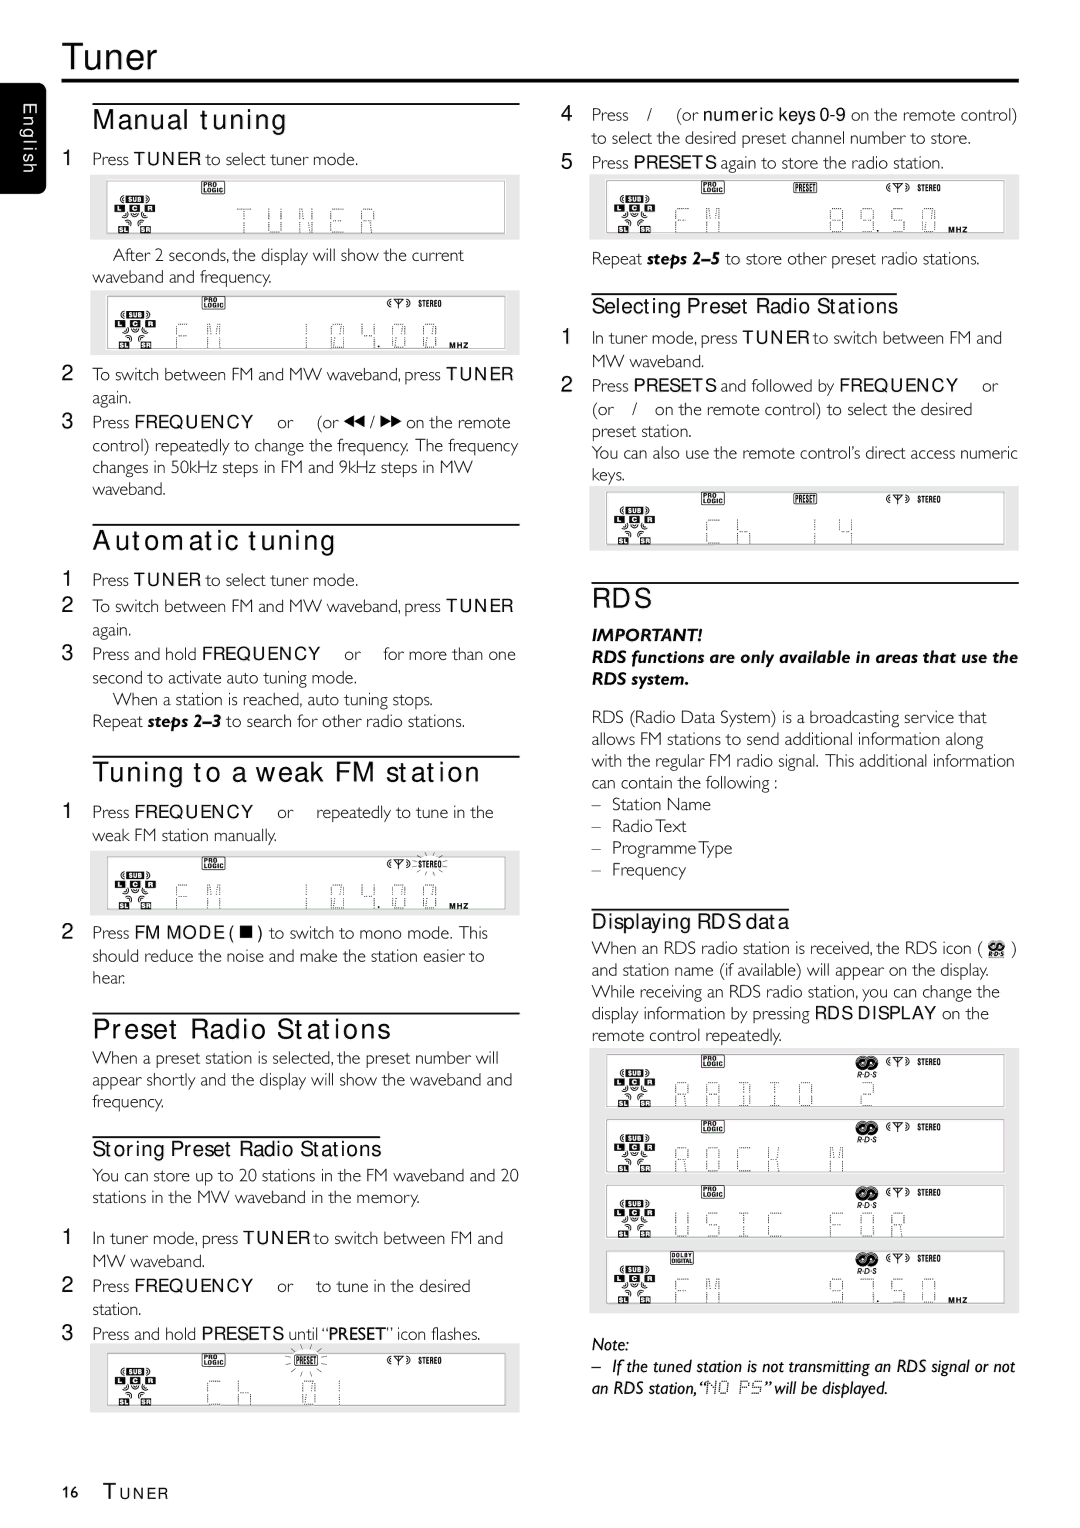
➜ After 2 seconds, the display will show the current

● Repeat steps 2–5to store other preset radio stations.

waveband and frequency.


2To switch between FM and MW waveband, press TUNER again.

3Press FREQUENCY 4or 3(or à / áon the remote control) repeatedly to change the frequency. The frequency changes in 50kHz steps in FM and 9kHz steps in MW waveband.

Automatic tuning

1Press TUNER to select tuner mode.

2To switch between FM and MW waveband, press TUNER again.

3Press and hold FREQUENCY 4or 3for more than one

second to activate auto tuning mode.

➜ When a station is reached, auto tuning stops.

Repeat steps 2–3to search for other radio stations.

Tuning to a weak FM station

1Press FREQUENCY 4or 3repeatedly to tune in the weak FM station manually.

2Press FM MODE (Ç) to switch to mono mode. This should reduce the noise and make the station easier to hear.

Preset Radio Stations

When a preset station is selected, the preset number will appear shortly and the display will show the waveband and frequency.

Storing Preset Radio Stations

You can store up to 20 stations in the FM waveband and 20 stations in the MW waveband in the memory.

1In tuner mode, press TUNER to switch between FM and MW waveband.

2Press FREQUENCY 4or 3to tune in the desired station.

3Press and hold PRESETS until “PRESET” icon flashes.

Selecting Preset Radio Stations

1In tuner mode, press TUNER to switch between FM and MW waveband.

2Press PRESETS and followed by FREQUENCY 4or 3

(or (/ )on the remote control) to select the desired preset station.

You can also use the remote control’s direct access numeric keys.

RDS

IMPORTANT!

RDS functions are only available in areas that use the RDS system.

RDS (Radio Data System) is a broadcasting service that allows FM stations to send additional information along with the regular FM radio signal. This additional information can contain the following :

Station Name

Radio Text

Programme Type

Frequency

Displaying RDS data

When an RDS radio station is received, the RDS icon ( Ç ) and station name (if available) will appear on the display. While receiving an RDS radio station, you can change the display information by pressing RDS DISPLAY on the remote control repeatedly.

Note:

If the tuned station is not transmitting an RDS signal or not an RDS station,“NO PS” will be displayed.

16TUNER

Page 16
Image 16
Philips MX-1060D, MX-1050D manual Tuner, Manual tuning, Automatic tuning, Tuning to a weak FM station, Preset Radio Stations

MX-1050D, MX-1060D specifications

The Philips MX-1050D and MX-1060D are advanced digital audio systems designed for professional use, particularly in venues requiring high-quality sound reinforcement. These models are celebrated for their robust features, versatility, and user-friendly interfaces that cater to a range of applications from live performances to studio recordings.

One of the defining characteristics of the MX-1050D and MX-1060D is their superior audio fidelity. Both models are engineered with state-of-the-art digital processing technology that ensures dynamic range and clarity in sound reproduction. This technology minimizes distortion and enhances the overall listening experience, making them ideal for both vocal and instrumental performances.

The MX-1050D offers 50 watts of output power, whereas the MX-1060D boasts a powerful 60 watts, enabling them to fill larger rooms with rich, detailed sound. Both systems come equipped with multiple input options—such as microphone and line inputs—allowing for different configurations depending on user needs. This flexibility makes the systems suitable for various settings, from small gatherings to larger events.

Another notable feature is the integrated digital effects processor found in both models. Users can add effects like reverb and echo, enhancing the audio's ambiance and making performances more immersive. This built-in technology means that external effects units are not always necessary, simplifying the setup process for users.

Portability is also a key aspect of the MX-1050D and MX-1060D. Their compact design and lightweight construction make them easy to transport, which is essential for mobile sound applications. Additionally, the systems feature durable casings, ensuring they can withstand the rigors of frequent moving and setup.

Connectivity options further enhance usability. The inclusion of Bluetooth technology allows users to stream audio directly from mobile devices, facilitating easy access to playlists and backing tracks. This feature, combined with USB and AUX inputs, positions the MX series as a comprehensive solution for modern audio needs.

In summary, the Philips MX-1050D and MX-1060D are distinguished by their high-output power, exceptional sound quality, integrated digital effects, and versatile connectivity options. Their user-friendly design and portability make them ideal choices for professionals seeking reliable audio equipment for a variety of applications. Whether for live performances, events, or studio work, these systems deliver exceptional audio performance, meeting the demands of modern sound engineering.