Connections
En gli sh
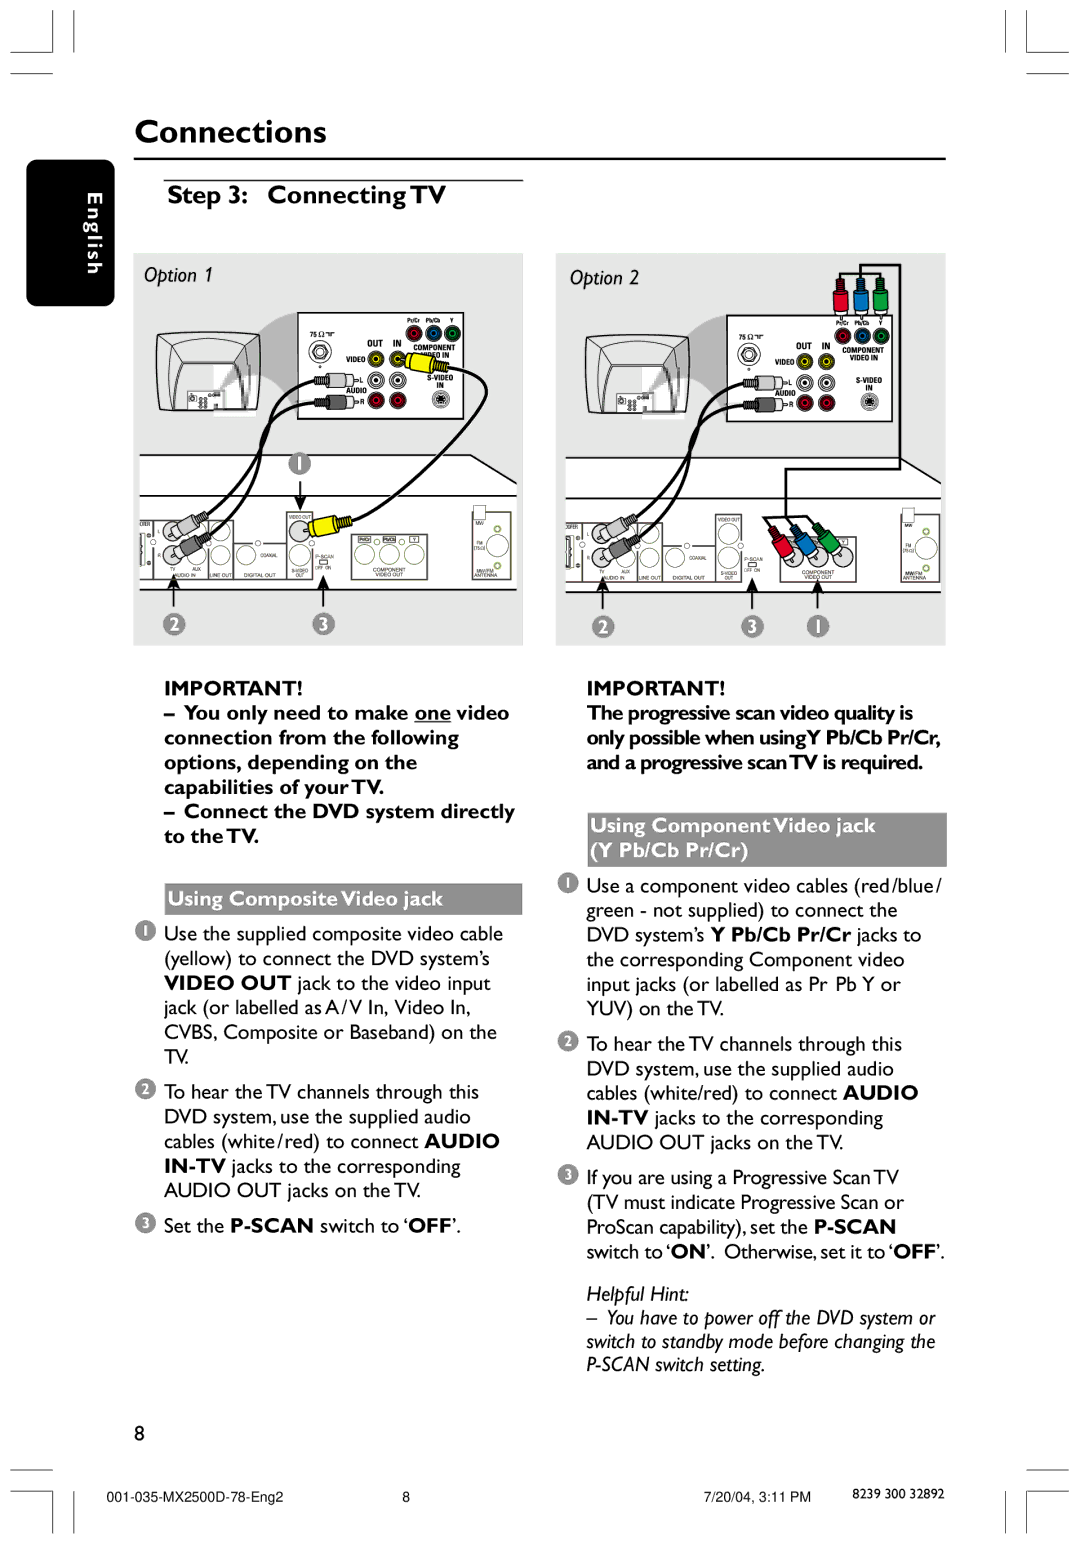
Step 3: Connecting TV
Option 1 |
| Option 2 |
|
|
|
|
|
|
1
OOFER |
MW |
OOFER |
MW |
2 | 3 | 2 | 3 | 1 |
IMPORTANT!
–You only need to make one video connection from the following options, depending on the capabilities of your TV.
–Connect the DVD system directly to the TV.
Using Composite Video jack
1Use the supplied composite video cable (yellow) to connect the DVD system’s VIDEO OUT jack to the video input jack (or labelled as A/V In, Video In, CVBS, Composite or Baseband) on the TV.
2To hear the TV channels through this DVD system, use the supplied audio cables (white/red) to connect AUDIO
3 Set the P-SCAN switch to ‘OFF’.
IMPORTANT!
The progressive scan video quality is only possible when usingY Pb/Cb Pr/Cr, and a progressive scanTV is required.
Using Component Video jack (Y Pb/Cb Pr/Cr)
1Use a component video cables (red/blue/ green - not supplied) to connect the DVD system’s Y Pb/Cb Pr/Cr jacks to the corresponding Component video input jacks (or labelled as Pr Pb Y or YUV) on the TV.
2To hear the TV channels through this DVD system, use the supplied audio cables (white/red) to connect AUDIO
3If you are using a Progressive Scan TV (TV must indicate Progressive Scan or ProScan capability), set the
Helpful Hint:
– You have to power off the DVD system or switch to standby mode before changing the
8
8 | 7/20/04, 3:11 PM | 8239 300 32892 |