Displaying the Battery Charge

The charge indicator on the display shows the charge level of the battery. If the charge is too low, the display illumi- nation is switched off and the hands-free function is not available. Place the cordless telephone into the charging station.

Changing the Batteries in the Cordless Telephone

1Press and hold ’ (at least two seconds) for switching off the cordless telephone.

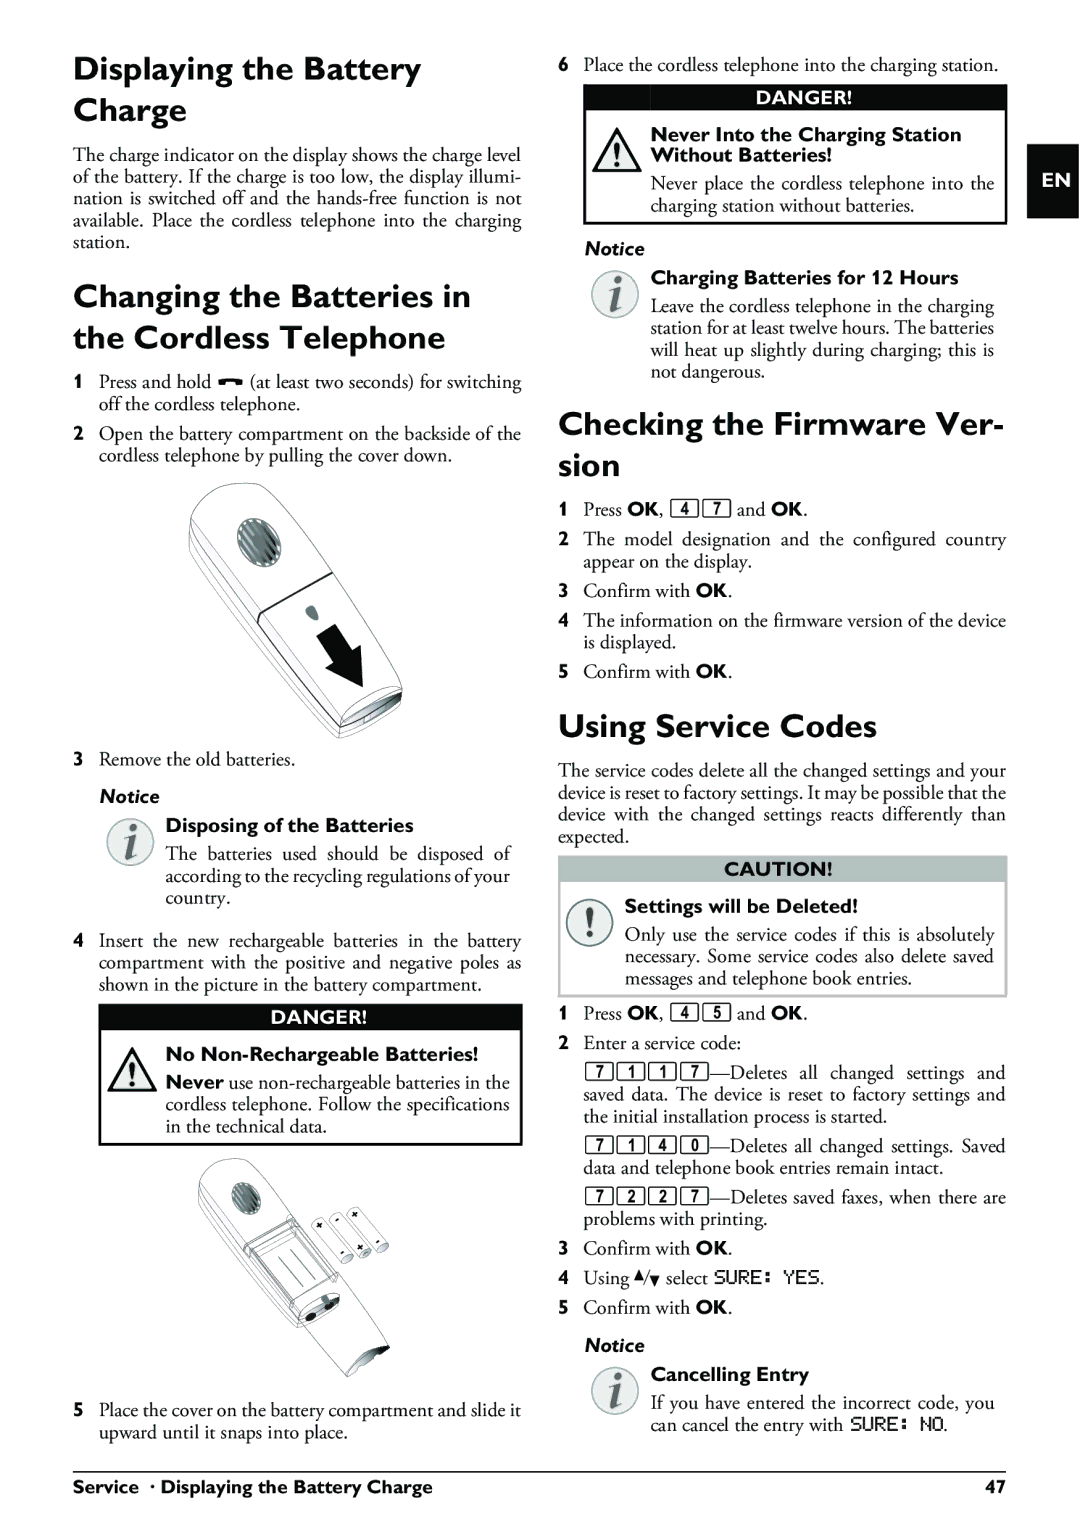
2Open the battery compartment on the backside of the cordless telephone by pulling the cover down.

3Remove the old batteries.

Notice

Disposing of the Batteries

The batteries used should be disposed of according to the recycling regulations of your country.

4Insert the new rechargeable batteries in the battery compartment with the positive and negative poles as shown in the picture in the battery compartment.

DANGER!

No Non-Rechargeable Batteries!

Never use non-rechargeable batteries in the cordless telephone. Follow the specifications in the technical data.

5Place the cover on the battery compartment and slide it upward until it snaps into place.

6Place the cordless telephone into the charging station.

DANGER!

Never Into the Charging Station

Without Batteries!

Never place the cordless telephone into the charging station without batteries.

Notice

Charging Batteries for 12 Hours

Leave the cordless telephone in the charging station for at least twelve hours. The batteries will heat up slightly during charging; this is not dangerous.

Checking the Firmware Ver- sion

1Press OK, 47 and OK.

2The model designation and the configured country appear on the display.

3Confirm with OK.

4The information on the firmware version of the device is displayed.

5Confirm with OK.

Using Service Codes

The service codes delete all the changed settings and your device is reset to factory settings. It may be possible that the device with the changed settings reacts differently than expected.

CAUTION!

Settings will be Deleted!

Only use the service codes if this is absolutely necessary. Some service codes also delete saved messages and telephone book entries.

1Press OK, 45 and OK.

2Enter a service code:

7117—Deletes all changed settings and saved data. The device is reset to factory settings and the initial installation process is started.

7140—Deletes all changed settings. Saved data and telephone book entries remain intact.

7227—Deletes saved faxes, when there are problems with printing.

3Confirm with OK.

4Using [ select SURE: YES.

5Confirm with OK.

Notice

Cancelling Entry

If you have entered the incorrect code, you can cancel the entry with SURE: NO.

EN

Service · Displaying the Battery Charge

47

Page 47
Image 47
Philips PPF 650 Displaying the Battery Charge, Changing the Batteries in the Cordless Telephone, Using Service Codes

PPF 650 specifications

The Philips PPF 650 is a versatile and innovative personal fax machine that caters to both home and small office needs. Known for its reliability, the PPF 650 offers a range of features designed to streamline communication and enhance productivity. With its compact design and straightforward functionality, it is an ideal choice for users who require efficient faxing capabilities without the complexities often associated with larger office machines.

One of the standout features of the PPF 650 is its thermal inkjet printing technology. This allows for crisp and clear document reproduction with resolutions up to 300 dpi, ensuring that faxes are not only functional but also visually appealing. The machine is capable of sending and receiving black-and-white faxes at a speed of approximately 10 seconds per page, making it a suitable option for users who require quick transmission of important documents.

The PPF 650 comes equipped with a user-friendly interface that includes a 2-line LCD display. This display provides essential information, such as the status of the fax and menu options, which makes navigation straightforward even for those who may not be technologically savvy. Additionally, the device features an automatic document feeder (ADF), allowing users to send multi-page documents with ease, without the need to manually feed each page.

Connectivity is another strong point of the Philips PPF 650. It includes a standard phone line connection, making it easy to integrate into existing office environments. Furthermore, the machine supports a variety of communication formats, enabling it to handle different types of documents, whether they are textual, graphical, or a combination of both.

In terms of memory, the PPF 650 is equipped with a generous internal memory that can store up to 50 pages of incoming faxes. This feature provides peace of mind for users, as it ensures that no important faxes are lost, even if paper runs out during transmission. The machine also includes a built-in telephone handset, allowing for convenient voice communication without needing a separate phone.

Overall, the Philips PPF 650 combines functionality, speed, and ease of use, making it an excellent choice for individuals and small businesses looking for reliable faxing solutions. Its combination of thermal inkjet technology, effective memory management, and straightforward operation positions it as a valuable tool in today’s fast-paced communication landscape.