10 ENGLISH


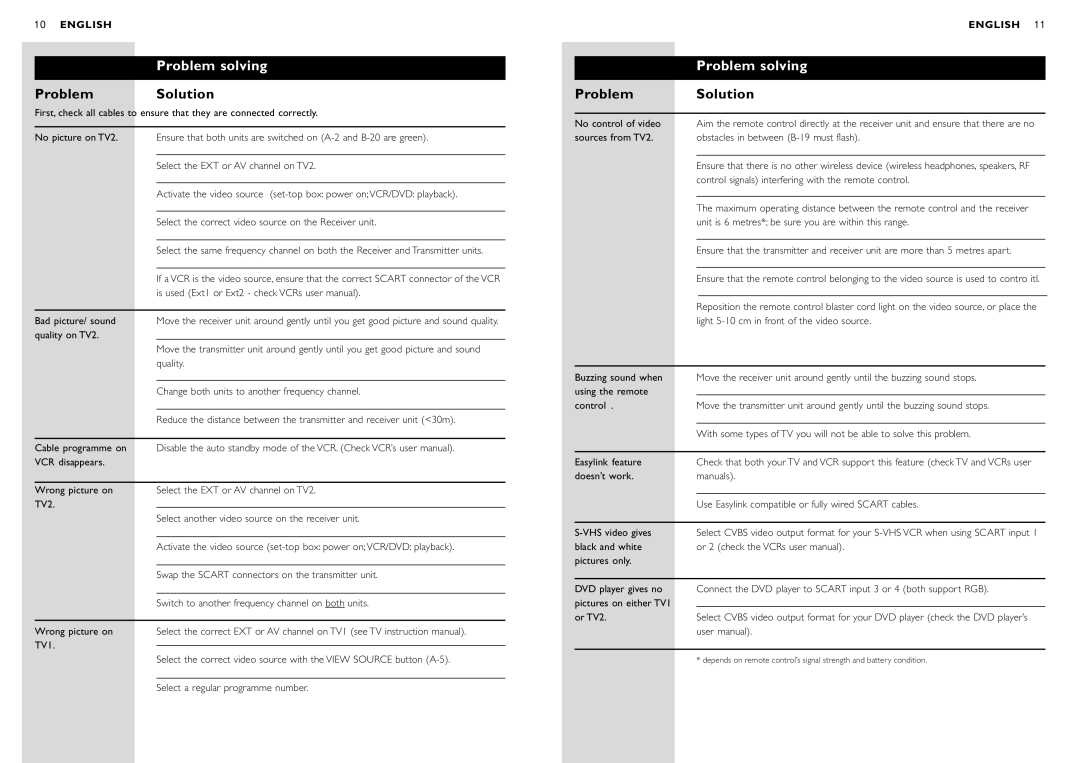
Problem solving


Problem

Solution

First, check all cables to ensure that they are connected correctly.


No picture on TV2.

Ensure that both units are switched on (A-2 and B-20 are green).


Select the EXT or AV channel on TV2.


Activate the video source (set-top box: power on; VCR/DVD: playback).


Select the correct video source on the Receiver unit.


Select the same frequency channel on both the Receiver and Transmitter units.


If a VCR is the video source, ensure that the correct SCART connector of the VCR


is used (Ext1 or Ext2 - check VCRs user manual).


Bad picture/ sound

Move the receiver unit around gently until you get good picture and sound quality.

quality on TV2.


Move the transmitter unit around gently until you get good picture and sound


quality.


Change both units to another frequency channel.


Reduce the distance between the transmitter and receiver unit (<30m).


Cable programme on

Disable the auto standby mode of the VCR. (Check VCR’s user manual).

VCR disappears.


Wrong picture on

Select the EXT or AV channel on TV2.

TV2.


Select another video source on the receiver unit.


Activate the video source (set-top box: power on; VCR/DVD: playback).


Swap the SCART connectors on the transmitter unit.


Switch to another frequency channel on both units.


Wrong picture on

Select the correct EXT or AV channel on TV1 (see TV instruction manual).

TV1.


Select the correct video source with the VIEW SOURCE button (A-5).


Select a regular programme number.


ENGLISH 11


Problem solving


Problem

Solution


No control of video

Aim the remote control directly at the receiver unit and ensure that there are no


sources from TV2.

obstacles in between (B-19 must flash).


Ensure that there is no other wireless device (wireless headphones, speakers, RF


control signals) interfering with the remote control.


The maximum operating distance between the remote control and the receiver


unit is 6 metres*; be sure you are within this range.


Ensure that the transmitter and receiver unit are more than 5 metres apart.


Ensure that the remote control belonging to the video source is used to contro itl.


Reposition the remote control blaster cord light on the video source, or place the


light 5-10 cm in front of the video source.


Buzzing sound when

Move the receiver unit around gently until the buzzing sound stops.


using the remote


control .

Move the transmitter unit around gently until the buzzing sound stops.


With some types of TV you will not be able to solve this problem.


Easylink feature

Check that both your TV and VCR support this feature (check TV and VCRs user


doesn’t work.

manuals).


Use Easylink compatible or fully wired SCART cables.


S-VHS video gives

Select CVBS video output format for your S-VHS VCR when using SCART input 1


black and white

or 2 (check the VCRs user manual).


pictures only.


DVD player gives no

Connect the DVD player to SCART input 3 or 4 (both support RGB).


pictures on either TV1


or TV2.

Select CVBS video output format for your DVD player (check the DVD player’s


user manual).


* depends on remote control’s signal strength and battery condition.

Page 5
Image 5
Philips SBC VL1400 manual Problem solving, Problem Solution

SBC VL1400 specifications

The Philips SBC VL1400 is a remarkable piece of audio technology that has made a significant impact in the realm of personal listening devices. Launched as a compact and portable solution for music enthusiasts, this headset is designed to deliver high-quality sound with a comfortable fit.

One of the main features of the SBC VL1400 is its lightweight design. Weighing in at just a few grams, it is ideal for users who are always on the go. The adjustable headband ensures that the headset sits snugly on the head, providing a secure fit without causing discomfort during prolonged use. The ear cushions are made from soft materials that enhance comfort, making them suitable for extended listening sessions.

In terms of sound quality, the SBC VL1400 utilizes advanced audio technologies to deliver a balanced and immersive listening experience. The headset is equipped with high-performance neodymium drivers, which are known for their ability to produce rich bass tones and clear mid-to-high frequencies. This results in a well-rounded sound profile that appeals to a wide range of musical tastes.

Another noteworthy characteristic of the SBC VL1400 is its foldable design. This feature allows users to easily store the headset when not in use, making it an excellent choice for travel. The compact design fits neatly into backpacks or purses, ensuring that music lovers can take their audio experience with them wherever they go.

The SBC VL1400 also incorporates a universal 3.5mm audio jack, making it compatible with a wide array of devices, including smartphones, tablets, and laptops. This versatility ensures that users can connect to their favorite audio sources seamlessly.

In addition to sound quality and comfort, durability is another vital factor to consider. The materials used in the construction of the SBC VL1400 are robust, designed to withstand the rigors of daily use without compromising on performance. This makes it suitable for both casual listeners and those who require a reliable headset for professional use.

Overall, the Philips SBC VL1400 stands out due to its blend of portability, comfort, and audio performance. It caters to diverse user needs, ensuring that anyone can enjoy high-quality sound on the move. Whether for everyday listening, workouts, or long journeys, the SBC VL1400 proves to be a worthy companion for any audio enthusiast.