Table of contents
Music
Slideshow format with background
English
Care of the screen
Reduce contrast and brightness when viewing
Stationary images on the TV
Tip
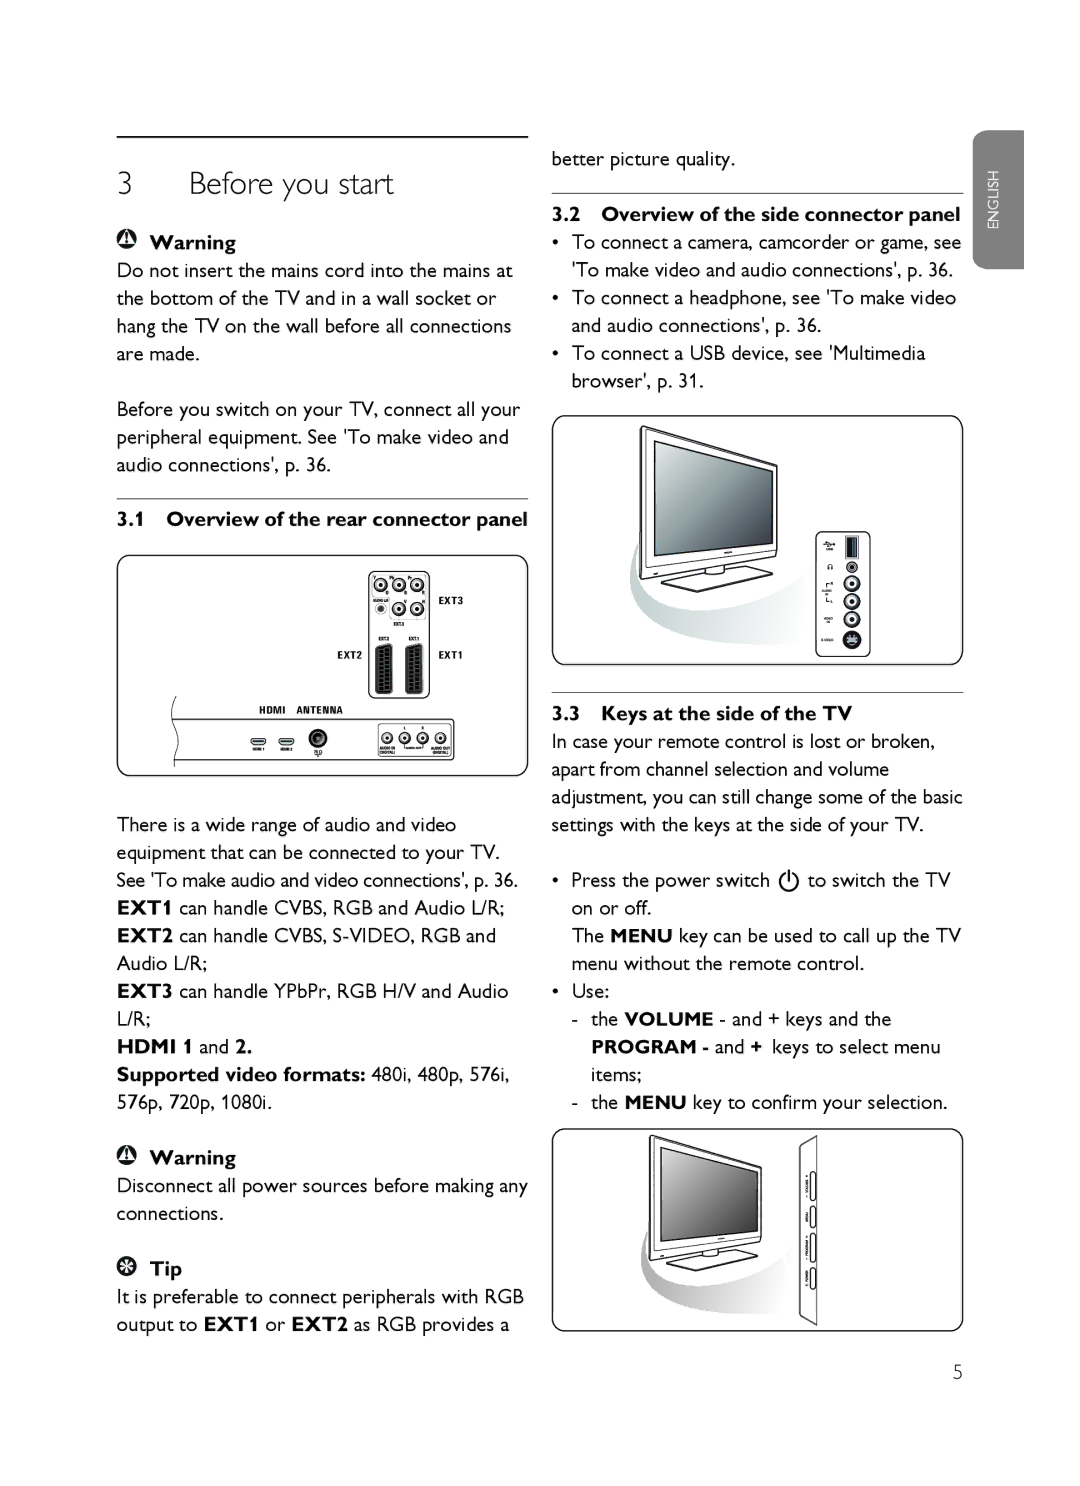
Overview of the side connector panel
Overview of the rear connector panel
Before you start
Hdmi 1 Supported video formats 480i, 480p, 576i, 576p, 720p
Light indicator on the TV
Getting started
Philips
Complete the initial TV installation procedure
Settings assistant select your TV settings
TV menu allows you to access the TV menu. See below
How to navigate through the menus Introduction
Installation allows you
Use the o or œ key to select a menu item
English
‡ πº †
Standby
BTeletext On/Off
Cursor keys
11 0/9 Digit keys
10 ¬Mute key
Previous channel
VOL +
Adjust viewing and listening settings
Use of the TV menu settings
Select Settings assistant and press the π key
Use of the Standard settings if present
Individual settings for picture and sound
Select Reset to standard and press the π key
Adjust picture menu settings
Select Picture and Sound press the π key
Brightness
Contrast
Colour
Hue
Digital Natural Motion
Pixel Plus
DNR Dynamic Noise Reduction
Select Off, Minimum, Medium or
On the remote control
This function is also accessible via
When in Movie Expand 149, Movie
Adjust sound menu settings
Surround mode
Volume
Headphone volume
Delta volume
Sleeptimer
Adjust feature menu settings
Select Sleeptimer. Press the π key
Subtitle
Select Set or Change code
On timer
Set code/Change code
Installation menu
Only one On timer can be set
Demo
Search for and store TV channels Tip
Select your menu language
Automatic installation
This menu allows you to select your preferred menu language
Select your country
Rearrange the channel number list
Manual installation
Rearrange
Uninstall reinstall
Rename
Set your preferences
Select your location
Select Teletext 2.5 On to take advantage of this feature
Select Teletext
Display a Programme title
Digital Audio
Reset the Factory settings
Select a Decoder channel number
EXT1 or EXT2
Automatic software announcement if present
How to upgrade the TV software
USB device upgrade
To select a channel from the diplayed favourite list
Create your favourite list
To select another favourite channel list
To create a favourite list or to modify the list
EXT1 HDD
Multimedia Browser
To view content from a USB device Tip
To insert a USB device
To remove the USB device
Pictures Video Music
Following icons may appear
Folder
Function keys at the bottom of the screen
Multimedia function keys on the remote control
Teletext
Enlarge a Teletext
Hypertext
Teletext menu
Reveal
Side panel overview Camera, Camcorder or Game
To make video and audio connections
Connect your camera, camcorder or game As shown
Connect to Video 2 and Audio L
Rear panel overview
With a eurocable
Connect a DVD or VCR recorder
Connect a decoder and a VCR
With the aerial cable only
Connect two VCRs or VCR and DVD recorder
With Component Video connectors
With eurocables
Connect a satellite receiver With a eurocable
With a DVI connector
With a Hdmi connector
Digital Audio in connector of the TV
Connect a DVD player, Cable box or game console Tip
Connect a DVD player, satellite receiver or Cable Box
Audio in connector of the TV
EXT3 on the TV
Audio jack of EXT3
Connect a PC
PC equipped with a DVI connector
PC equipped with a VGA connector
Analogue Home Cinema amplifier
Connect a Home Cinema amplifier Digital Home Cinema amplifier
Troubleshooting
English
To prepare a portable memory for software upgrade
Philips TV software upgrade with portable memory
Automatic software upgrade procedure
Switch off your TV and remove all memory devices
Manual software upgrade procedure
Switch on your TV with the power key B at the side of the TV
Page
Following syntax should be used to create the text file
General Rules
General Format
Tag Name Use Description
Supported XML-tags
USB Memory Device Issues
Digital camera and USB issues
Digital Camera Issues
Page
Index
Page
Disposal of your old product
Recycling
Directive 2002/96/EC
Disposal of batteries