4. Installing your video recorder

Preparation for use

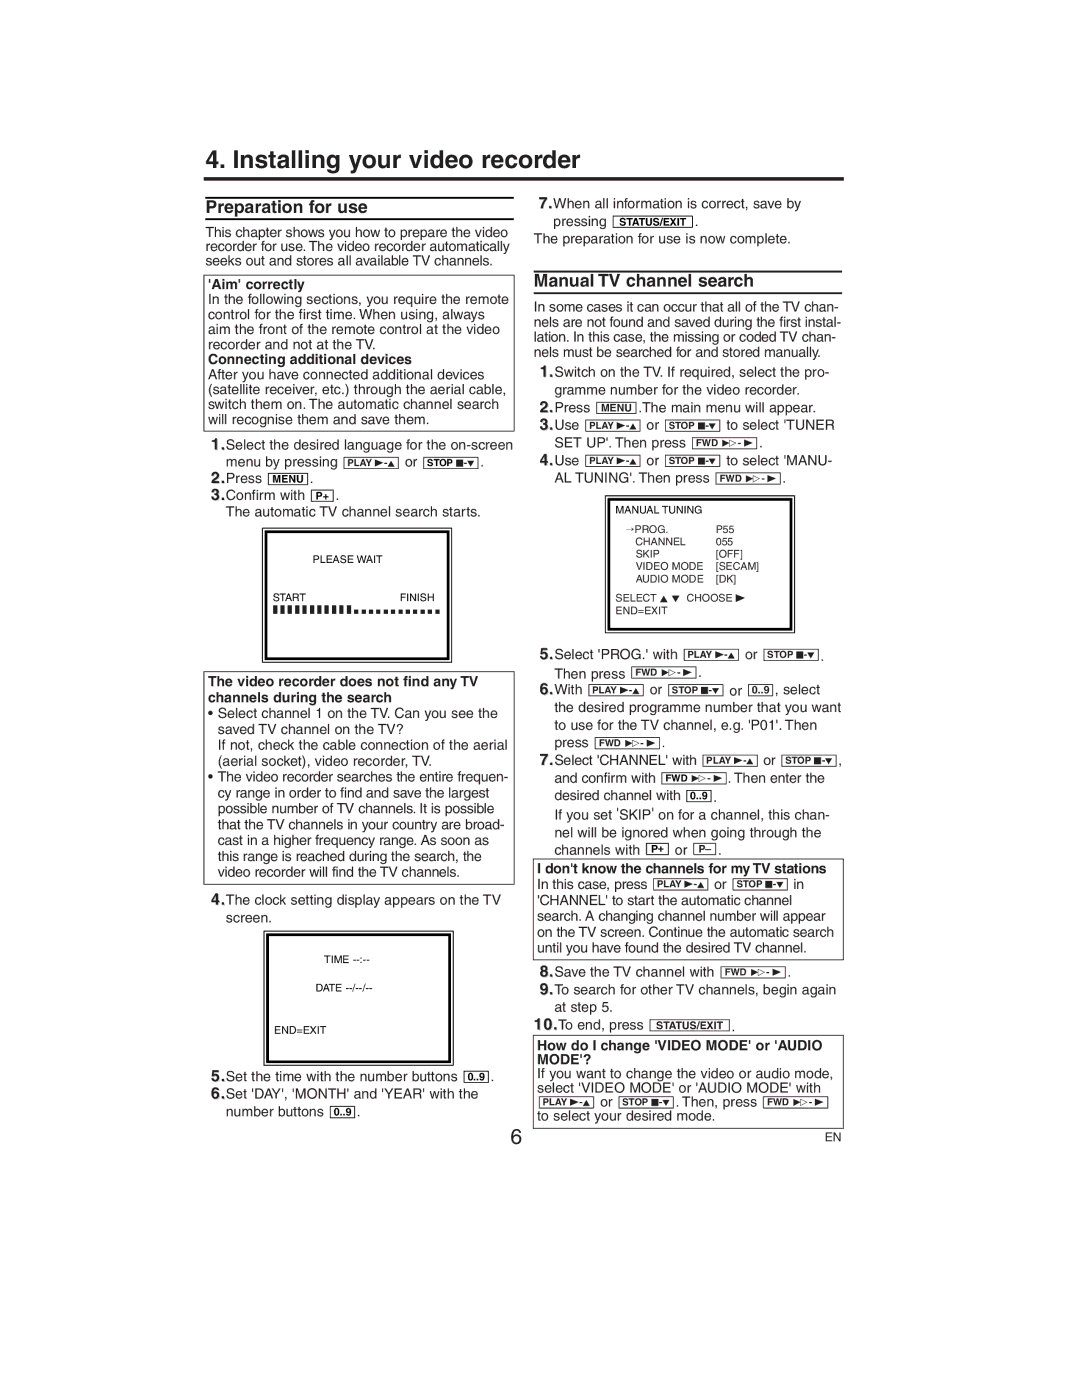
This chapter shows you how to prepare the video recorder for use. The video recorder automatically seeks out and stores all available TV channels.

'Aim' correctly

In the following sections, you require the remote control for the first time. When using, always aim the front of the remote control at the video recorder and not at the TV.

Connecting additional devices

After you have connected additional devices (satellite receiver, etc.) through the aerial cable, switch them on. The automatic channel search will recognise them and save them.

1.Select the desired language for the on-screen menu by pressing PLAY B-Kor STOP C-L .

2.Press MENU .

3.Confirm with P+ .

The automatic TV channel search starts.

PLEASE WAIT

STARTFINISH

❚ ❚ ❚ ❚ ❚ ❚ ❚ ❚ ❚ ❚ ❚ ❚ ❚ ❚ ❚ ❚ ❚ ❚ ❚ ❚ ❚ ❚ ❚

The video recorder does not find any TV channels during the search

Select channel 1 on the TV. Can you see the saved TV channel on the TV?

If not, check the cable connection of the aerial (aerial socket), video recorder, TV.

The video recorder searches the entire frequen- cy range in order to find and save the largest possible number of TV channels. It is possible that the TV channels in your country are broad- cast in a higher frequency range. As soon as this range is reached during the search, the video recorder will find the TV channels.

4.The clock setting display appears on the TV screen.

TIME --:--

DATE --/--/--

END=EXIT

5.Set the time with the number buttons 0..9 .

6.Set 'DAY', 'MONTH' and 'YEAR' with the number buttons 0..9 .

6

7.When all information is correct, save by

pressing STATUS/EXIT .

The preparation for use is now complete.

Manual TV channel search

In some cases it can occur that all of the TV chan- nels are not found and saved during the first instal- lation. In this case, the missing or coded TV chan- nels must be searched for and stored manually.

1.Switch on the TV. If required, select the pro-

gramme number for the video recorder.


2.Press


.The main menu will appear.


MENU


3.Use


or


to select 'TUNER


PLAY B-K

STOP C-L

SET UP'. Then press


.


FWD 1- B


4.Use


or


to select 'MANU-


PLAY B-K

STOP C-L

AL TUNING'. Then press


.


FWD 1- B


MANUAL TUNING


PROG.

P55


CHANNEL

055


SKIP

[OFF]


VIDEO MODE

[SECAM]


AUDIO MODE

[DK]


SELECT K L CHOOSE B


END=EXIT


Select 'PROG.' with


or


PLAY B-K

STOP C-L


5.


.

Then press


.


FWD 1- B


6.With


or


or


, select


PLAY B-K

STOP C-L


0..9


the desired programme number that you want

to use for the TV channel, e.g. 'P01'. Then


press


.


FWD 1- B


7.Select 'CHANNEL' with PLAY B-Kor STOP C-L , and confirm with FWD 1- B . Then enter the

desired channel with 0..9 .

If you set 'SKIP' on for a channel, this chan- nel will be ignored when going through the

channels with P+ or P– .

I don't know the channels for my TV stations In this case, press PLAY B-Kor STOP C-Lin 'CHANNEL' to start the automatic channel search. A changing channel number will appear on the TV screen. Continue the automatic search until you have found the desired TV channel.

8.Save the TV channel with FWD 1- B .

9.To search for other TV channels, begin again at step 5.

10.To end, press STATUS/EXIT .

How do I change 'VIDEO MODE' or 'AUDIO MODE'?

If you want to change the video or audio mode, select 'VIDEO MODE' or 'AUDIO MODE' with

PLAY B-Kor STOP C-L . Then, press FWD 1- B

to select your desired mode.

EN

Page 6
Image 6
Philips VR150/58 specifications Installing your video recorder, Preparation for use, Manual TV channel search

VR150/58 specifications

The Philips VR150/58 is a versatile and innovative device designed to elevate the home entertainment experience. This state-of-the-art video recorder combines advanced features and modern technologies, making it a popular choice for consumers seeking to capture and enjoy their favorite television shows and movies.

One of the standout features of the Philips VR150/58 is its high-quality recording capabilities. The device supports both VHS and S-VHS formats, ensuring that users can record in standard or superior quality depending on their preferences. This flexibility in recording formats allows users to maximize the quality of their home videos or television captures.

The VR150/58 is equipped with a built-in timer, enabling users to schedule recordings effortlessly. This feature ensures that consumers never miss their favorite shows, even when they are not at home. The timer settings are intuitive and user-friendly, allowing for quick adjustments that cater to varying viewing schedules.

Additionally, the device features a user-friendly interface that simplifies navigation through menus and recording settings. An easy-to-read display provides real-time information about the recording process, such as elapsed time and remaining tape capacity. This makes managing recordings a breeze, even for those who may not be tech-savvy.

The Philips VR150/58 also incorporates modern playback technologies to enhance the viewing experience. Users can enjoy features such as rewind, fast forward, and pause during playback, offering greater control over the content. Furthermore, the device supports multiple playback speeds, allowing users to review recordings at their preferred pace.

In terms of connectivity, the VR150/58 is designed to easily integrate with other home entertainment systems. It features standard AV outputs, enabling users to connect external devices like televisions, sound systems, and gaming consoles. This versatility enhances the overall functionality of the recorder, making it a valuable addition to any media setup.

Built with durability in mind, the Philips VR150/58 promises reliable performance over time. The robust construction and quality components ensure that it can withstand regular use, making it a wise investment for those who appreciate a dependable home media solution.

In conclusion, the Philips VR150/58 video recorder delivers an impressive array of features and technology tailored for the modern viewer. With its high-quality recording capabilities, user-friendly design, and seamless connectivity, it stands out as an excellent choice for anyone looking to enhance their home entertainment experience.