CONGRATULATIONS
YOU NOW OWN A NEW
PHILIPS
VIDEORECORDER
TO CONTINUE PRESS OK

 AV2 EXT2


 AUX IN L AUX IN R AUX OUT L AUX OUT R
ENGLISH
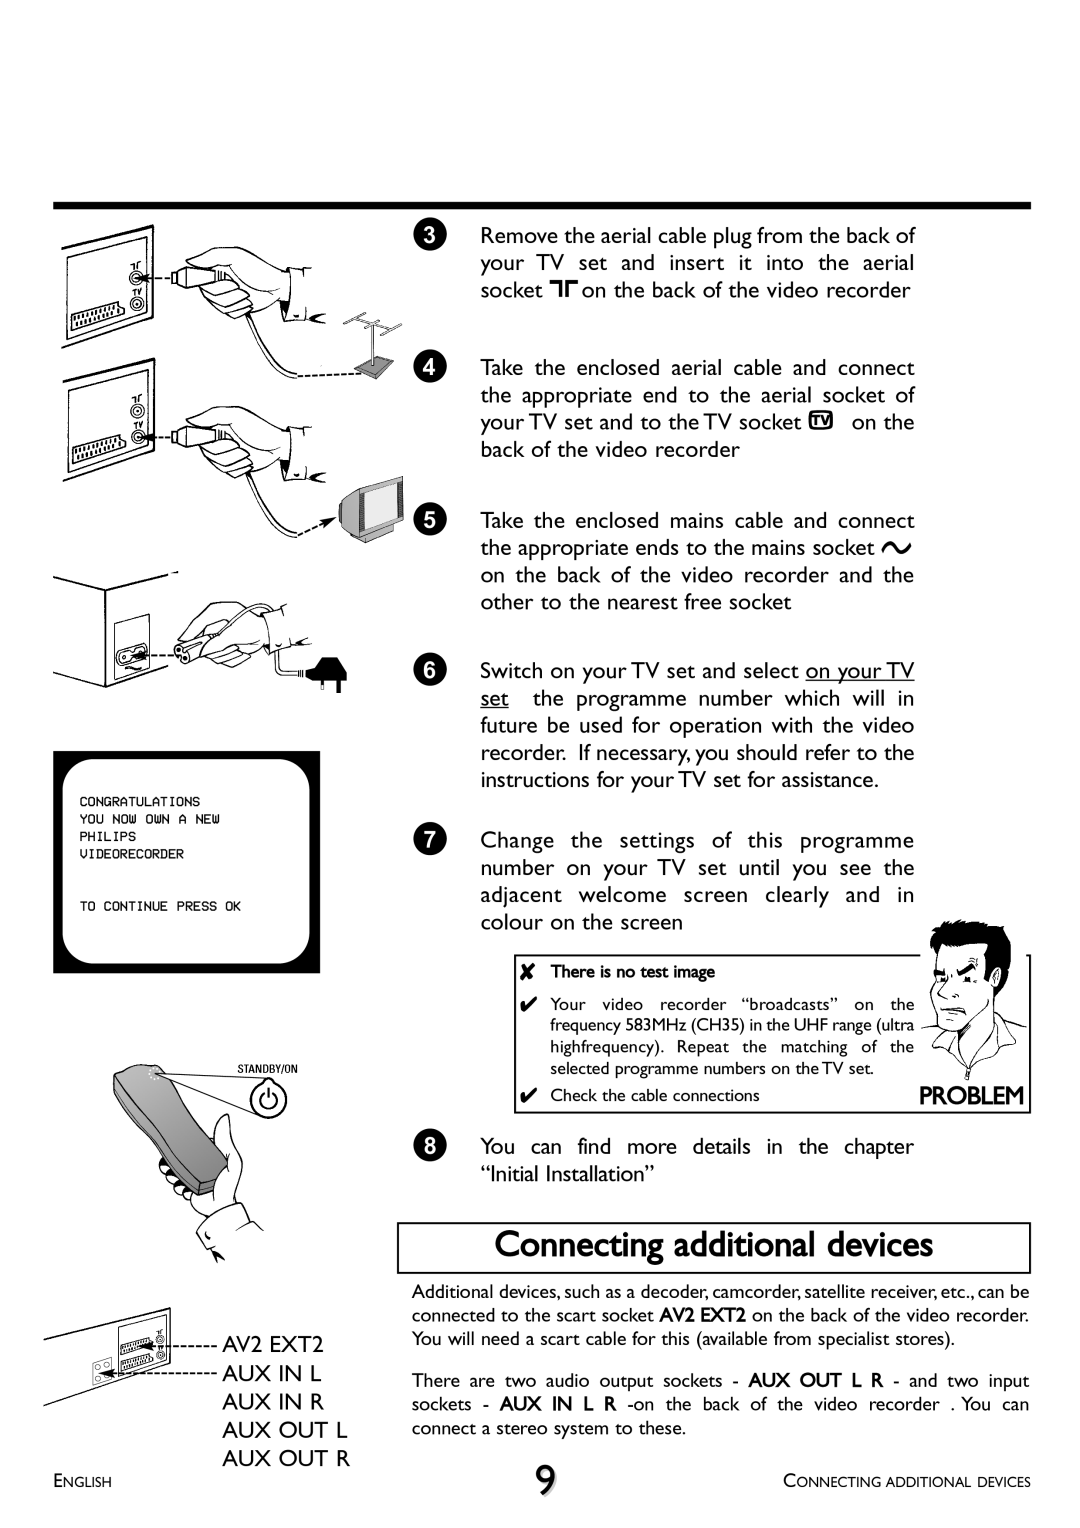
3Remove the aerial cable plug from the back of
your TV set and insert it into the aerial socket 2on the back of the video recorder
4Take the enclosed aerial cable and connect
the appropriate end to the aerial socket of your TV set and to the TV socket 3 on the back of the video recorder
5Take the enclosed mains cable and connect the appropriate ends to the mains socket 4 on the back of the video recorder and the other to the nearest free socket
6Switch on your TV set and select on your TV set the programme number which will in future be used for operation with the video recorder. If necessary, you should refer to the instructions for your TV set for assistance.
7Change the settings of this programme number on your TV set until you see the adjacent welcome screen clearly and in colour on the screen
8There is no test image
4 | Your video recorder “broadcasts” on the |
|
| frequency 583MHz (CH35) in the UHF range (ultra |
|
| highfrequency). Repeat the matching of the |
|
| selected programme numbers on the TV set. |
|
4 | Check the cable connections | PROBLEM |
8You can find more details in the chapter “Initial Installation”
Connecting additional devices
Additional devices, such as a decoder, camcorder, satellite receiver, etc., can be connected to the scart socket AV2 EXT2 on the back of the video recorder. You will need a scart cable for this (available from specialist stores).
There are two audio output sockets - AUX OUT L R - and two input sockets - AUX IN L R
9 | CONNECTING ADDITIONAL DEVICES |
|
