DIN Front/Rear-mount
This unit can be properly installed either from “Front” (conventional DIN
Before installing the unit
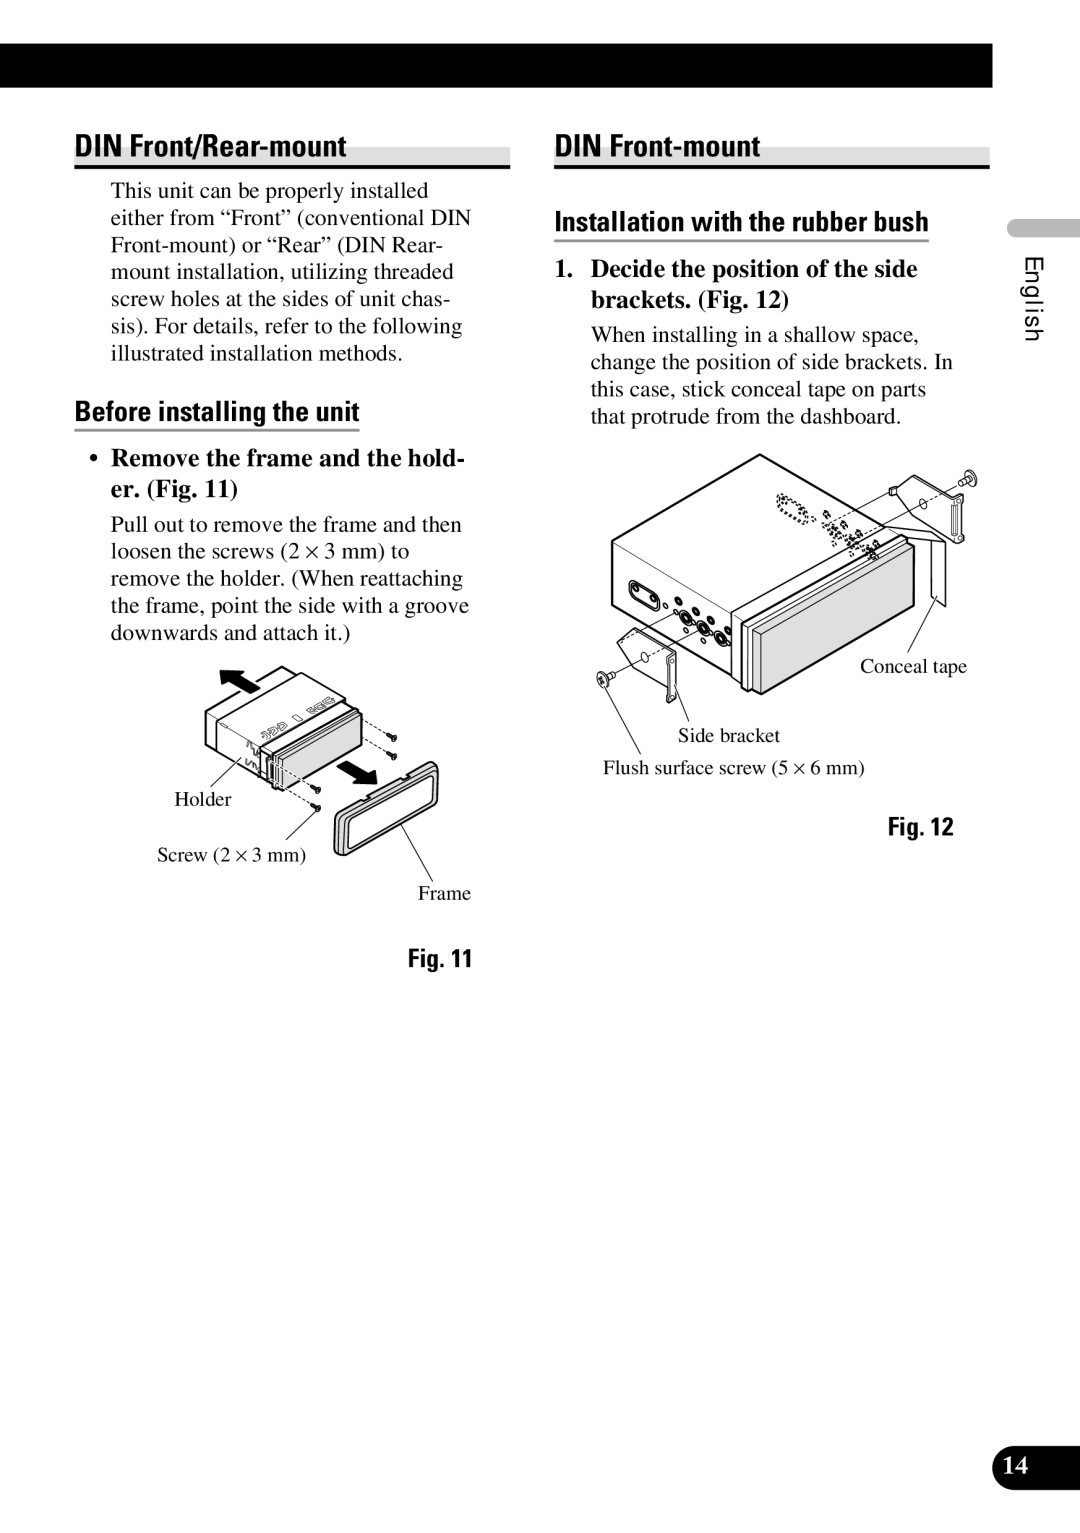
•Remove the frame and the hold- er. (Fig. 11)
Pull out to remove the frame and then loosen the screws (2 ⋅ 3 mm) to remove the holder. (When reattaching the frame, point the side with a groove downwards and attach it.)
Holder
Screw (2 ⋅ 3 mm)
Frame
Fig. 11
DIN Front-mount
Installation with the rubber bush
When installing in a shallow space, | English |
1. Decide the position of the side |
|
brackets. (Fig. 12) |
|
change the position of side brackets. In |
|
this case, stick conceal tape on parts |
|
that protrude from the dashboard. |
|
| Español |
Side bracket | Conceal tape | Deutsch |
|
|
Flush surface screw (5 ⋅ 6 mm)
Fig. 12
Français Italiano
Nederlands
14
