Installation
2.Install the unit into the dash- board. (Fig. 13)
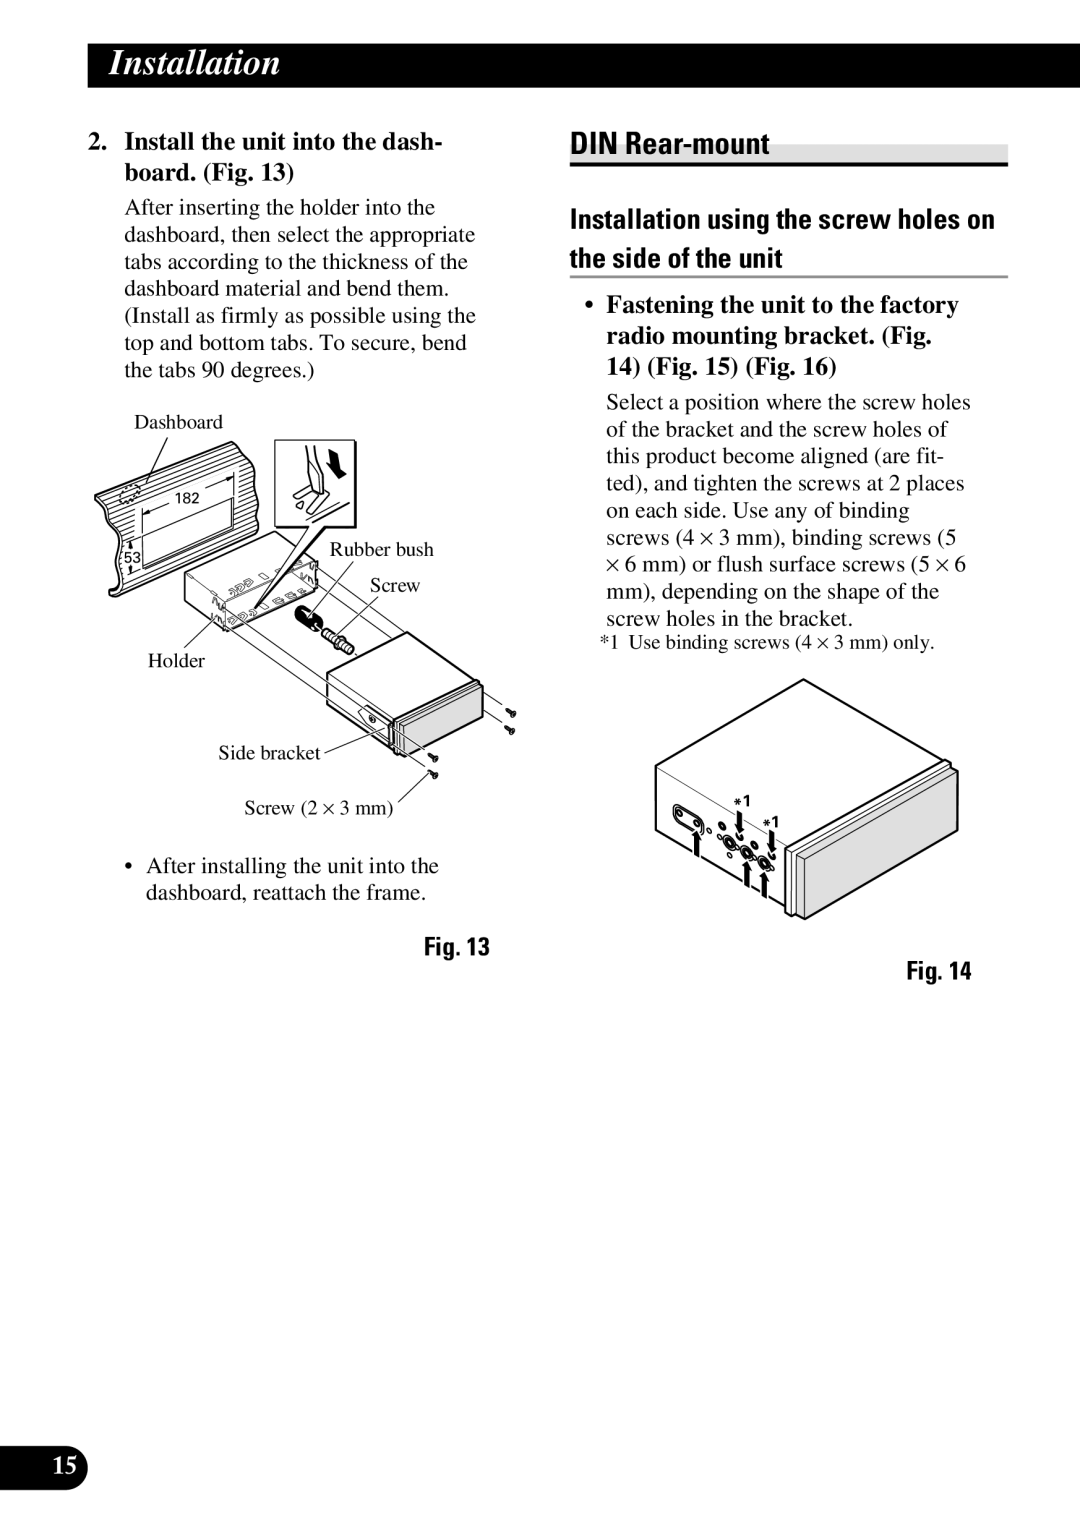
After inserting the holder into the dashboard, then select the appropriate tabs according to the thickness of the dashboard material and bend them. (Install as firmly as possible using the top and bottom tabs. To secure, bend the tabs 90 degrees.)
Dashboard
182
53 | Rubber bush |
| |
| Screw |
Holder
Side bracket ![]()
![]()
![]()
Screw (2 ⋅ 3 mm)
•After installing the unit into the dashboard, reattach the frame.
Fig. 13
DIN Rear-mount
Installation using the screw holes on the side of the unit
•Fastening the unit to the factory radio mounting bracket. (Fig. 14) (Fig. 15) (Fig. 16)
Select a position where the screw holes of the bracket and the screw holes of this product become aligned (are fit- ted), and tighten the screws at 2 places on each side. Use any of binding screws (4 ⋅ 3 mm), binding screws (5
⋅6 mm) or flush surface screws (5 ⋅ 6 mm), depending on the shape of the screw holes in the bracket.
*1 Use binding screws (4 ⋅ 3 mm) only.
*1
*1
Fig. 14
15