CDJ-800 specifications
The Pioneer CDJ-800 is a professional digital media player that has become a staple in both club environments and home studios since its introduction. Renowned for its robustness and versatility, the CDJ-800 offers a range of features that cater to DJs of all skill levels, making it an essential tool in modern electronic music performance.One of the most notable characteristics of the CDJ-800 is its ability to play various formats. It supports both CDs and digital audio files on USB drives, allowing DJs to transition seamlessly between traditional and digital media. The player facilitates compatibility with MP3, WAV, and AIFF formats, providing ample flexibility for music selection. This adaptability ensures that DJs can bring along their music library without the need for extensive setup.
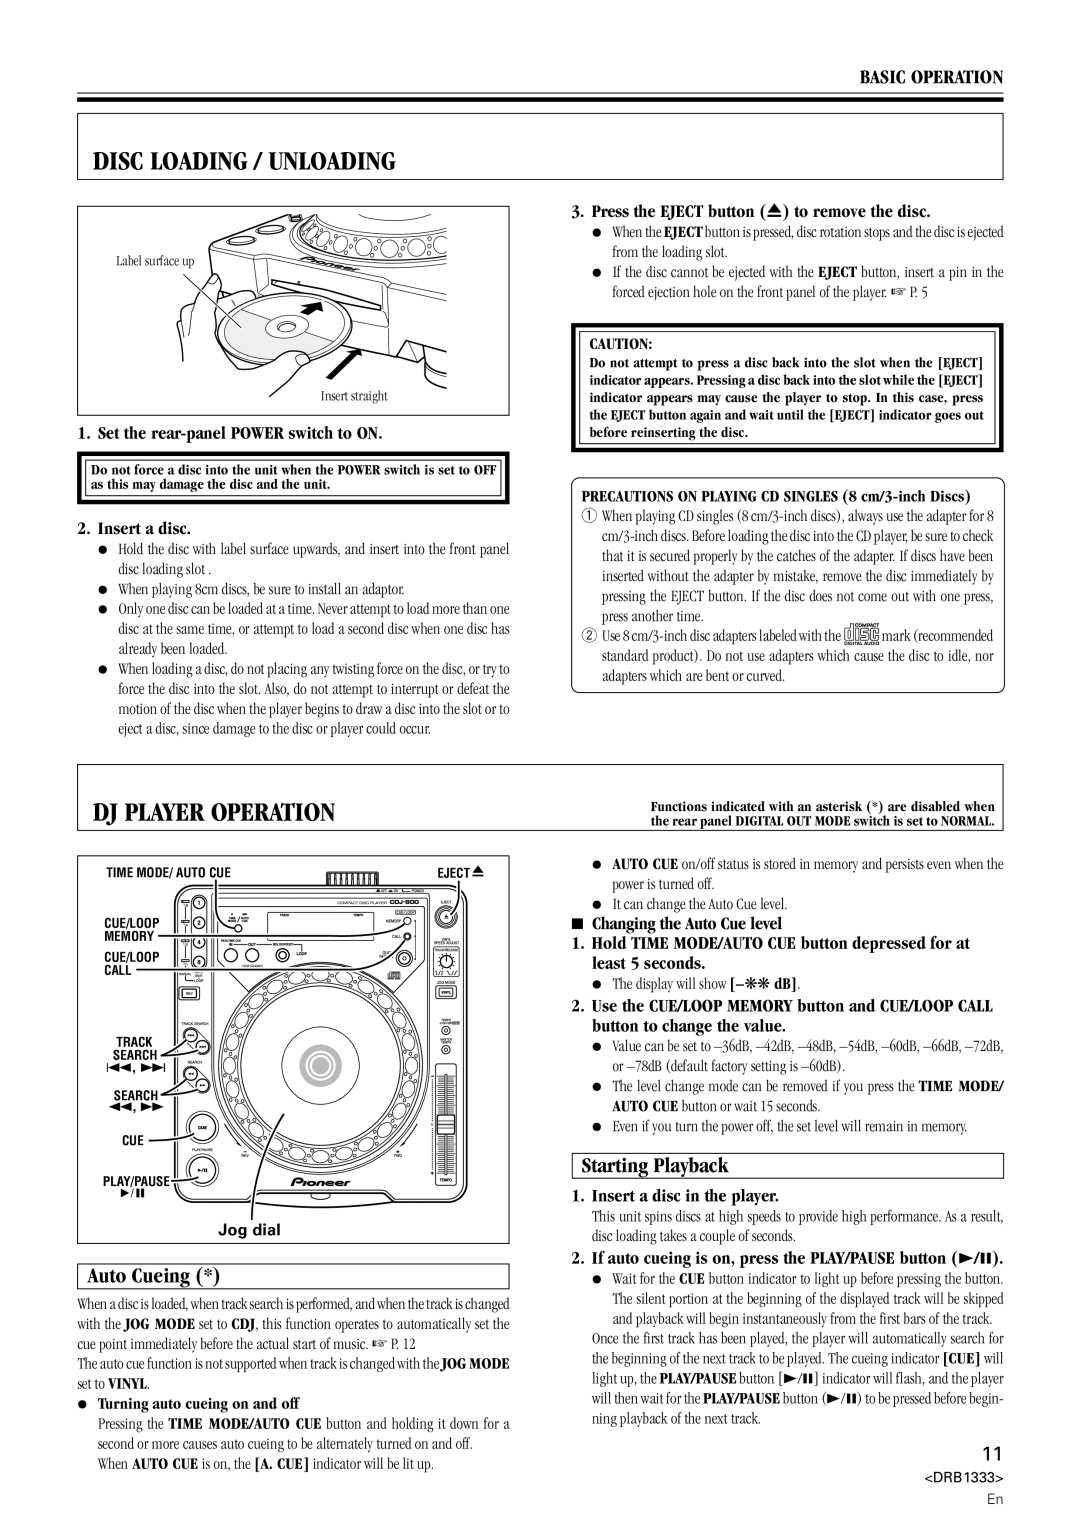
The layout of the CDJ-800 is designed for ease of use and speed. A large, responsive jog wheel provides precise control over track manipulation, allowing for accurate scratching and pitch bending. Additionally, a clear display screen presents vital information such as track time, BPM, and waveform analysis. These features help DJs to visualize their performances and make real-time adjustments with ease.
Another key feature of the CDJ-800 is its advanced looping capabilities. DJs can create and manipulate loops on the fly, enhancing the creative potential during live sets. The player includes memory points for storing loop positions, which allows for quick access to specific parts of tracks without the need for extensive searching.
The CDJ-800 also incorporates Pioneer’s Anti-Shock technology, which protects against skipping during playback. With its anti-vibration design and built-in buffer memory, the player ensures a smooth audio output even in dynamic environments, such as clubs or festivals.
Networking capabilities are yet another highlight of the CDJ-800. It features the ability to link multiple units together, allowing DJs to control several players simultaneously. This network functionality not only streamlines performance but also encourages creative mixing possibilities.
In conclusion, the Pioneer CDJ-800 stands out for its combination of user-friendly features, adaptability to different media formats, and powerful performance capabilities. Its robust design, advanced looping functions, and networking options make it a formidable choice for anyone looking to take their DJ skills to the next level. As a marriage of technology and creativity, the CDJ-800 is a significant asset in the world of electronic music.