Getting started
Chapter 4
Getting started
iPod playback features
Once you have connected everything, you’re ready to starting watching videos and listening to music. Follow the steps below for an intro- duction to your iPod dock.
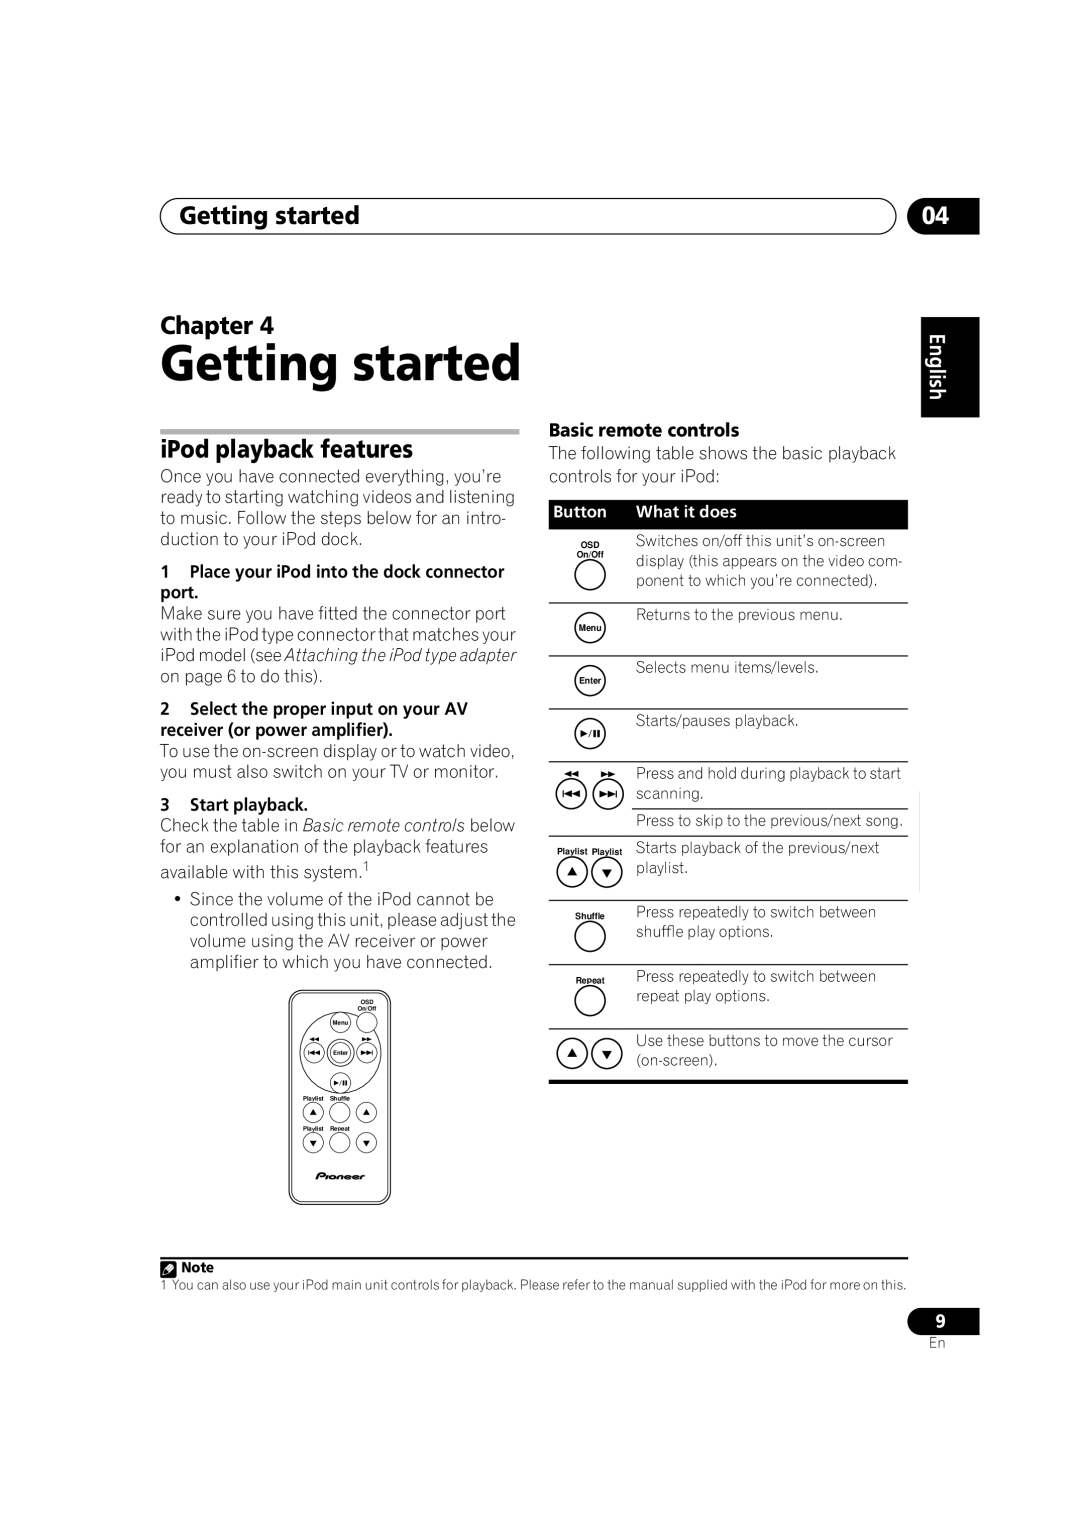
Basic remote controls
The following table shows the basic playback controls for your iPod:
Button What it does
OSD Switches on/off this unit’s
04
English Deutsch
1Place your iPod into the dock connector port.
Make sure you have fitted the connector port with the iPod type connector that matches your iPod model (see Attaching the iPod type adapter on page 6 to do this).
2Select the proper input on your AV receiver (or power amplifier).
To use the
3Start playback.
Check the table in Basic remote controls below
On/Off
Menu
Enter
display (this appears on the video com- ponent to which you’re connected).
Returns to the previous menu.
Selects menu items/levels.
Starts/pauses playback.
Press and hold during playback to start scanning.
Press to skip to the previous/next song.
Français Italiano Nederlands
for an explanation of the playback features available with this system.1
•Since the volume of the iPod cannot be controlled using this unit, please adjust the volume using the AV receiver or power amplifier to which you have connected.
OSD
On/Off
Menu
Enter
Playlist Shuffle
Playlist Repeat
Playlist Playlist Starts playback of the previous/next playlist.
Shuffle Press repeatedly to switch between shuffle play options.
Repeat Press repeatedly to switch between repeat play options.
Use these buttons to move the cursor
Español
![]() Note
Note
1 You can also use your iPod main unit controls for playback. Please refer to the manual supplied with the iPod for more on this.
9
En