Troubleshooting

Specifications

If the picture quality is poor or there is some other problem, check the adjustments, operations, etc., before requesting service.

English


Symptom

Checks

Remedy


The unit emits a crackling sound.

• Are the image and sound normal?

• If there are no abnormalities in the image and sound,


Mechanical sound is heard.

• Maybe the sound from the cooling fans used to prevent over heating.


the noise is caused by the cabinet reacting to


changes in temperature. This will not affect


performance.


Picture is disturbed.

• Is a connected component set directly in front or at

• Leave some space between the display and the


Sound is noisy.

the side of the display?

connected components.


Remote control operates erroneously.


The remote control does not work.

• Are the remote control’s batteries worn out?

• Replace both batteries with new ones.


• Is IR REMOTE set to ON?

• Set IR REMOTE OFF on OPTION3 menu.


• Has an ID number been set for the main unit?

• Set an ID number with the ID NO. SET button, or set


the ID number to ALL.


Monitor’s power does not turn on when the

• Is the monitor’s power cord plugged into a power

• Plug the monitor’s power cord into a power outlet.


remote control’s power button is pressed.

outlet?


• Are all the monitor’s indicators off?

• Press the power button on the monitor to turn on the


power.


• Are the remote control’s batteries worn out?

• Replace both batteries with new ones.


• Is IR REMOTE set to OFF?

• Set IR REMOTE ON.


• Has an ID number been set for the main unit?

• Set an ID number with the ID NO. SET button, or set


the ID number to ALL.


Monitor does not operate when the remote

• Is the remote control pointed at the monitor, or is

• Point the remote control at the monitor’s remote


control’s buttons are pressed.

there an obstacle between the remote control and

control sensor when pressing buttons, or remove the


the monitor?

obstacle.


• Is direct sunlight or strong artificial light shining on

• Eliminate the light by closing curtains, pointing the


the monitor’s remote control sensor?

light in a different direction, etc.


• Are the remote control’s batteries worn out?

• Replace both batteries with new ones.


• The remote cable is plugged into the REMOTE IN

• Unplug the remote cable from the monitor.


terminal (Wired).


The front panel buttons of the main unit do

• The front panel buttons do not function during KEY

• Set the KEY Lock to OFF.


not function.

Lock.


No sound or picture is produced.

• Is the monitor’s power cord plugged into a power

• Plug the monitor’s power cord into a power outlet.


outlet?


Picture appears but no sound is produced.

• Is the volume set at the minimum?

• Increase the volume.


• Is the MUTING mode set?

• Press the remote control’s MUTING button.


• Are the speakers properly connected?

• Connect the speakers properly.


• Is AUDIO INPUT set correctly?

• Set AUDIO INPUT on the SOUND menu correctly.


Poor picture with VIDEO signal input.

• Improper control setting.

• Adjust picture control as needed.

Troubleshooting


Nothing appears on screen.

Local interference.

Try another location for the monitor.


• Is the computer’s power turned on?

• Turn on the computer’s power.


Cable interconnections.

Be sure all connections are secure.


Input impedance is not correct level.


Poor picture with RGB signal input.

• Improper control setting.

• Adjust picture controls as needed.


Incorrect RGB connector pin connections.

Check pin assignments and connections.


Tint is poor or colors are weak.

• Are the tint and colors properly adjusted?

• Adjust the tint and color (under PICTURE).


• Is a source connected?

• Connect source to the monitor.


• Is the power management function in the standby

• Operate the computer (move the mouse, etc.).


or off mode?


• Is LOOP OUT set to ON?

• Set LOOP OUT OFF.


Part of picture is cut off or picture is not

• Is the position adjustment appropriate?

• Adjust the SCREEN properly.


centered.


Image is too large or too small.

• Is the screen size adjustment appropriate?

• Press the SCREEN SIZE button on the remote


control and adjust properly.


Picture is unstable.

• Is the computer’s resolution setting appropriate?

• Set to the proper resolution.


STANDBY/ON indicator is lighted in red.

• Horizontal and / or vertical sync signal is not

• Check the input signal.


present when the Intelligent Power Manager


control is on.


STANDBY/ON indicator is blinking in red.

• The temperature inside the main unit has become

• Promptly switch off the power of the main unit and


too high and has activated the protector.

wait until the internal temperature drops. See*1.


STANDBY/ON indicator is blinking in green

——————

• Prompty switch off the power of the main unit. See


and red, or green.

*2.


*1 Overheat protector

If the monitor becomes too hot, the overheat protector will be activated and the monitor will be turned off. If this happens, turn off the power to the monitor and unplug the power cord. If the room where the monitor is installed is particularly hot, move the monitor to a cooler location and wait for the monitor to cool for 60 minutes. If the problem persists, contact your dealer.

*2 In the following case, power off the monitor immediately and contact your dealer or authorized Service Center.

The monitor turns off 5 seconds after powering on and then the STANDBY/ON indicator blinks. It indicates that the power supply circuit, plasma display panel, temperature sensor, or one or more fans have been damaged.

Screen Size

53.2"(H)29.9"(V) inches


1351(H)760(V) mm


diagonal 61"


Aspect Ratio

16 : 9

Resolution

1365(H)768(V) pixels

Signals

Synchronization Range Horizontal : 15.5 to 110 kHz


(automatic : step scan)


Vertical : 50.0 to 120 Hz


(automatic : step scan)


Input Signals

RGB, NTSC (3.58/4.43), PAL (B,G,M,N),


PAL60, SECAM, HD*1 , DVD*1 , DTV*1

Input Terminals (VIDEO1 and PC1 can also be used as OUTPUT terminals)


PC


Visual 1 (Analog)

mini D-sub 15-pin1


Visual 2 (Analog)

BNC (R, G, B, H/CS, V)1*2


Visual 3 (Digital)

DVI-D 24-pin1*3


Video


Visual 1

BNC1


Visual 2

RCA-pin1


Visual 3

S-Video: DIN 4-pin1


COMPONENT


Visual 1

RCA-pin (Y, PB[CB], PR[CR])1*1


Visual 2

BNC (Y, PB[CB], PR[CR])1*1, *2


Audio

Stereo RCA3 (Selectable)


RS-232C

D-sub 9-pin1


Sound output

9W+9W at 6 ohm

Power Supply

AC100-120V 50/60Hz

Current Rating

8.0A (maximum)

Power Consumption

540W (standby 0.9W)

Dimensions

57.9 (W)34.7 (H)4.7 (D) inches


1470 (W)880 (H)119(D) mm


Weight

134.5 lbs / 61.0 kg (without stand)

Environmental Considerations


Operating Temperature

0°C to 40°C / 32°F to 104°F

Other Features Motion compensated 3D Scan Converter (NTSC, PAL, 480I, 576I, 525I, 625I, 1035I, 1080I), 2-3 pull down Converter (NTSC, 480I, 525I, 1035I, 1080I (60Hz)), 2-2 pull down Converter (PAL, 576I, 625I, NTSC, 480I, 525I), Digital Zoom Function (100-900% Selectable), Video Wall 4-25 multi screen, Self Diagnosis, Image Burn reduction tools (ABL LOCK1~3, INVERSE, WHITE, ORBITER (Auto1,2/Manual), SCREEN WIPER), Color Temperature select (high/mid/mid low/low, user has 4 memories), Key lock (Except power SW), Auto Picture, Input Skip, Color Detail Adjustment, Low Tone (3 mode), Auto ID, Programmable Timer, Gamma Correction

(4 mode), Loop through interface, Plug and play (DDC1, DDC2b, PC3: DDC2b only)

The features and specifications may be subject to change without notice.

*1 COMPONENT input signals supported on this system

480P (60 Hz)

480I (60 Hz)

525P (60 Hz)

525I (60 Hz)

576P (50 Hz)

576I (50 Hz)

625P (50 Hz)

625I (50 Hz)

720P (60 Hz)

1035I (60 Hz)

1080I (50 Hz)

1080I (60 Hz)

*2 The 5-BNC connectors are used as PC2 and COMPONENT2 input. Select one of them under “BNC INPUT”.

*3 Compatible with HDCP. Supported Signals

• 640 480P @ 59.94/60Hz

• 1920 1080I @ 50Hz

• 1280

720P @ 59.94/60Hz

• 720 576P @ 50Hz

• 1920

1080I @ 59.94/60Hz

• 1440 (720) 576P @ 50Hz

720 480P @ 59.94/60Hz

1440 (720) 480I @ 59.94/60Hz

Note: In some cases a signal on the plasma monitor may not be displayed properly. The problem may be an inconsistency with standards from the source equipment (DVD, Set-top box, etc...). If you do experience such a problem please contact your dealer and also the manufacturer of the source equipment.

English

Specifications

32

33

En

En

Page 21
Image 21
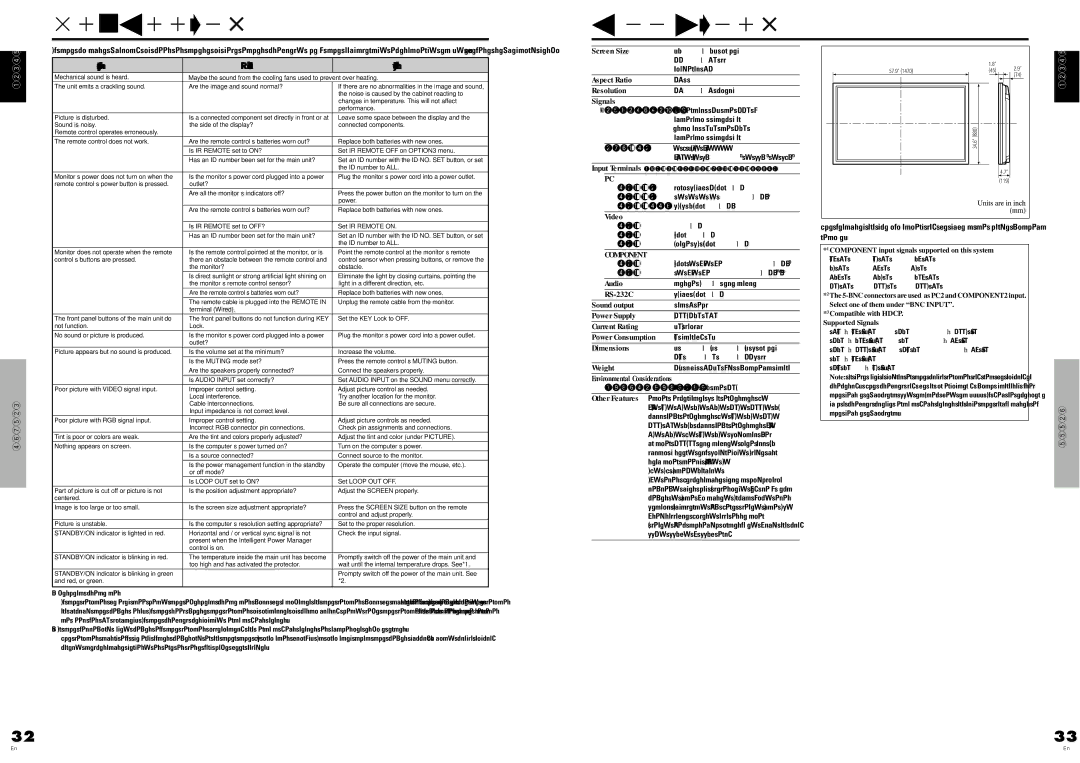
Pioneer PDP-614MX operating instructions Troubleshooting Specifications, Symptom Checks Remedy

PDP-614MX specifications

The Pioneer PDP-614MX is a notable plasma display panel that emerged in the early 2000s, reflecting the cutting-edge technology of its time. With a screen size of 61 inches, it became a significant choice for consumers seeking a large-format display for both home theaters and professional environments.

One of the standout features of the PDP-614MX is its impressive resolution. Boasting a native resolution of 1,024 x 768 pixels, the display delivers a clear and vibrant picture quality, which was particularly remarkable at its launch. The use of plasma technology allowed for deeper blacks and an expansive color gamut, making images appear more lifelike and immersive.

The PDP-614MX also introduced advancements in contrast ratio and brightness, contributing to an enhanced viewing experience. With a contrast ratio of 3000:1, it was able to handle a diverse range of lighting situations, from bright living rooms to darker home theaters. This feature was particularly appreciated in high-definition content playback, where sharp contrasts and rich colors are essential.

In terms of connectivity, the PDP-614MX provided a variety of inputs, including HDMI and component video, ensuring compatibility with multiple devices such as DVD players, gaming consoles, and cable boxes. This versatility was crucial for users looking to integrate the display into existing home entertainment systems seamlessly.

Another significant characteristic of the PDP-614MX was its design. The sleek, modern aesthetics complemented contemporary home décor, making it a visually appealing option. Its lightweight structure also allowed for easier installation and mounting, which was a boon for consumers who wanted to optimize their viewing space.

Pioneer's commitment to durability and longevity was evident in the construction of the PDP-614MX. With a lifespan of around 60,000 hours, users could expect years of reliable service. In addition, features such as anti-image retention technology helped to minimize the risk of burn-in, a common issue with older plasma displays.

Overall, the Pioneer PDP-614MX was a remarkable product for its time, combining advanced plasma technology with practical design and user-friendly features. Its rich picture quality, extensive connectivity options, and thoughtful construction made it a desirable choice for those looking to take their viewing experience to the next level.