07Helpful Information

Picture

Issue

Possible Solutions


Picture does not appear

• Check the setting for Color Decoding when using INPUT 2 or INPUT 3 (pages 52 and 53).

properly

• Check the setting for Signal Type.


• Check the setting for Video when using INPUT 4 through INPUT 8 (page 54).


• Check the setting for Signal Format when using INPUT 3 through INPUT 8 (page 54).


After-image lag

• If a bright or still image was on screen for a long period before switching to a darker


image, the original image may appear as an after-image or ghost. Try playing another


bright image, switching the picture quickly many times, or show a very active scene.


• Use the Long Life Settings function (see “4.2.1 Extend Your Panel Life”)


• Display the Video Pattern screen to help reduce after-image lag.


KURO LINK


Issue

Possible Solutions


KURO LINK does not

• Check the connections between the panel and the HDMI equipment.

function

• Confirm that the settings for the panel are correct.


• Confirm that the equipment is HDMI compliant.


• Confirm that settings for the equipment are correct.


For details, refer to the operating instructions that came with the equipment.


Error message: “The

• Check the connections between the panel and the HDMI equipment.

device cannot be

• Confirm that settings for the equipment are correct.

operated. Please check

For details, refer to the operating instructions that came with the equipment.

connection”


No picture

• Check the connections between the panel and the HDMI equipment.


• Confirm that settings for the equipment are correct.


For details, refer to the operating instructions that came with the equipment.


Panel sounds/noises

• Some sounds are appropriate for plasma technology.


Examples: fan motor noise, electrical circuit humming, glass panel buzzing, etc.


Brightness on sides of

• Display content that completely fills the screen until unevenness is minimized.

screen are uneven

• Change the AV mode setting.


IP Control


Issue

Possible Solutions


Web browser screen

• Confirm that the indicator turns on after setting the LED option to On.

does not open after

• Check the cable connection if the indicator does not light.

entering the correct IP

• Confirm that the other end of the cable is properly connected to the PC, hub or router if

Address

the indicator does not light.


The indicator lights but

• Confirm that the other end of the cable is not connected to any other device than

the web browser screen

Ethernet (such as a telephone).

does not open

• When using a DHCP, confirm that the IP Address allocated by the server has not


changed (the address may change as a DHCP server reallocates the addresses


periodically).


Entering an IP Address

• Confirm that the DHCP server is activated within the network.

fails even after activating


the DHCP function


78

En

Page 78
Image 78
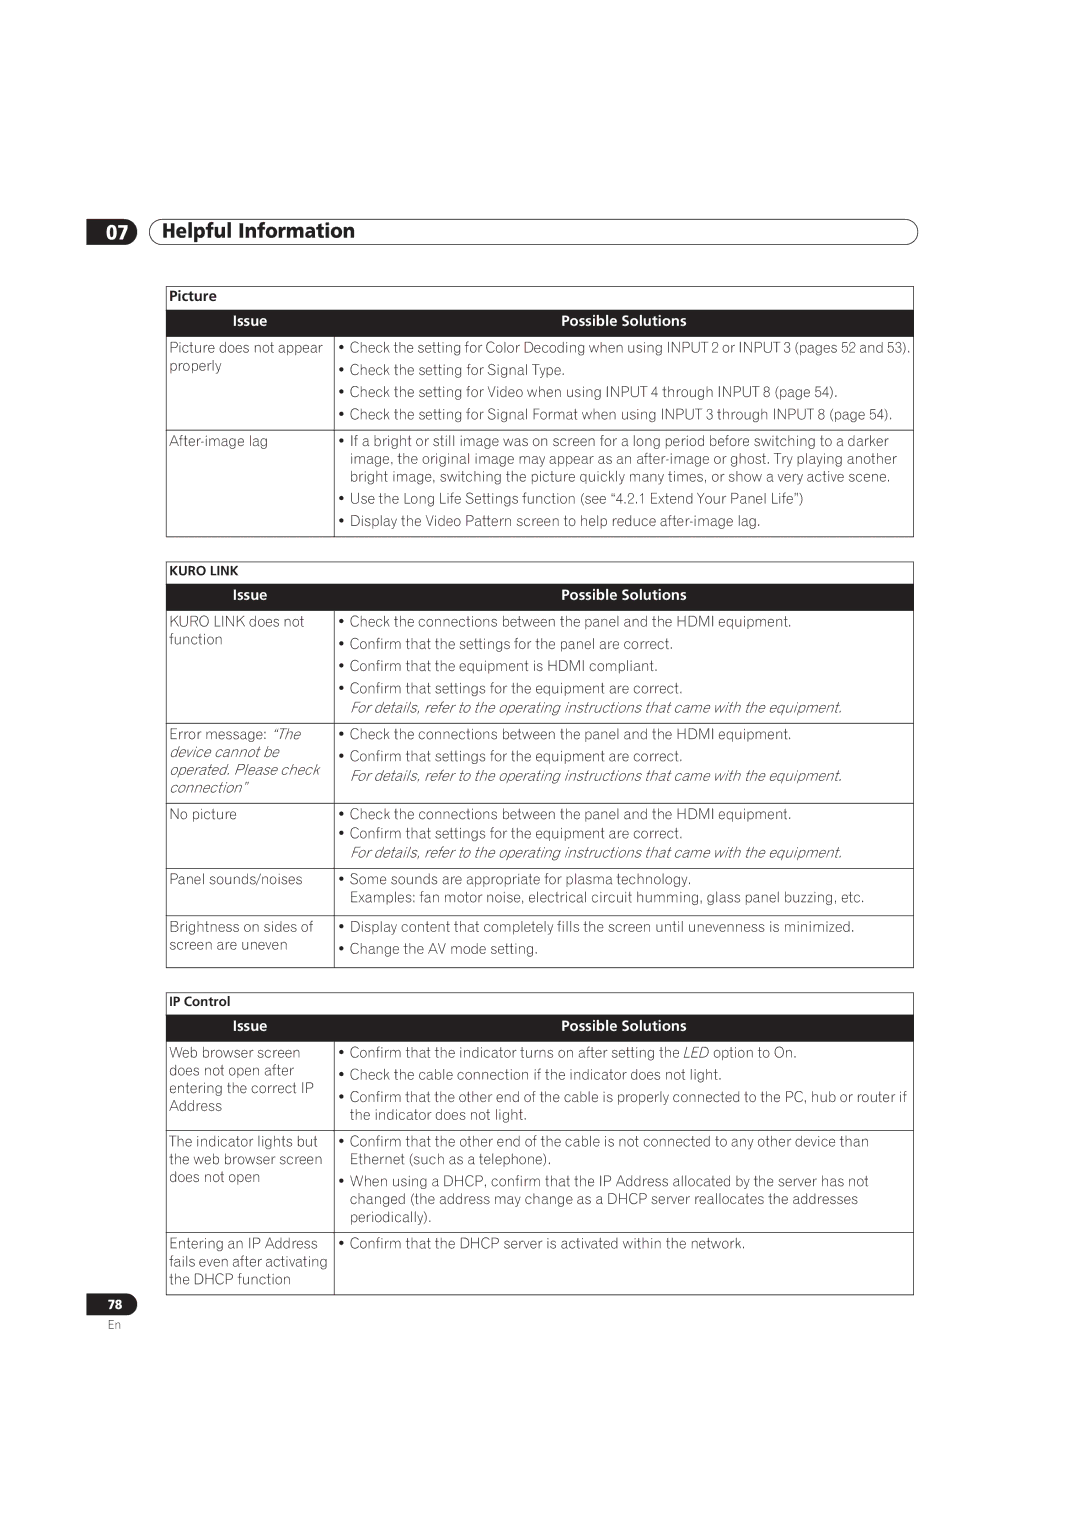
Pioneer PRO-101FD, PRO-141FD manual Device cannot be, Operated. Please check, Connection

PRO-101FD, PRO-141FD specifications

The Pioneer PRO-141FD and PRO-101FD are two remarkable models in the realm of professional audio equipment, specifically designed for individuals seeking superior sound quality and performance. These devices boast features that cater to diverse audio requirements, making them ideal choices for sound engineers, musicians, and audio enthusiasts alike.

One of the standout characteristics of both the PRO-141FD and PRO-101FD is their exceptional sound reproduction capabilities. The units are equipped with advanced drivers that ensure a clear, balanced sound across all frequencies. This includes an extended low-end response that provides the depth needed for strong bass performance, as well as crisp highs that capture intricate details in vocals and instruments. This versatility makes them suitable for a wide range of applications, from live performances to studio recordings.

In terms of build quality, both models are designed with durability in mind. Constructed from robust materials, they can withstand the rigors of professional use while remaining lightweight for easy transport. The cabinets are designed to minimize resonance and interference, which enhances the overall audio experience. This combination of durability and design ensures that users can rely on these units in demanding environments.

Technologically, the Pioneer PRO series implements advanced audio processing algorithms to deliver outstanding clarity and precision. These models include features such as multiple EQ settings, allowing users to customize their sound profile to suit different environments and personal preferences. Additionally, the PRO-141FD and PRO-101FD are designed to support various connectivity options, including Bluetooth, XLR, and TRS inputs, making them incredibly versatile for different audio setups.

Another key feature is the efficiency of power management in these models. They are engineered to provide maximum output while consuming minimal power, ensuring longer operating times and reduced energy costs. This is particularly beneficial for users who rely on their equipment for extended periods, such as during tours or extended recording sessions.

The ergonomics of the Pioneer PRO series also set them apart. User-friendly controls and intuitive interfaces allow for quick adjustments during live settings, enabling performers and sound engineers to focus on the performance rather than the equipment.

In summary, the Pioneer PRO-141FD and PRO-101FD are equipped with impressive sound quality, durable construction, advanced technology, versatile connectivity, and user-friendly design. These attributes make them stand out in the competitive audio equipment market, catering to both casual users and professional audiophiles. Whether for live sound applications or studio work, these models offer an excellent solution for anyone seeking high-quality audio performance.