Connecting up
|
|
|
|
|
|
|
|
|
|
|
|
|
|
| IN |
|
|
|
| TV |
|
|
|
L | AUDIO OUT (5.1 ch ) | CENTER |
| Y | PB |
| |
|
| L |
|
|
|
|
|
|
|
|
| COAXIAL |
|
|
|
R | FRONT | R SURROUND | SUB | OPTICAL | VIDEO | PR COMPONENT VIDEO OUT | S |
AUDIO OUT ( 2 ch ) |
| WOOFER | DIGITAL AUDIO OUT | OUT | VIDEO OUT | ||
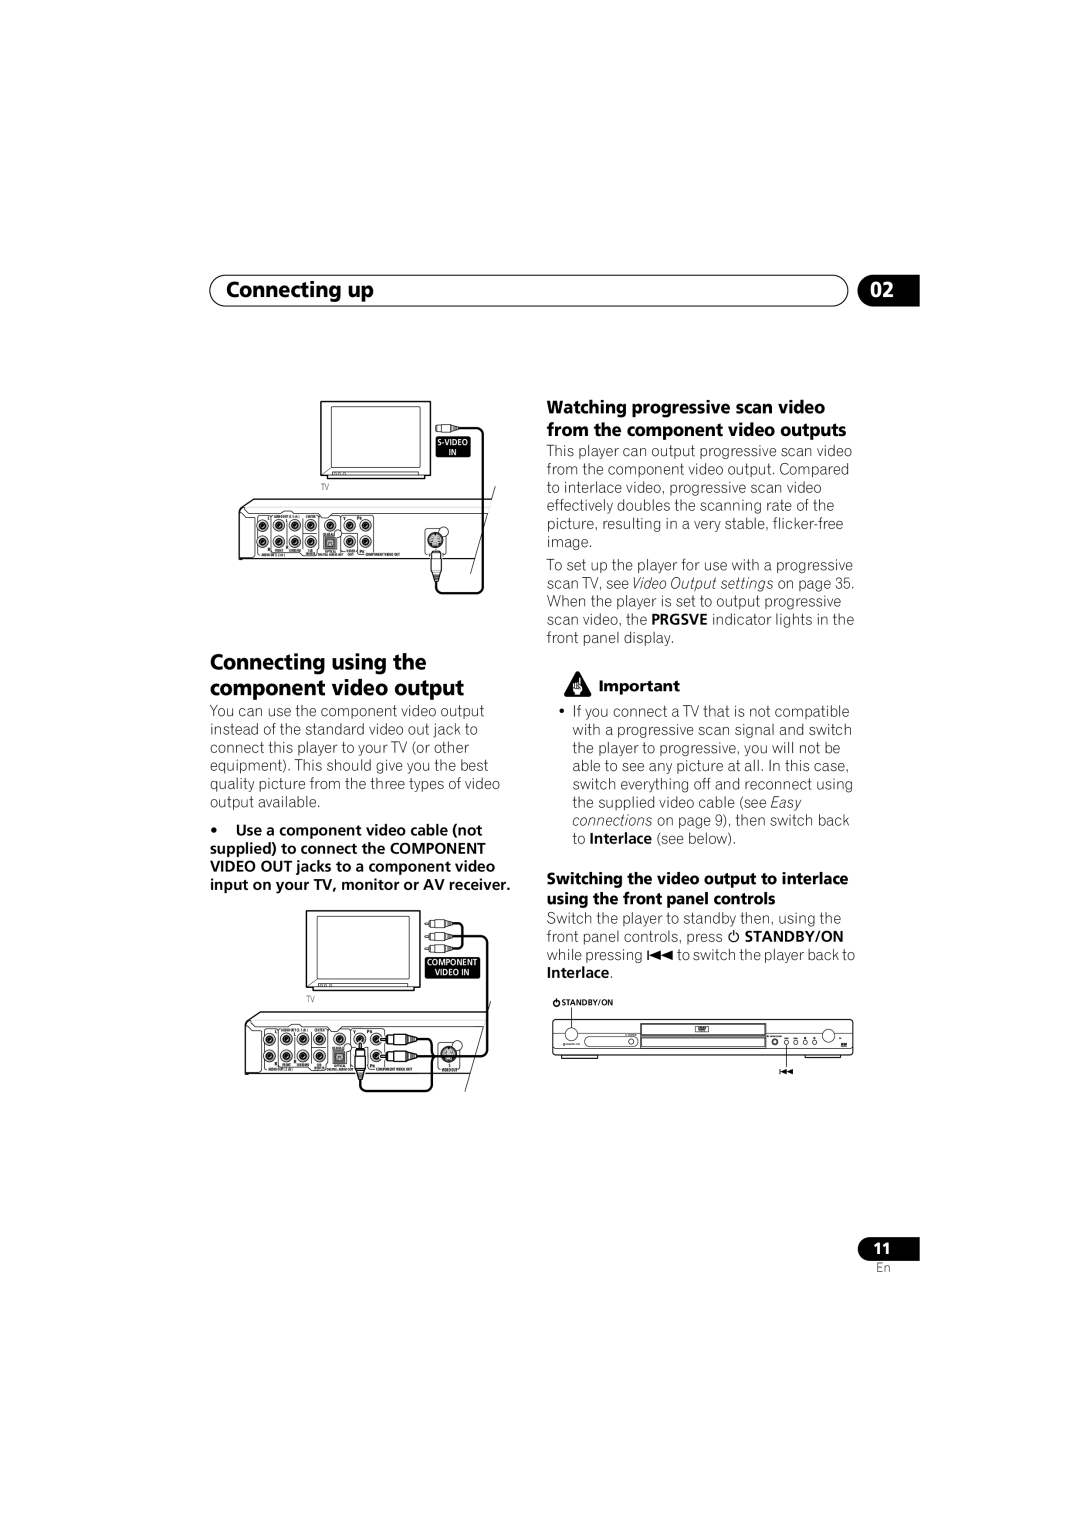
Connecting using the component video output
You can use the component video output instead of the standard video out jack to connect this player to your TV (or other equipment). This should give you the best quality picture from the three types of video output available.
•Use a component video cable (not supplied) to connect the COMPONENT VIDEO OUT jacks to a component video input on your TV, monitor or AV receiver.
COMPONENT
VIDEO IN
TV
L | AUDIO OUT (5.1 ch ) CENTER | Y | PB |
| L |
| L |
|
|
|
|
|
|
| COAXIAL |
|
|
|
|
|
|
|
|
| R |
|
R | FRONT | R SURROUND | SUB | OPTICAL | VIDEO | PR COMPONENT VIDEO OUT | S |
AUDIO OUT ( 2 ch ) |
| WOOFER | DIGITAL AUDIO OUT | OUT | VIDEO OUT | ||
02
Watching progressive scan video from the component video outputs
This player can output progressive scan video from the component video output. Compared to interlace video, progressive scan video effectively doubles the scanning rate of the picture, resulting in a very stable,
To set up the player for use with a progressive scan TV, see Video Output settings on page 35. When the player is set to output progressive scan video, the PRGSVE indicator lights in the front panel display.
![]() Important
Important
•If you connect a TV that is not compatible with a progressive scan signal and switch the player to progressive, you will not be able to see any picture at all. In this case, switch everything off and reconnect using the supplied video cable (see Easy connections on page 9), then switch back to Interlace (see below).
Switching the video output to interlace using the front panel controls
Switch the player to standby then, using the front panel controls, press STANDBY/ON
while pressing | to switch the player back to |
Interlace. |
|
STANDBY/ON |
|
FL DIMMER |
|
STANDBY/ON |
|
11
En