VSX-D309 specifications
The Pioneer VSX-D309 is a versatile and feature-rich home theater receiver that exemplifies Pioneer’s commitment to quality audio and innovative technology. Launched as part of the company’s well-regarded line of audio products, the VSX-D309 is designed to provide an immersive home entertainment experience.One of the main features of the VSX-D309 is its robust power output, typically delivering 100 watts per channel across five channels. This ample power means that users can enjoy loud and clear audio reproduction, making it a great choice for music, movies, and gaming. The receiver also incorporates Dolby Pro Logic and DTS decoding, allowing it to deliver dynamic surround sound that enhances any audio experience. This technology creates a 5.1-channel surround sound experience from stereo sources, giving users an immersive feeling akin to being in a movie theater.
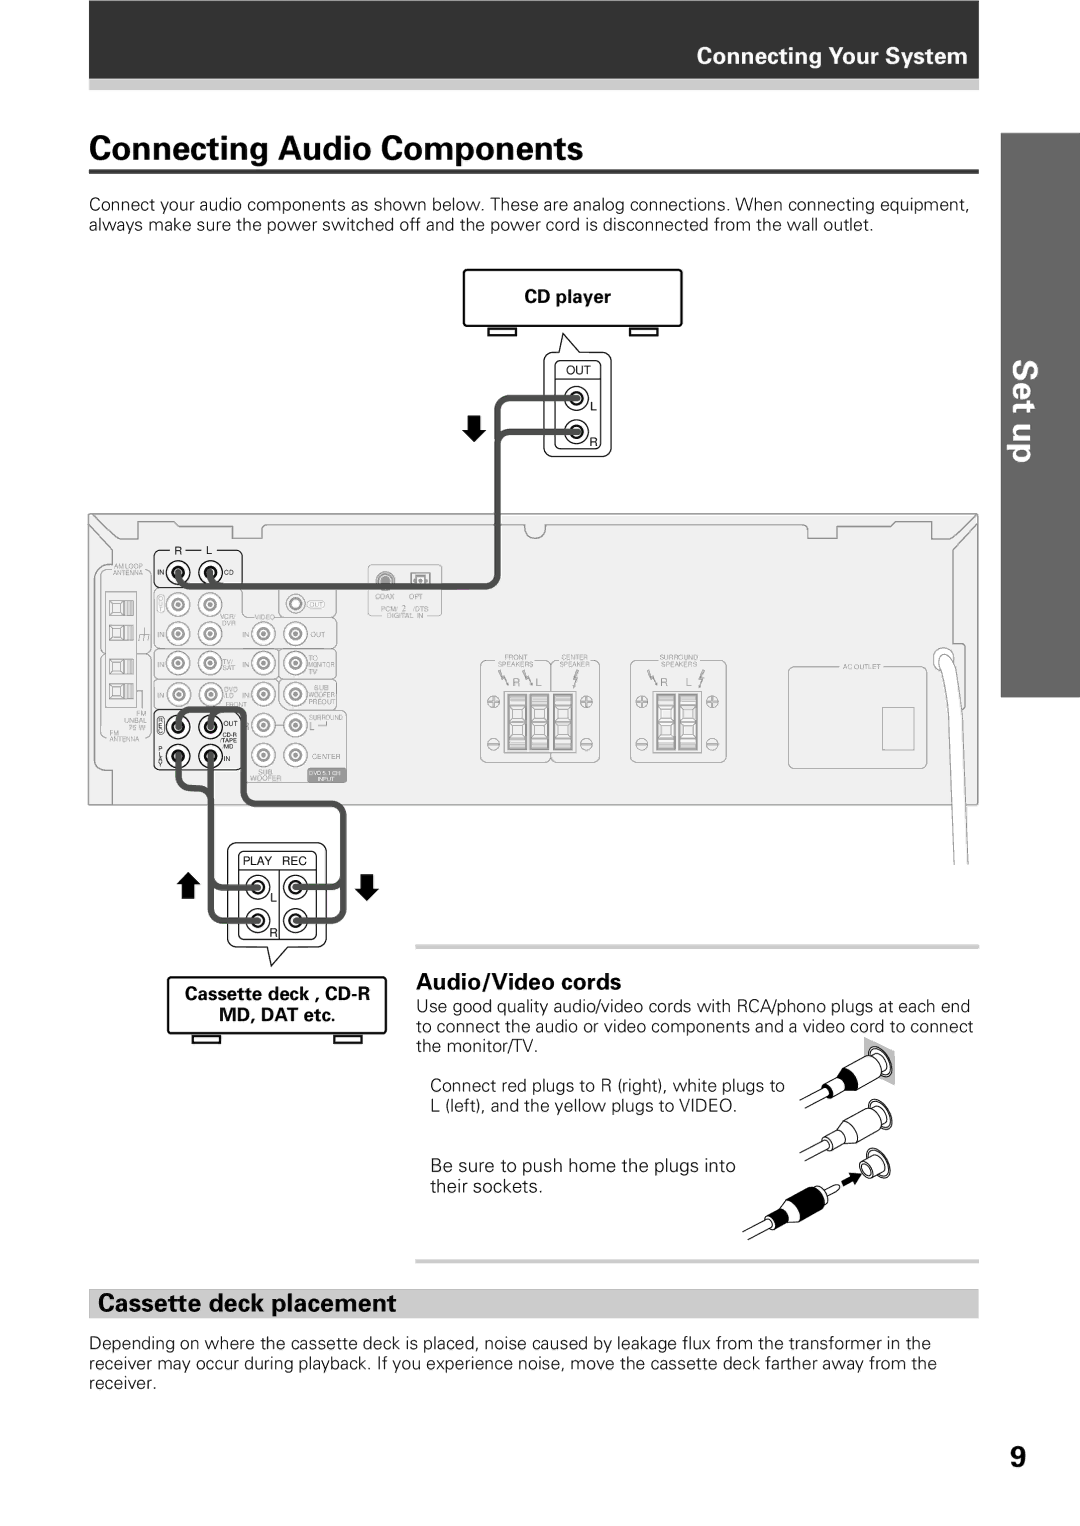
Another notable characteristic of the VSX-D309 is its comprehensive connectivity options. The receiver is equipped with multiple audio and video inputs, including composite video, S-video, and digital audio options such as optical and coaxial connections. This variety allows users to connect multiple devices, such as DVD players, gaming consoles, and a variety of audio sources seamlessly. Additionally, the receiver features a built-in AM/FM tuner, enabling users to explore a vast array of radio stations.
Pioneer has also integrated their proprietary Advanced Sound Retrieval technology into the VSX-D309. This feature works to restore the audio lost during compression, ensuring a richer and more nuanced sound, particularly in compressed audio formats. Furthermore, the receiver includes adjustable equalization settings, allowing audiophiles to tailor the sound according to their listening preferences and room acoustics.
An essential aspect of the VSX-D309 is its ease of use. The layout of the receiver is user-friendly, with a well-organized remote control that allows users to navigate through settings quickly. The intuitive on-screen display guides users through setup and adjustment, ensuring that even those less familiar with audio equipment can achieve optimal performance.
In summary, the Pioneer VSX-D309 is a capable home theater receiver that combines power, versatility, and user-friendly features. Its robust audio technologies, coupled with an array of connectivity options and advanced sound processing features, make it an excellent choice for anyone looking to enhance their home entertainment system. Whether for casual listening or full home theater setups, the VSX-D309 remains a noteworthy option in Pioneer’s lineup.

