Planar User’s Manual
1.Display Module
The display is a 17.4” diagonal, Active Matrix Liquid Crystal Display (AMLCD). The screen is capable of supporting a maximum resolution of 1280 x 1024 (SXGA).
2.◄Function►Select Buttons
These two buttons allow you to select the control functions in the OSD. Press either button to scroll horizontally through the main menu and submenu items.
3. Adjust
  Control Buttons
The ![]() button allows you to increase the menu item value. The
button allows you to increase the menu item value. The ![]() button allows you to decrease the menu item value.
button allows you to decrease the menu item value.
4.Menu
Push the Menu select button activates the On Screen Display (OSD).
5.LED Power Mode Indicator
This LED indicator stays lit when the power is on and when the monitor is receiving a proper video signal. The LED will blink slowly when the LCD monitor is in power saving mode.
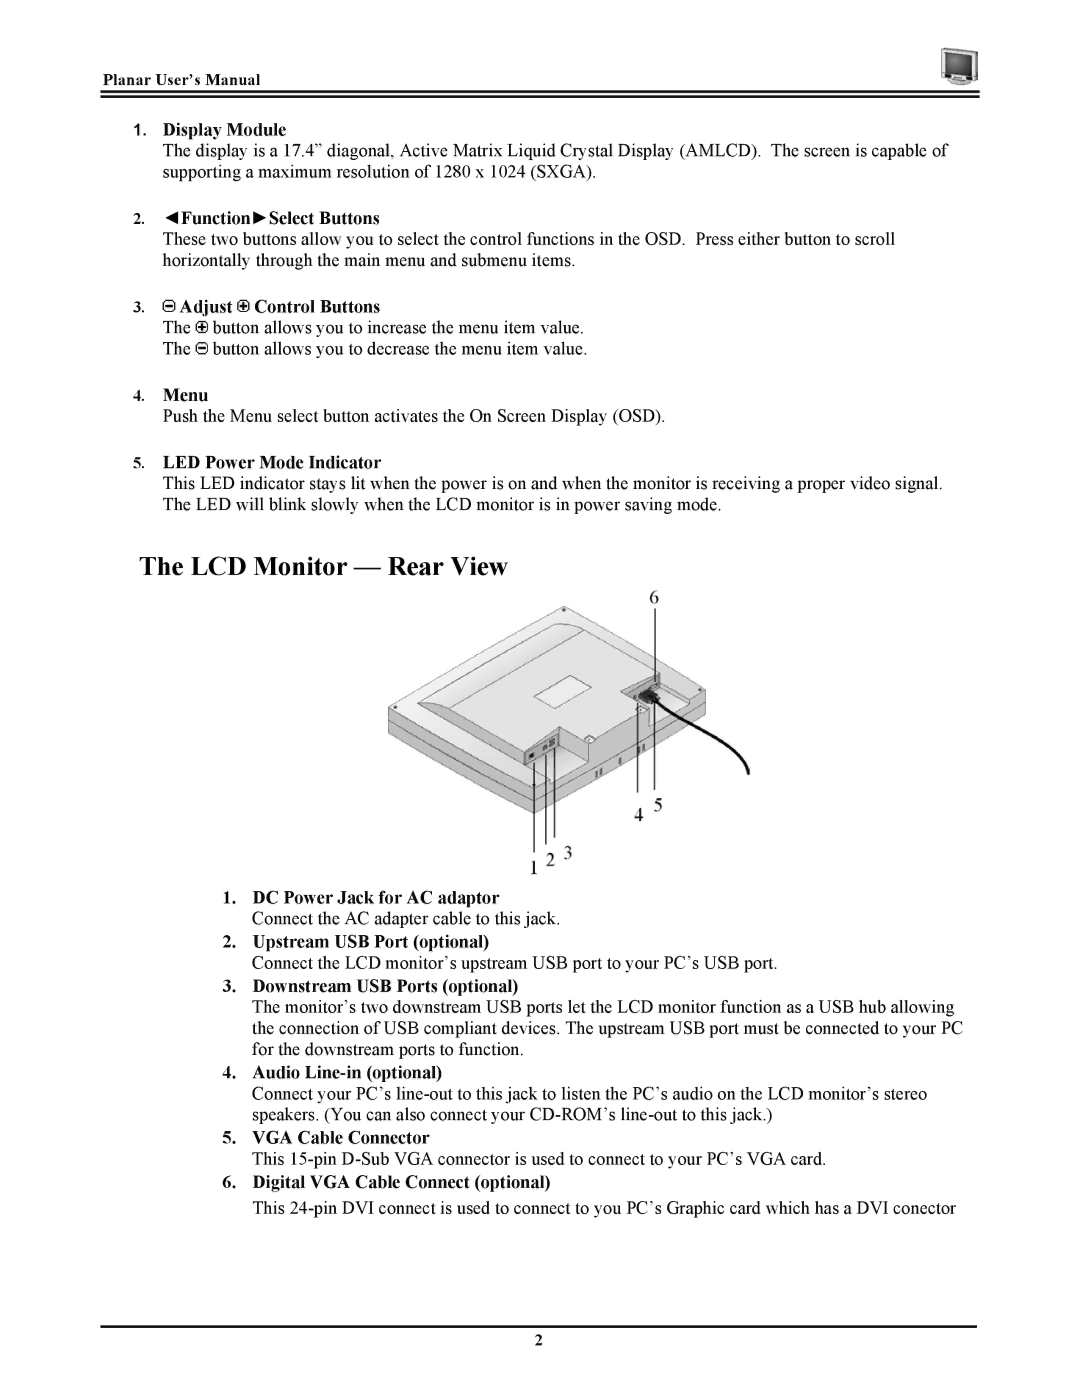
The LCD Monitor — Rear View
1.DC Power Jack for AC adaptor Connect the AC adapter cable to this jack.
2.Upstream USB Port (optional)
Connect the LCD monitor’s upstream USB port to your PC’s USB port.
3.Downstream USB Ports (optional)
The monitor’s two downstream USB ports let the LCD monitor function as a USB hub allowing the connection of USB compliant devices. The upstream USB port must be connected to your PC for the downstream ports to function.
4.Audio Line-in (optional)
Connect your PC’s
5.VGA Cable Connector
This
6.Digital VGA Cable Connect (optional)
This
2