Wall-Mount Installation Instructions
Preparing To Install The Optional Wall Mount Arm (not included)
This LED LCD Monitor can be attached to a wall mounting arm you can purchase separately.
Turn the power OFF then disconnect the cables from the LED LCD Monitor before performing the procedure below.
1.Lay the LED LCD Monitor face down on a soft surface.
2.Remove the two screws holding the stand to the hinge.
3.Remove the stand.
Attaching The Optional Wall Mount Arm (not supplied)
Follow these steps to finish installing the wall mounting arm:
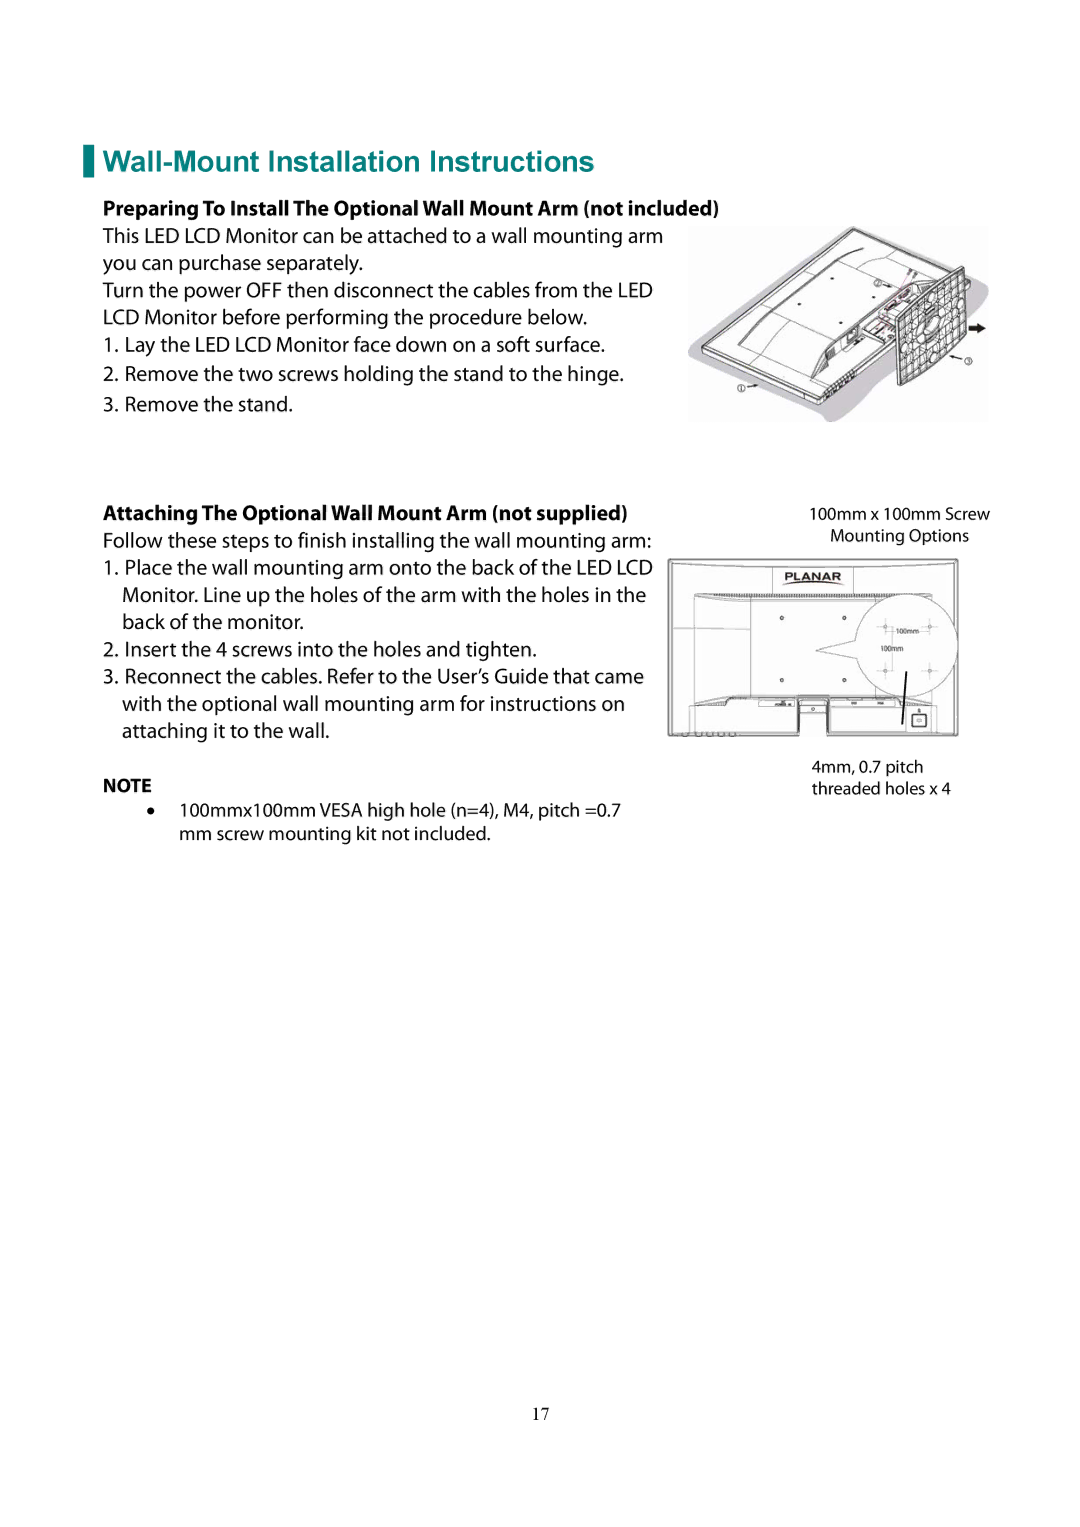
1.Place the wall mounting arm onto the back of the LED LCD Monitor. Line up the holes of the arm with the holes in the back of the monitor.
2.Insert the 4 screws into the holes and tighten.
3.Reconnect the cables. Refer to the User’s Guide that came with the optional wall mounting arm for instructions on attaching it to the wall.
NOTE
∙100mmx100mm VESA high hole (n=4), M4, pitch =0.7 mm screw mounting kit not included.
100mm x 100mm Screw
Mounting Options
4mm, 0.7 pitch threaded holes x 4
17