ENGLISH
WALL MOUNTING
Each FX has an attached keyhole slot brack- et to mount it to a wall. Follow the steps below to safely secure the speaker. In the speaker carton you’ll find a template to help mark the correct screw locations. LIFTING THE SPEAKER SAFELY ONTO THE WALL IS A TWO PERSON JOB SO BE PREPARED.
Wall installation of the FX speakers requires basic skills in using tools such as a drill and screwdriver. If you are in doubt that you possess the necessary skills or tools, consult your Polk dealer or a professional installer.
1.Make sure the locations you select do not conceal electrical wiring or plumbing.
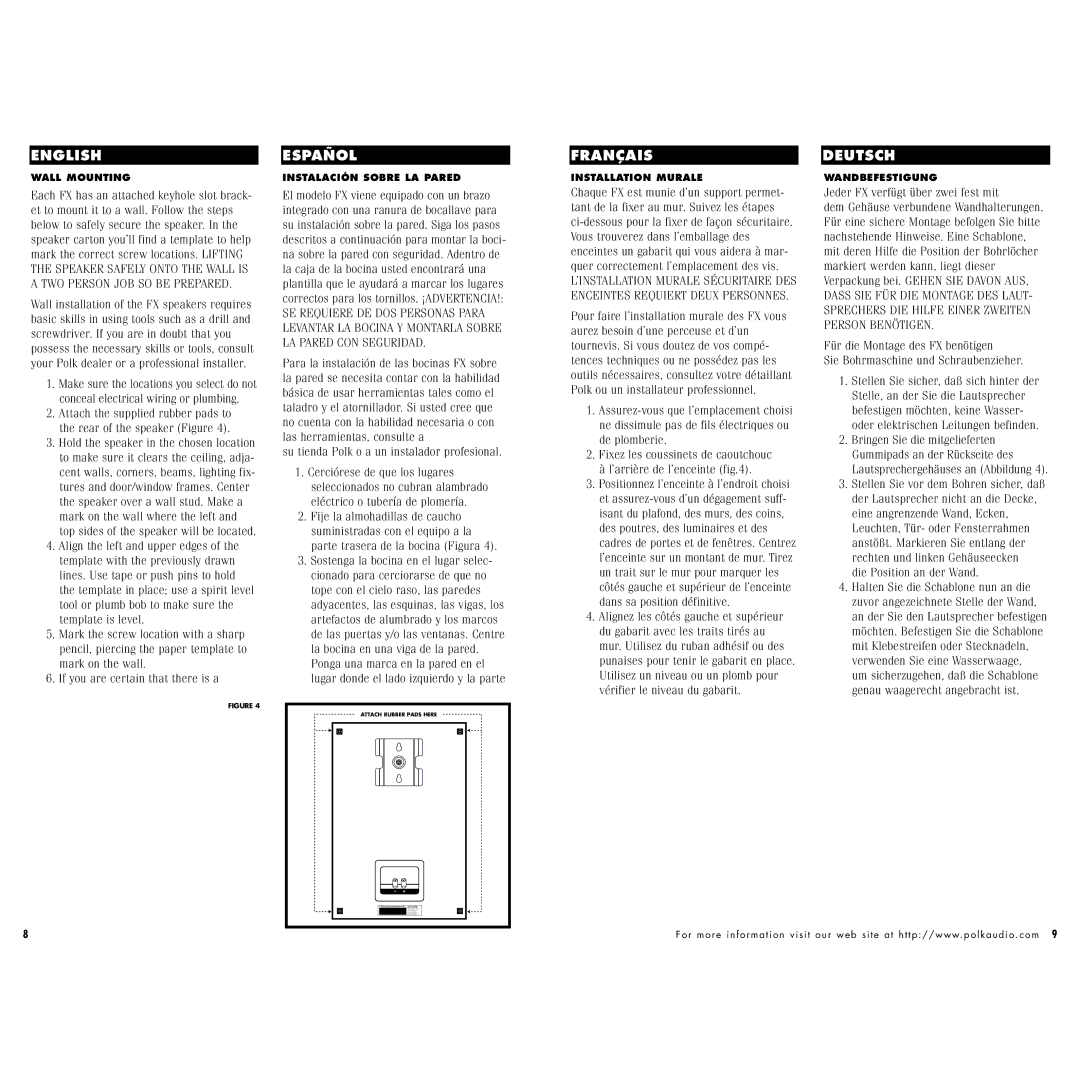
2.Attach the supplied rubber pads to the rear of the speaker (Figure 4).
3.Hold the speaker in the chosen location to make sure it clears the ceiling, adja- cent walls, corners, beams, lighting fix- tures and door/window frames. Center the speaker over a wall stud. Make a mark on the wall where the left and top sides of the speaker will be located.
4.Align the left and upper edges of the template with the previously drawn lines. Use tape or push pins to hold the template in place; use a spirit level tool or plumb bob to make sure the template is level.
5.Mark the screw location with a sharp pencil, piercing the paper template to mark on the wall.
6.If you are certain that there is a
FIGURE 4
ESPAÑOL
INSTALACIÓN SOBRE LA PARED
El modelo FX viene equipado con un brazo integrado con una ranura de bocallave para su instalación sobre la pared. Siga los pasos descritos a continuación para montar la boci- na sobre la pared con seguridad. Adentro de la caja de la bocina usted encontrará una plantilla que le ayudará a marcar los lugares correctos para los tornillos. ¡ADVERTENCIA!:
SE REQUIERE DE DOS PERSONAS PARA LEVANTAR LA BOCINA Y MONTARLA SOBRE LA PARED CON SEGURIDAD.
Para la instalación de las bocinas FX sobre la pared se necesita contar con la habilidad básica de usar herramientas tales como el taladro y el atornillador. Si usted cree que no cuenta con la habilidad necesaria o con las herramientas, consulte a
su tienda Polk o a un instalador profesional.
1.Cerciórese de que los lugares seleccionados no cubran alambrado eléctrico o tubería de plomería.
2.Fije la almohadillas de caucho suministradas con el equipo a la parte trasera de la bocina (Figura 4).
3.Sostenga la bocina en el lugar selec- cionado para cerciorarse de que no tope con el cielo raso, las paredes adyacentes, las esquinas, las vigas, los artefactos de alumbrado y los marcos de las puertas y/o las ventanas. Centre la bocina en una viga de la pared. Ponga una marca en la pared en el lugar donde el lado izquierdo y la parte
ATTACH RUBBER PADS HERE
f/x500 Surround Loudspeaker (Left)
FRANÇAIS
INSTALLATION MURALE
Chaque FX est munie d’un support permet- tant de la fixer au mur. Suivez les étapes ci-dessous pour la fixer de façon sécuritaire. Vous trouverez dans l’emballage des enceintes un gabarit qui vous aidera à mar- quer correctement l’emplacement des vis.
L’INSTALLATION MURALE SÉCURITAIRE DES ENCEINTES REQUIERT DEUX PERSONNES.
Pour faire l’installation murale des FX vous aurez besoin d’une perceuse et d’un tournevis. Si vous doutez de vos compé- tences techniques ou ne possédez pas les outils nécessaires, consultez votre détaillant Polk ou un installateur professionnel.
1.Assurez-vous que l’emplacement choisi ne dissimule pas de fils électriques ou de plomberie.
2.Fixez les coussinets de caoutchouc à l’arrière de l’enceinte (fig.4).
3.Positionnez l’enceinte à l’endroit choisi et assurez-vous d’un dégagement suff- isant du plafond, des murs, des coins, des poutres, des luminaires et des cadres de portes et de fenêtres. Centrez l’enceinte sur un montant de mur. Tirez un trait sur le mur pour marquer les côtés gauche et supérieur de l’enceinte dans sa position définitive.
4.Alignez les côtés gauche et supérieur du gabarit avec les traits tirés au mur. Utilisez du ruban adhésif ou des punaises pour tenir le gabarit en place. Utilisez un niveau ou un plomb pour vérifier le niveau du gabarit.
DEUTSCH
WANDBEFESTIGUNG
Jeder FX verfügt über zwei fest mit
dem Gehäuse verbundene Wandhalterungen. Für eine sichere Montage befolgen Sie bitte nachstehende Hinweise. Eine Schablone, mit deren Hilfe die Position der Bohrlöcher markiert werden kann, liegt dieser Verpackung bei. GEHEN SIE DAVON AUS,
DASS SIE FÜR DIE MONTAGE DES LAUT- SPRECHERS DIE HILFE EINER ZWEITEN PERSON BENÖTIGEN.
Für die Montage des FX benötigen
Sie Bohrmaschine und Schraubenzieher.
1.Stellen Sie sicher, daß sich hinter der Stelle, an der Sie die Lautsprecher befestigen möchten, keine Wasser- oder elektrischen Leitungen befinden.
2.Bringen Sie die mitgelieferten Gummipads an der Rückseite des Lautsprechergehäuses an (Abbildung 4).
3.Stellen Sie vor dem Bohren sicher, daß der Lautsprecher nicht an die Decke, eine angrenzende Wand, Ecken, Leuchten, Tür- oder Fensterrahmen anstößt. Markieren Sie entlang der rechten und linken Gehäuseecken
die Position an der Wand.
4.Halten Sie die Schablone nun an die zuvor angezeichnete Stelle der Wand, an der Sie den Lautsprecher befestigen möchten. Befestigen Sie die Schablone mit Klebestreifen oder Stecknadeln, verwenden Sie eine Wasserwaage, um sicherzugehen, daß die Schablone genau waagerecht angebracht ist.