ASSEMBLY
W ARNING: FOR YOUR OWN SAFETY, DO NOT CONNECT THE MITER SAW TO THE POWER SOURCE UNTIL THE MACHINE IS COMPLETELY ASSEMBLED AND YOU HAVE READ A N D UNDERSTOOD THE ENTIRE OWNER S MANUAL.
A
DC
A
B ![]()
Fig. 10 | Fig. 11 |
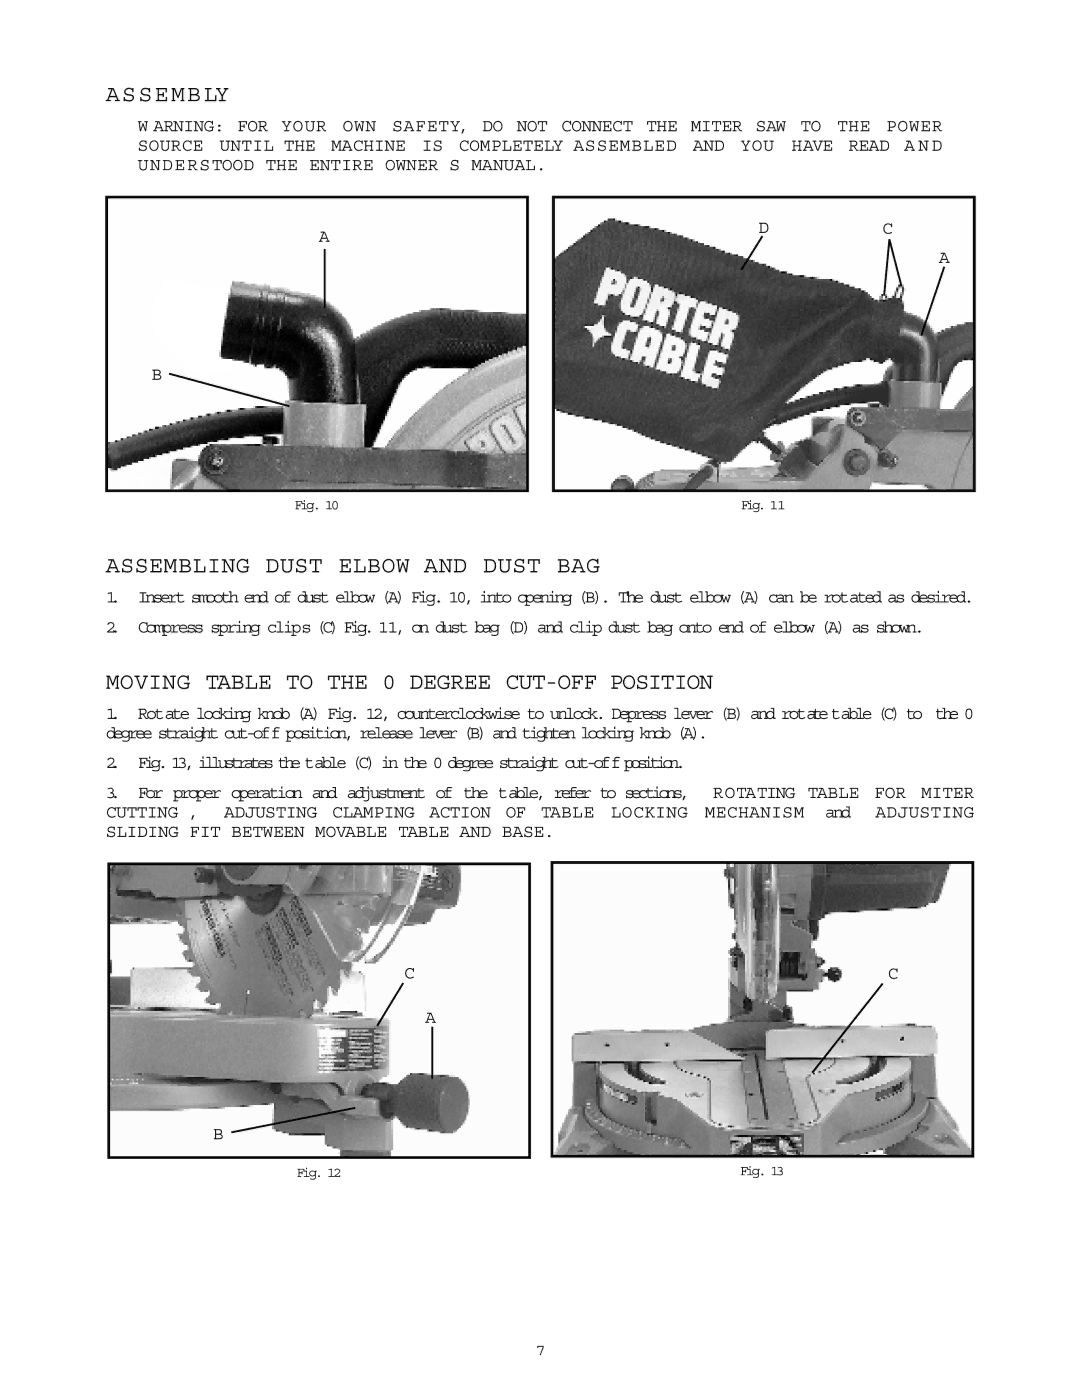
ASSEMBLING DUST ELBOW AND DUST BAG
1.Insert smooth end of dust elbow (A) Fig. 10, into opening (B). The dust elbow (A) can be rotated as desired.
2.Compress spring clips (C) Fig. 11, on dust bag (D) and clip dust bag onto end of elbow (A) as shown.
MOVING TABLE TO THE 0 DEGREE CUT-OFF POSITION
1.Rotate locking knob (A) Fig. 12, counterclockwise to unlock. Depress lever (B) and rotatetable (C) to the 0 degree straight
2.Fig. 13, illustrates the table (C) in the 0 degree straight cut-off position.
3. For proper operation and adjustment of the table, refer to sections, | ROTATING | TABLE | FOR MITER | |
CUTTING , ADJUSTING CLAMPING ACTION | OF TABLE LOCKING | MECHANISM | and | ADJUSTING |
SLIDING FIT BETWEEN MOVABLE TABLE AND | BASE. |
|
|
|
C
A
C
B
Fig. 12 | Fig. 13 |
7