MAINTENANCE
CHANGING THE BLADE
1. ![]() DISCONNECT MACHINE FROM
DISCONNECT MACHINE FROM
POWER SOURCE. USE ONLY 10" DIAMETER SAW BLADES RATED FOR 4600 RPM OR HIGHER WITH 5/8" ARBOR HOLES.
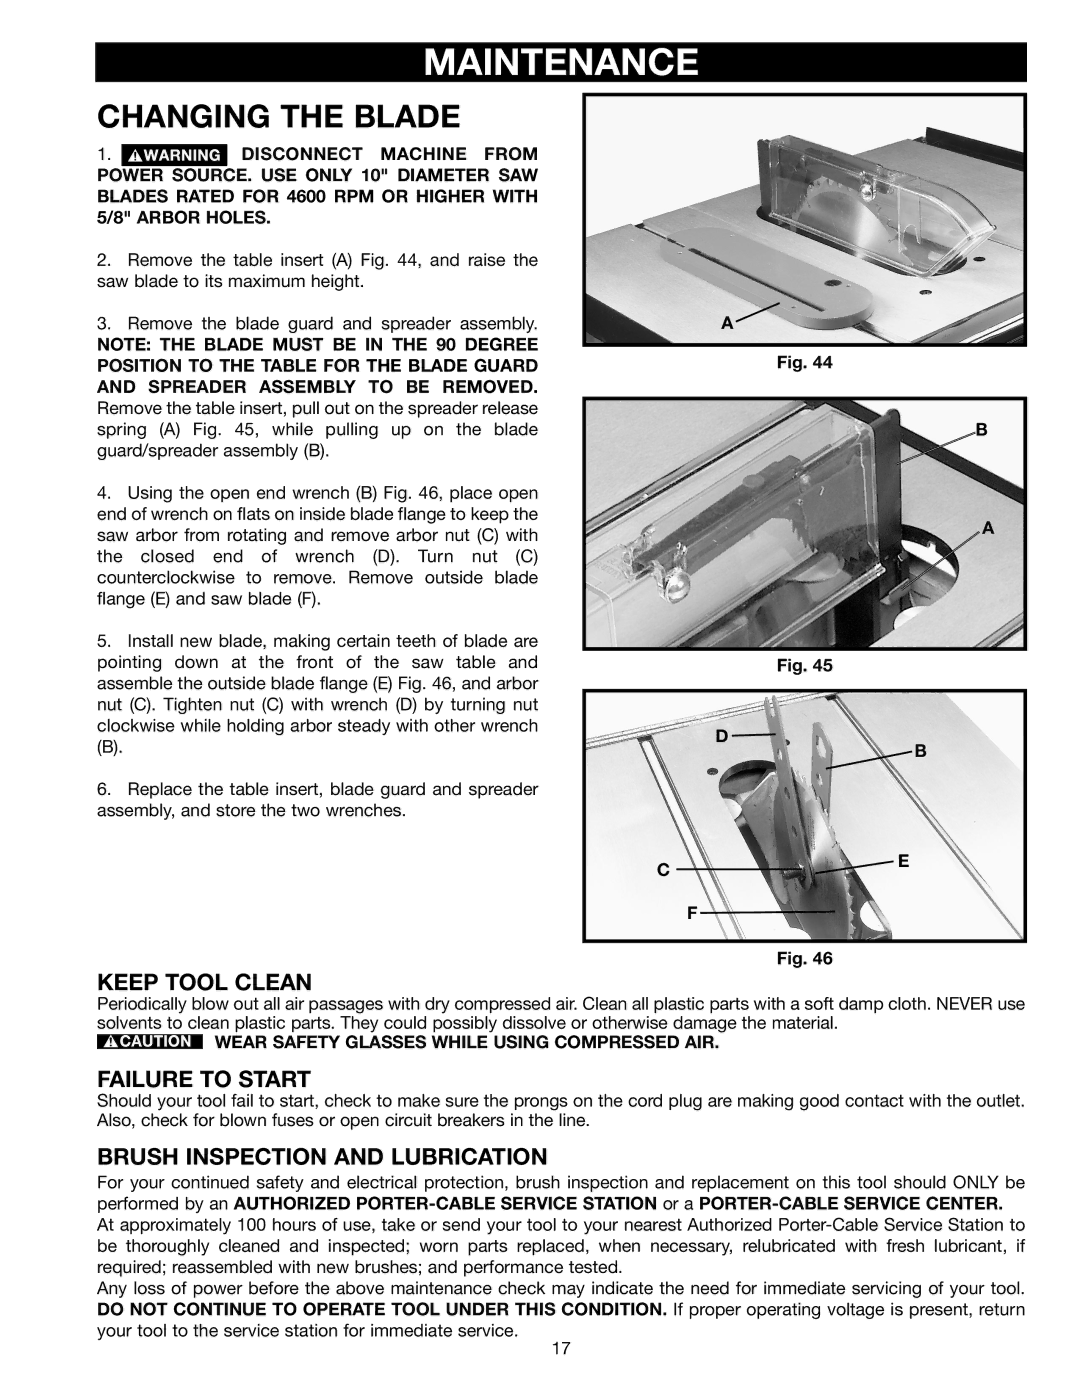
2.Remove the table insert (A) Fig. 44, and raise the saw blade to its maximum height.
3.Remove the blade guard and spreader assembly.
NOTE: THE BLADE MUST BE IN THE 90 DEGREE POSITION TO THE TABLE FOR THE BLADE GUARD AND SPREADER ASSEMBLY TO BE REMOVED. Remove the table insert, pull out on the spreader release spring (A) Fig. 45, while pulling up on the blade guard/spreader assembly (B).
4.Using the open end wrench (B) Fig. 46, place open end of wrench on flats on inside blade flange to keep the saw arbor from rotating and remove arbor nut (C) with the closed end of wrench (D). Turn nut (C) counterclockwise to remove. Remove outside blade flange (E) and saw blade (F).
5.Install new blade, making certain teeth of blade are pointing down at the front of the saw table and assemble the outside blade flange (E) Fig. 46, and arbor nut (C). Tighten nut (C) with wrench (D) by turning nut clockwise while holding arbor steady with other wrench
(B).
6.Replace the table insert, blade guard and spreader assembly, and store the two wrenches.
A
Fig. 44
B
A
Fig. 45
D
![]() B
B
C ![]()
![]() E
E
F
Fig. 46
KEEP TOOL CLEAN
Periodically blow out all air passages with dry compressed air. Clean all plastic parts with a soft damp cloth. NEVER use solvents to clean plastic parts. They could possibly dissolve or otherwise damage the material.
WEAR SAFETY GLASSES WHILE USING COMPRESSED AIR.
FAILURE TO START
Should your tool fail to start, check to make sure the prongs on the cord plug are making good contact with the outlet. Also, check for blown fuses or open circuit breakers in the line.
BRUSH INSPECTION AND LUBRICATION
For your continued safety and electrical protection, brush inspection and replacement on this tool should ONLY be performed by an AUTHORIZED
Any loss of power before the above maintenance check may indicate the need for immediate servicing of your tool. DO NOT CONTINUE TO OPERATE TOOL UNDER THIS CONDITION. If proper operating voltage is present, return your tool to the service station for immediate service.
17
