ASSEMBLY
![]() FOR YOUR OWN SAFETY, DO NOT CONNECT THE MACHINE TO THE POWER SOURCE UNTIL THE MACHINE IS COMPLETELY ASSEMBLED AND YOU READ AND UNDERSTAND THE ENTIRE INSTRUCTION MANUAL.
FOR YOUR OWN SAFETY, DO NOT CONNECT THE MACHINE TO THE POWER SOURCE UNTIL THE MACHINE IS COMPLETELY ASSEMBLED AND YOU READ AND UNDERSTAND THE ENTIRE INSTRUCTION MANUAL.
BLADE RAISING AND | E | |
LOWERING HANDWHEEL |
| |
D |
| |
|
|
|
Insert the
Fig. 4
E
D
A
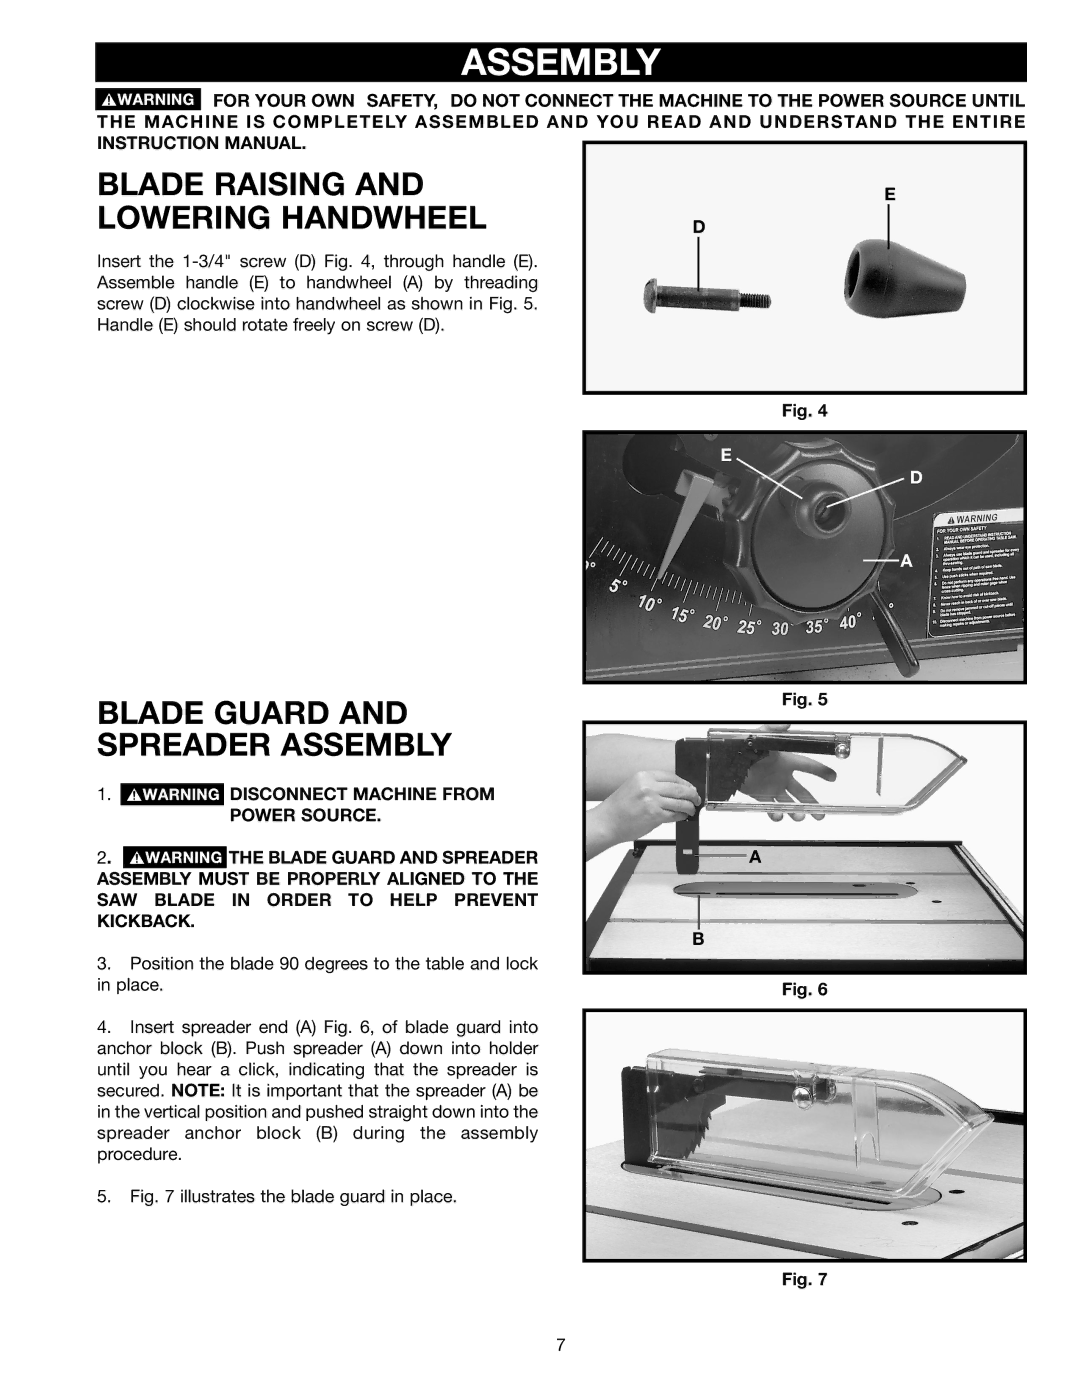
BLADE GUARD AND SPREADER ASSEMBLY
1. ![]() DISCONNECT MACHINE FROM
DISCONNECT MACHINE FROM
POWER SOURCE.
2. ![]() THE BLADE GUARD AND SPREADER
THE BLADE GUARD AND SPREADER
ASSEMBLY MUST BE PROPERLY ALIGNED TO THE SAW BLADE IN ORDER TO HELP PREVENT KICKBACK.
3.Position the blade 90 degrees to the table and lock in place.
4.Insert spreader end (A) Fig. 6, of blade guard into anchor block (B). Push spreader (A) down into holder until you hear a click, indicating that the spreader is secured. NOTE: It is important that the spreader (A) be in the vertical position and pushed straight down into the spreader anchor block (B) during the assembly procedure.
Fig. 5
A
B
Fig. 6
5.Fig. 7 illustrates the blade guard in place.
Fig. 7
7