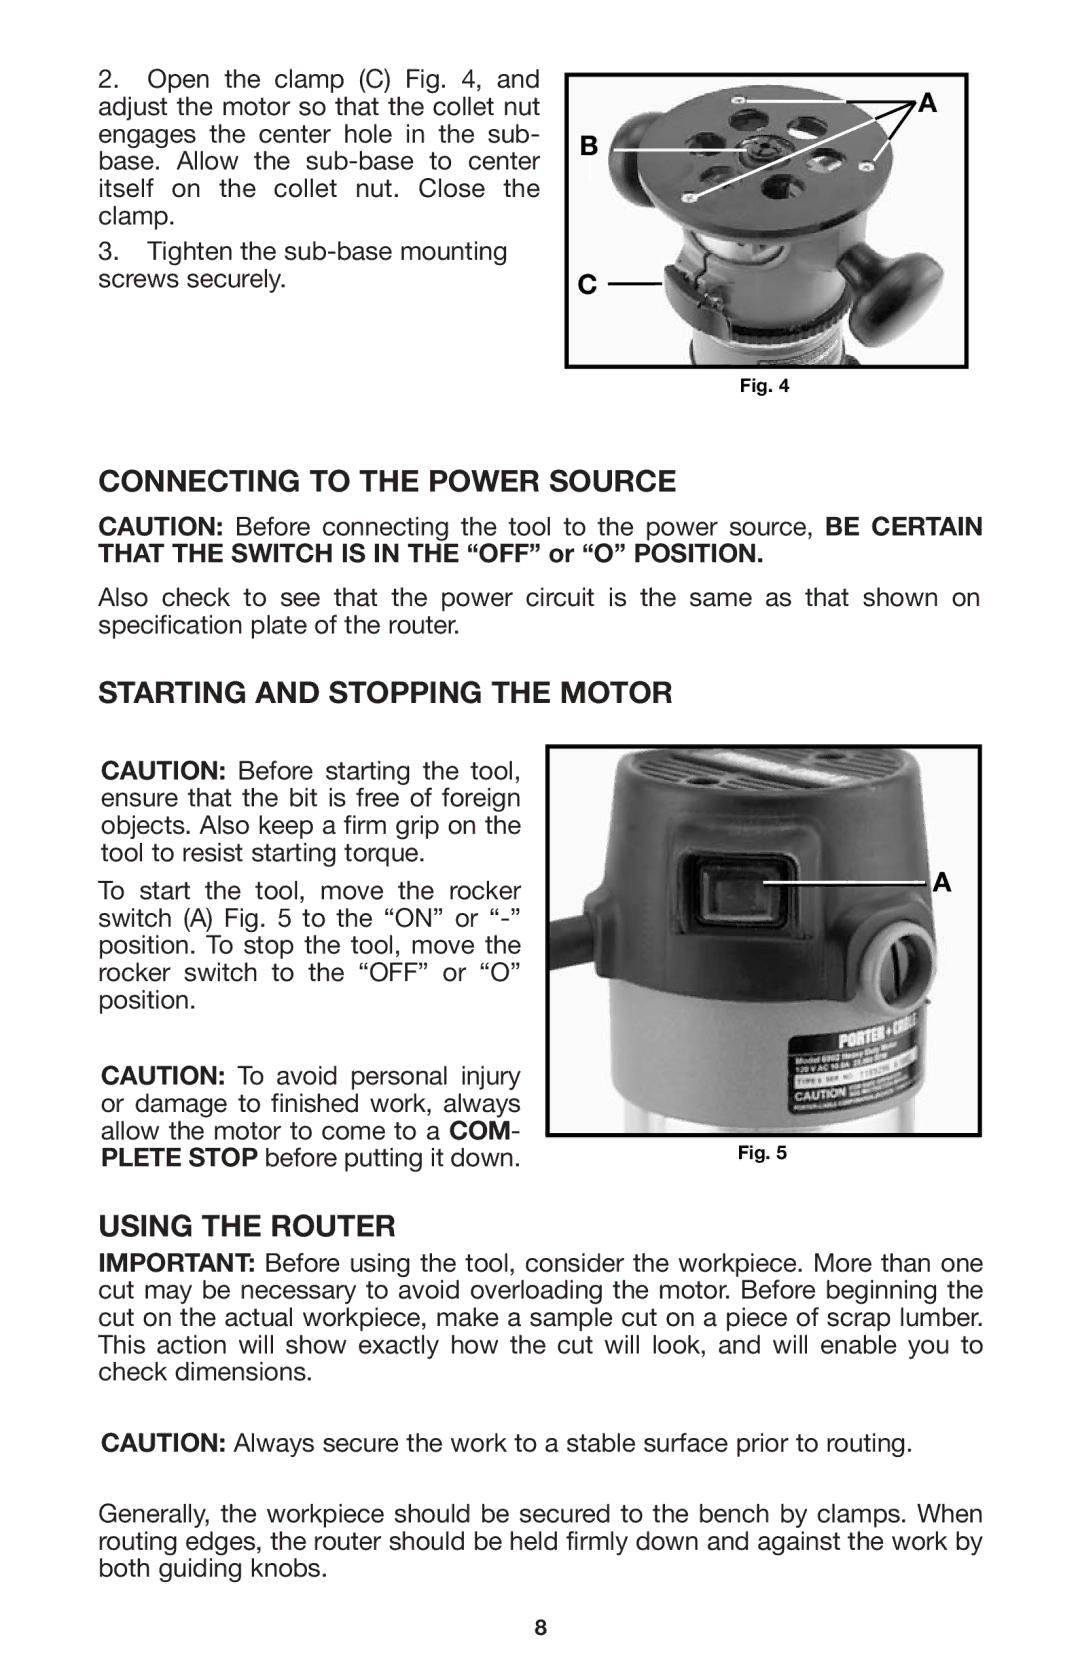
2.Open the clamp (C) Fig. 4, and adjust the motor so that the collet nut engages the center hole in the sub- base. Allow the
3.Tighten the
A
B ![]()
C
Fig. 4
CONNECTING TO THE POWER SOURCE
CAUTION: Before connecting the tool to the power source, BE CERTAIN
THAT THE SWITCH IS IN THE “OFF” or “O” POSITION.
Also check to see that the power circuit is the same as that shown on specification plate of the router.
STARTING AND STOPPING THE MOTOR
CAUTION: Before starting the tool, ensure that the bit is free of foreign objects. Also keep a firm grip on the tool to resist starting torque.
To start the tool, move the rocker switch (A) Fig. 5 to the “ON” or
CAUTION: To avoid personal injury or damage to finished work, always allow the motor to come to a COM- PLETE STOP before putting it down.
![]() A
A
Fig. 5
USING THE ROUTER
IMPORTANT: Before using the tool, consider the workpiece. More than one cut may be necessary to avoid overloading the motor. Before beginning the cut on the actual workpiece, make a sample cut on a piece of scrap lumber. This action will show exactly how the cut will look, and will enable you to check dimensions.
CAUTION: Always secure the work to a stable surface prior to routing.
Generally, the workpiece should be secured to the bench by clamps. When routing edges, the router should be held firmly down and against the work by both guiding knobs.
8
