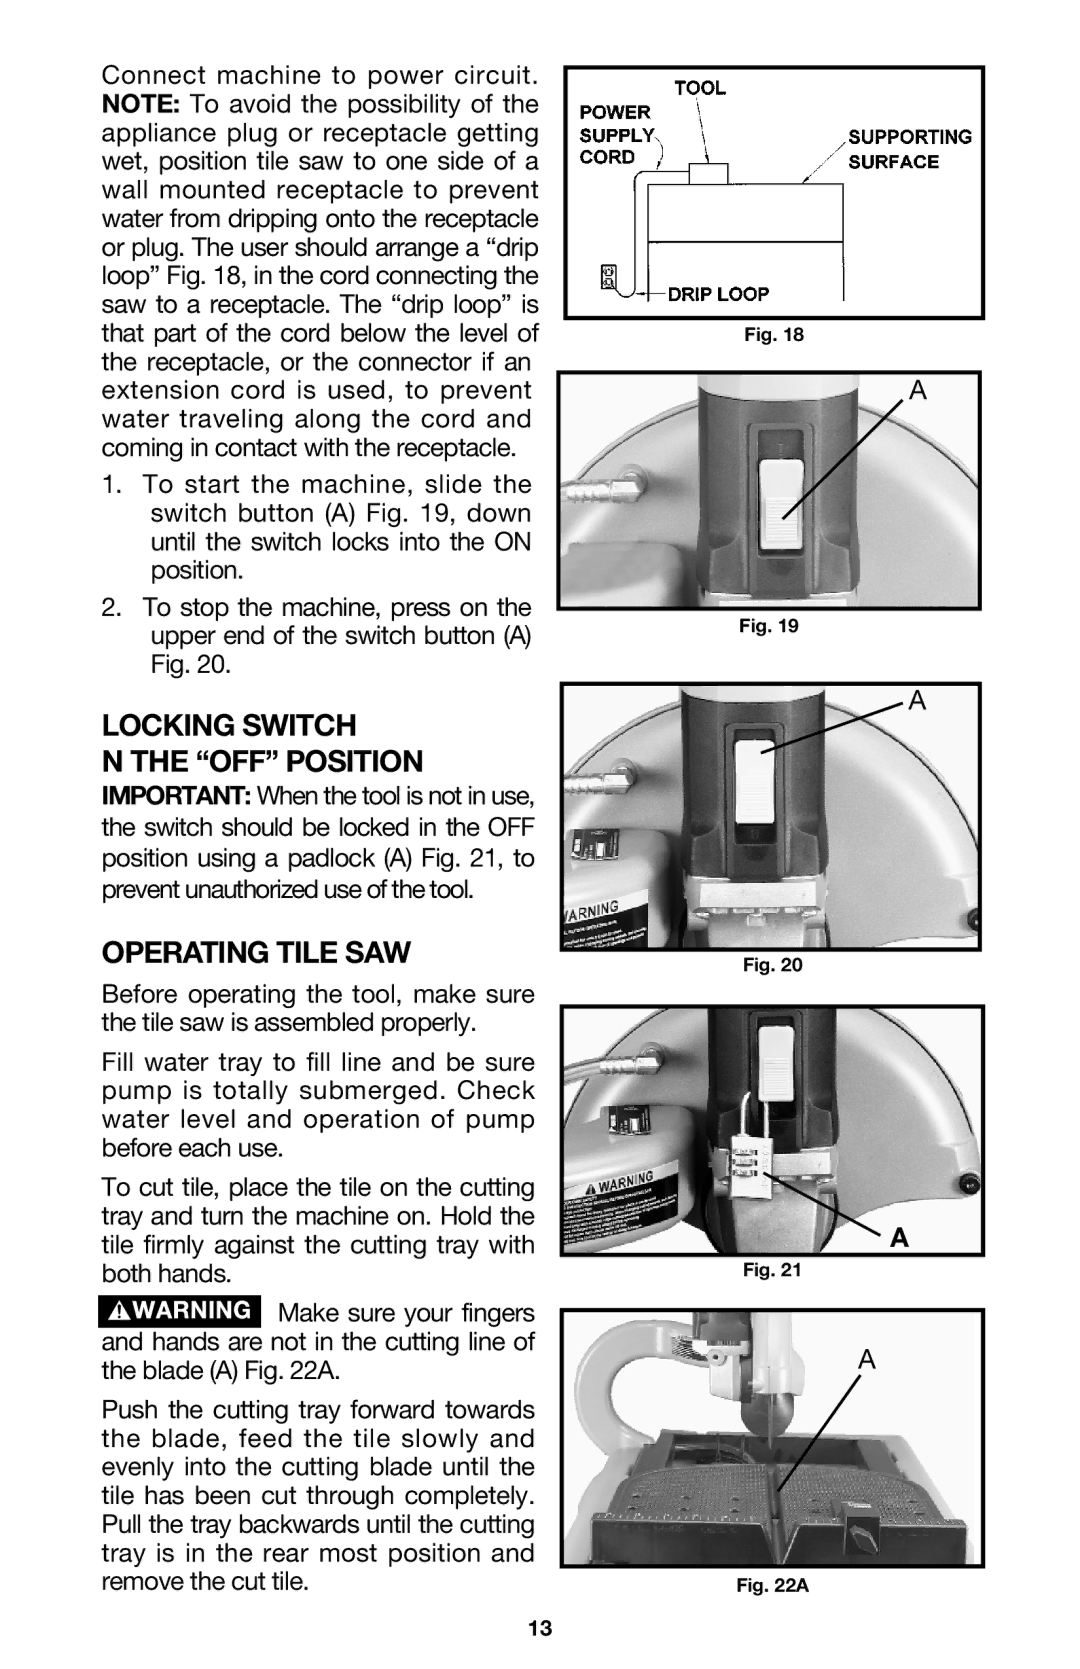
Connect machine to power circuit. NOTE: To avoid the possibility of the appliance plug or receptacle getting wet, position tile saw to one side of a wall mounted receptacle to prevent water from dripping onto the receptacle or plug. The user should arrange a “drip loop” Fig. 18, in the cord connecting the saw to a receptacle. The “drip loop” is that part of the cord below the level of the receptacle, or the connector if an extension cord is used, to prevent water traveling along the cord and coming in contact with the receptacle.
1.To start the machine, slide the switch button (A) Fig. 19, down until the switch locks into the ON position.
2.To stop the machine, press on the upper end of the switch button (A) Fig. 20.
LOCKING SWITCH
N THE “OFF” POSITION
IMPORTANT: When the tool is not in use, the switch should be locked in the OFF position using a padlock (A) Fig. 21, to prevent unauthorized use of the tool.
OPERATING TILE SAW
Before operating the tool, make sure the tile saw is assembled properly.
Fill water tray to fill line and be sure pump is totally submerged. Check water level and operation of pump before each use.
To cut tile, place the tile on the cutting tray and turn the machine on. Hold the tile firmly against the cutting tray with both hands.
![]() Make sure your fingers and hands are not in the cutting line of the blade (A) Fig. 22A.
Make sure your fingers and hands are not in the cutting line of the blade (A) Fig. 22A.
Push the cutting tray forward towards the blade, feed the tile slowly and evenly into the cutting blade until the tile has been cut through completely. Pull the tray backwards until the cutting tray is in the rear most position and remove the cut tile.
Fig. 18
A
Fig. 19
A
Fig. 20
A
Fig. 21
A
Fig. 22A
13
