To adjust the infeed roll:
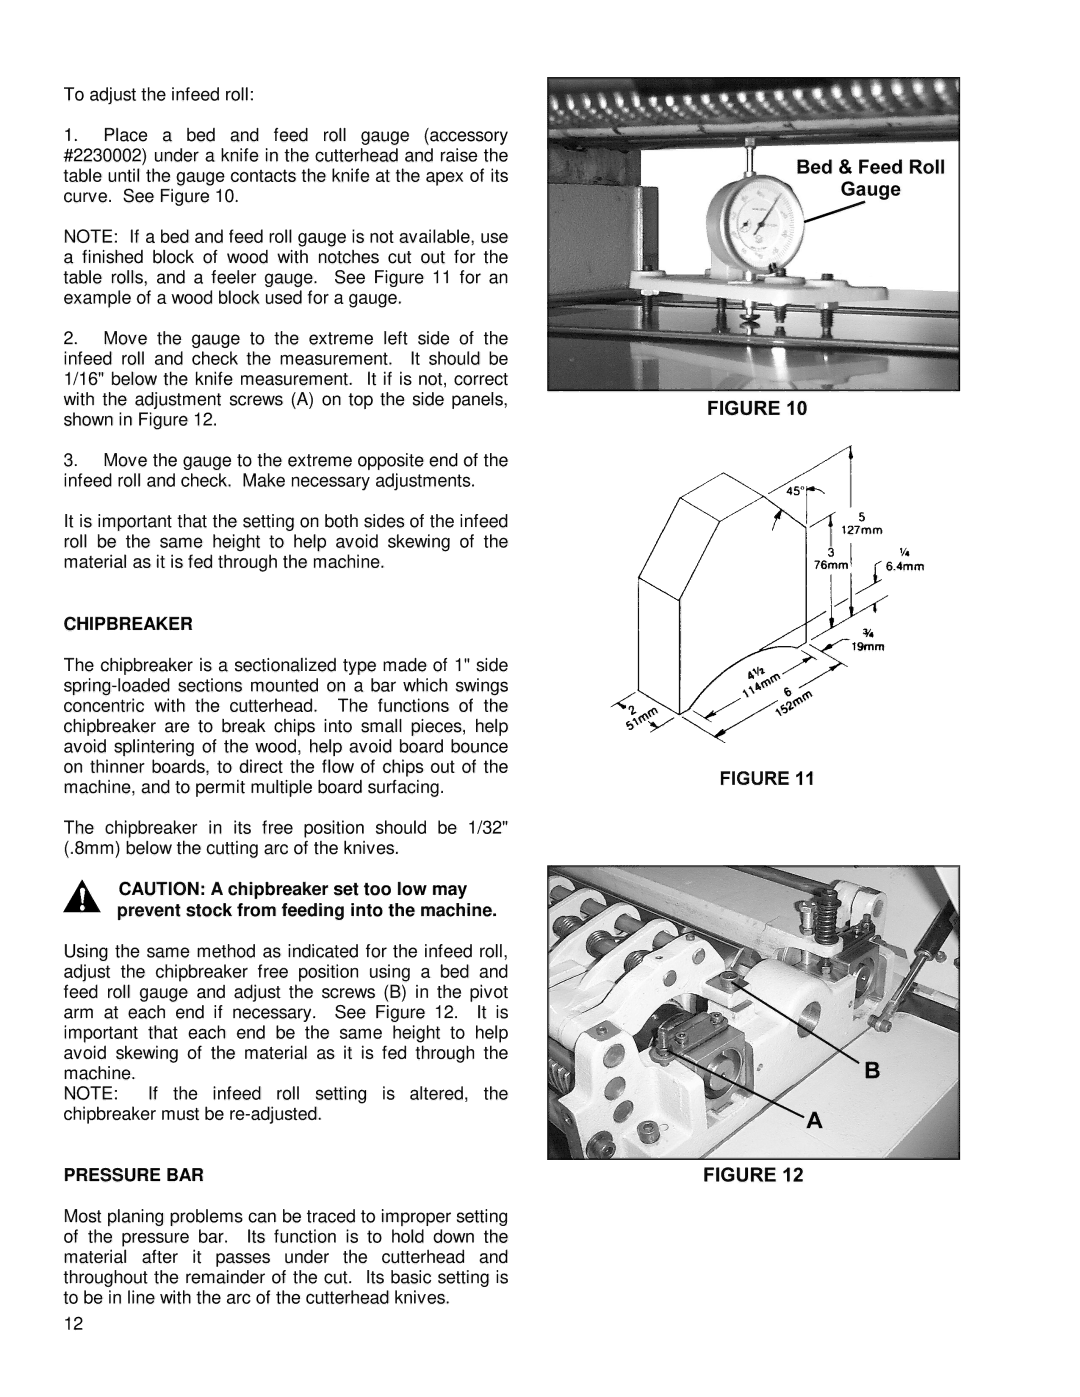
1.Place a bed and feed roll gauge (accessory #2230002) under a knife in the cutterhead and raise the table until the gauge contacts the knife at the apex of its curve. See Figure 10.
NOTE: If a bed and feed roll gauge is not available, use a finished block of wood with notches cut out for the table rolls, and a feeler gauge. See Figure 11 for an example of a wood block used for a gauge.
2.Move the gauge to the extreme left side of the infeed roll and check the measurement. It should be 1/16" below the knife measurement. It if is not, correct with the adjustment screws (A) on top the side panels, shown in Figure 12.
3.Move the gauge to the extreme opposite end of the infeed roll and check. Make necessary adjustments.
It is important that the setting on both sides of the infeed roll be the same height to help avoid skewing of the material as it is fed through the machine.
CHIPBREAKER
The chipbreaker is a sectionalized type made of 1" side
The chipbreaker in its free position should be 1/32" (.8mm) below the cutting arc of the knives.
CAUTION: A chipbreaker set too low may prevent stock from feeding into the machine.
Using the same method as indicated for the infeed roll, adjust the chipbreaker free position using a bed and feed roll gauge and adjust the screws (B) in the pivot arm at each end if necessary. See Figure 12. It is important that each end be the same height to help avoid skewing of the material as it is fed through the machine.
NOTE: If the infeed roll setting is altered, the chipbreaker must be
PRESSURE BAR
Most planing problems can be traced to improper setting of the pressure bar. Its function is to hold down the material after it passes under the cutterhead and throughout the remainder of the cut. Its basic setting is to be in line with the arc of the cutterhead knives.
12
