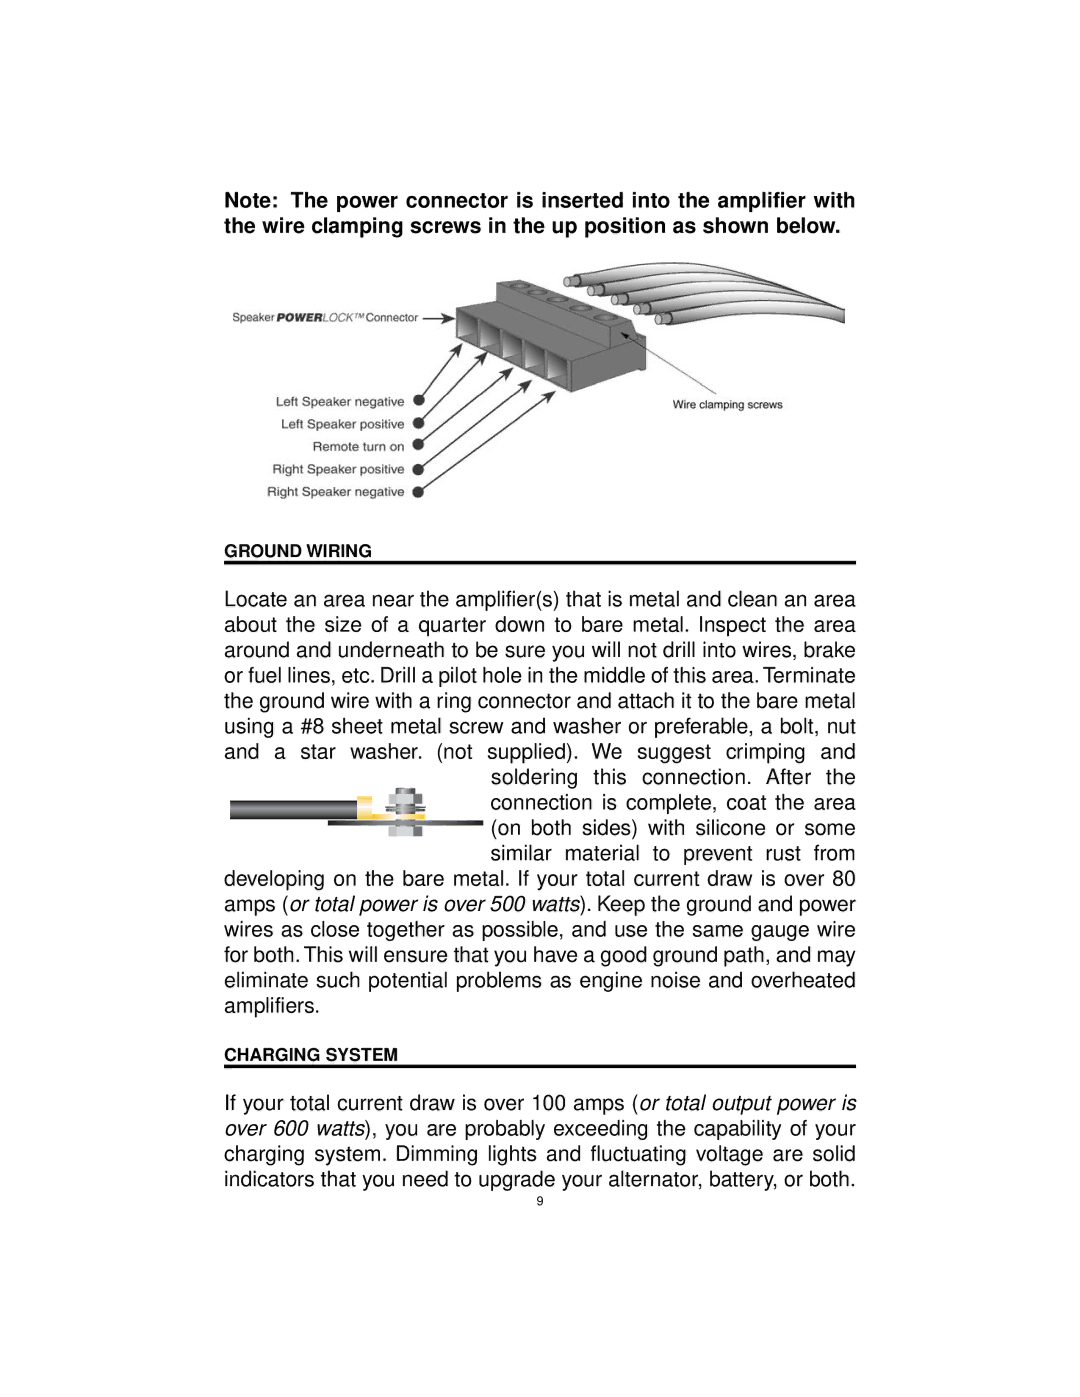
Note: The power connector is inserted into the amplifier with the wire clamping screws in the up position as shown below.
GROUND WIRING
Locate an area near the amplifier(s) that is metal and clean an area about the size of a quarter down to bare metal. Inspect the area around and underneath to be sure you will not drill into wires, brake or fuel lines, etc. Drill a pilot hole in the middle of this area. Terminate the ground wire with a ring connector and attach it to the bare metal using a #8 sheet metal screw and washer or preferable, a bolt, nut and a star washer. (not supplied). We suggest crimping and
soldering this connection. After the ![]()
![]()
![]()
![]()
![]() connection is complete, coat the area
connection is complete, coat the area ![]()
![]()
![]()
![]()
![]() (on both sides) with silicone or some similar material to prevent rust from
(on both sides) with silicone or some similar material to prevent rust from
developing on the bare metal. If your total current draw is over 80 amps (or total power is over 500 watts). Keep the ground and power wires as close together as possible, and use the same gauge wire for both. This will ensure that you have a good ground path, and may eliminate such potential problems as engine noise and overheated amplifiers.
CHARGING SYSTEM
If your total current draw is over 100 amps (or total output power is over 600 watts), you are probably exceeding the capability of your charging system. Dimming lights and fluctuating voltage are solid indicators that you need to upgrade your alternator, battery, or both.
9